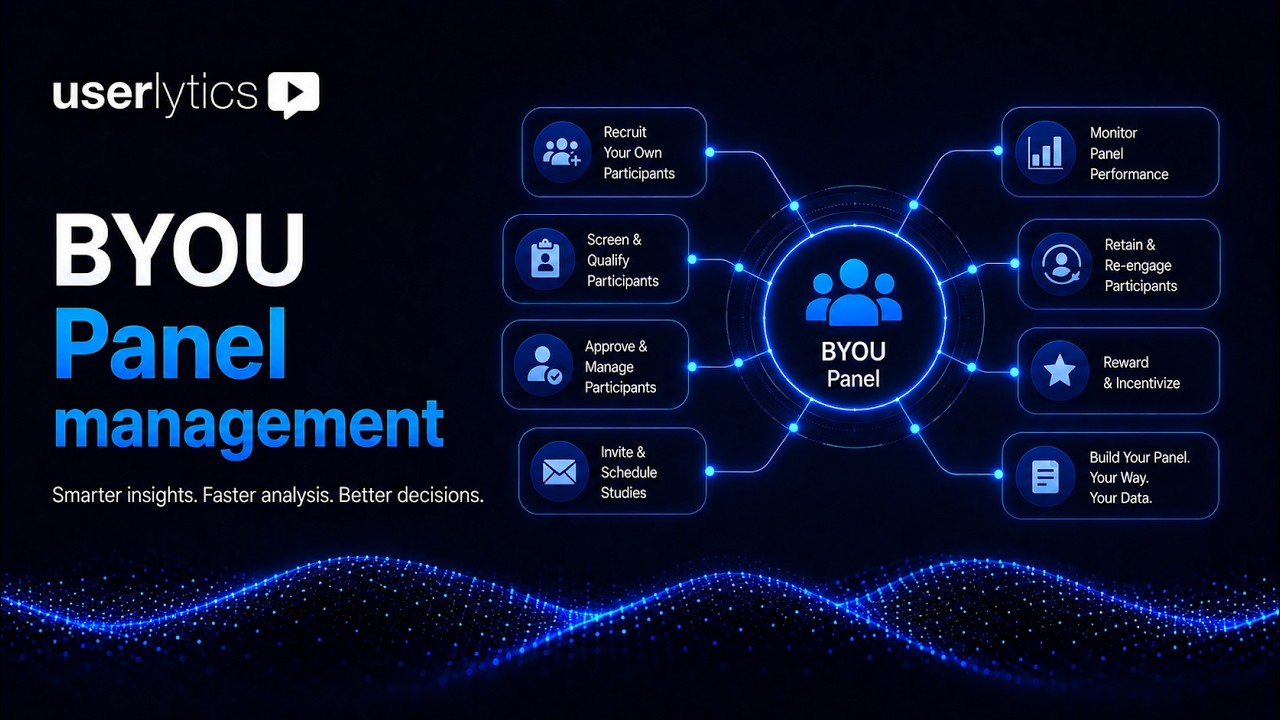
The BYOU Panel Management tool lets you import and invite your own participants directly from the platform, in three simple steps: Import, Validate, and Send, with no manual workarounds needed. You can also visualize and keep track of which participants have received invitations to participate in the study and the collected responses.
Sending Email Invitations
Once your BYOU study has been published, it’s time to invite your participants. First, you’ll land on a confirmation screen with a direct shortcut to import participants.
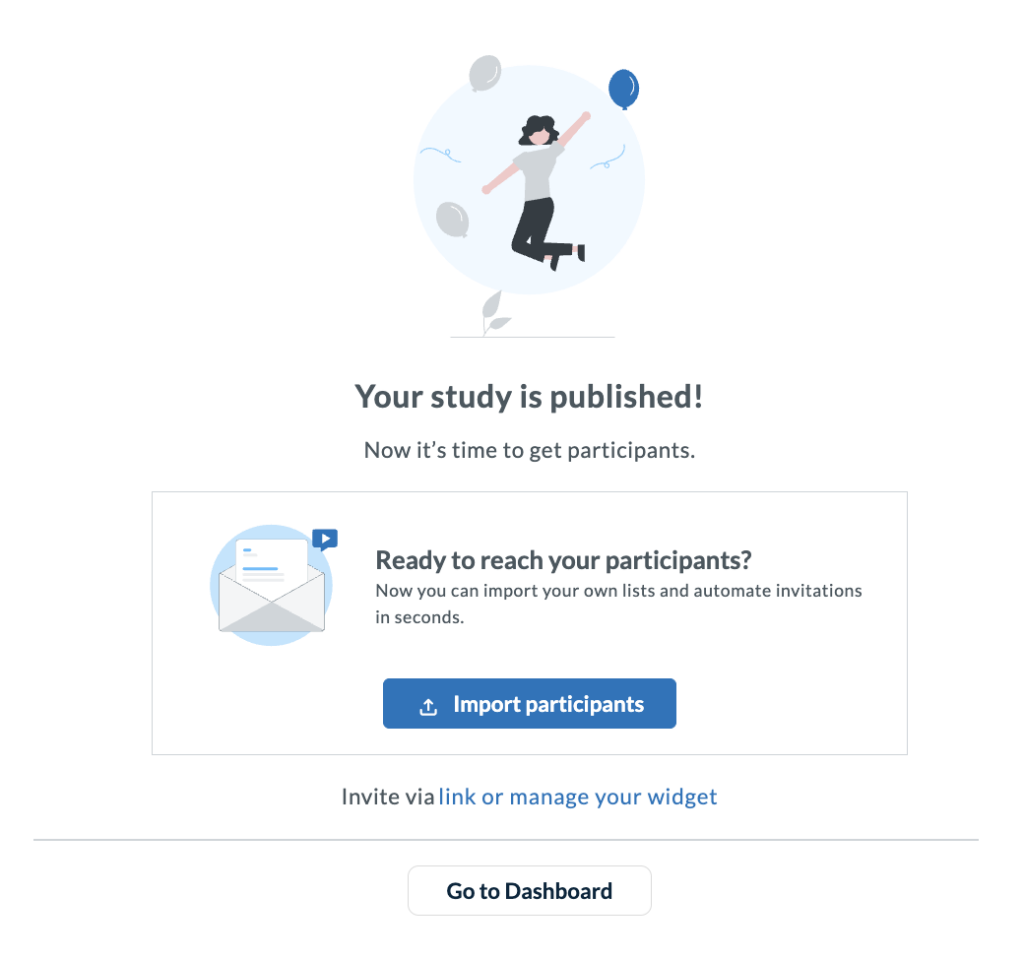
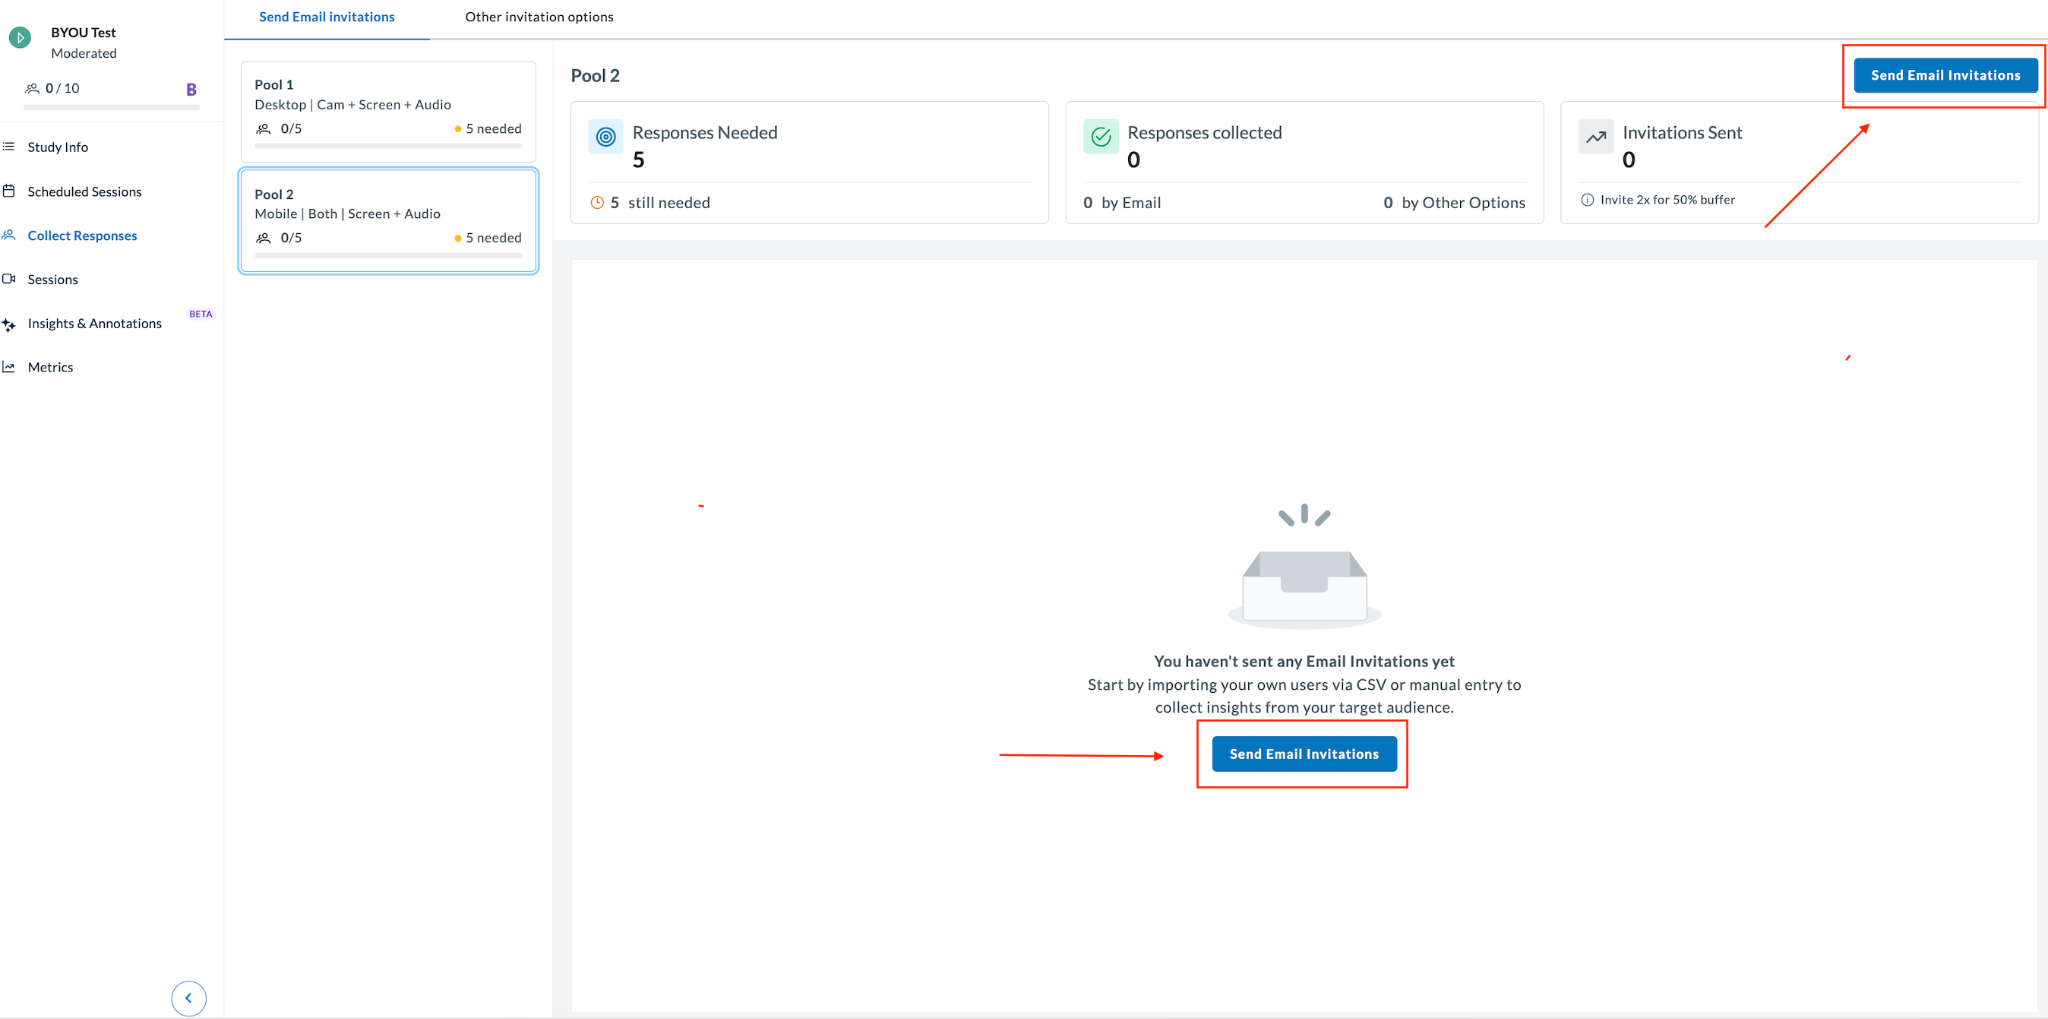
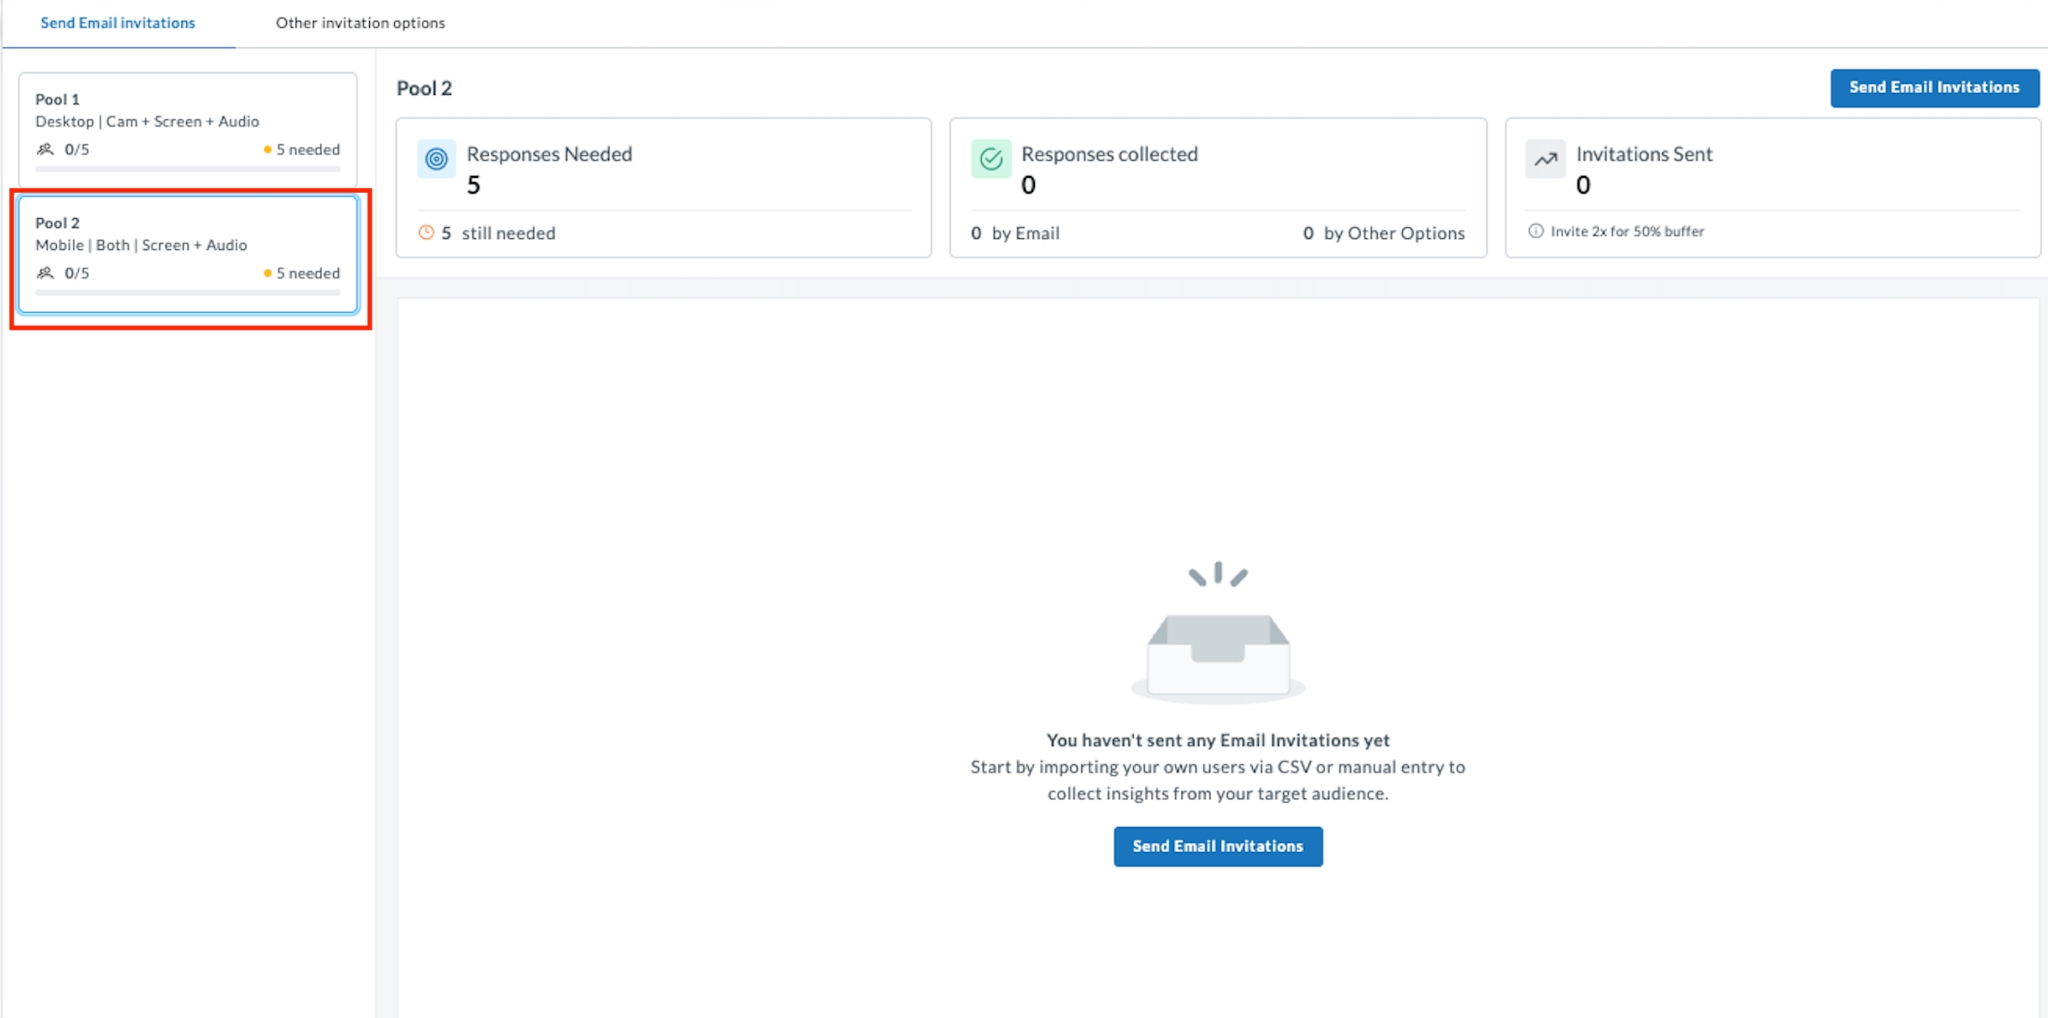
Click on “Import participants” or navigate to Collect Responses in the left sidebar and select the Send Email Invitations tab. Then click on either “Send Email Invitations” buttons for the audience you want to invite.
The Send Email Invitations panel walks you through three steps: Import, Validate, and Send.
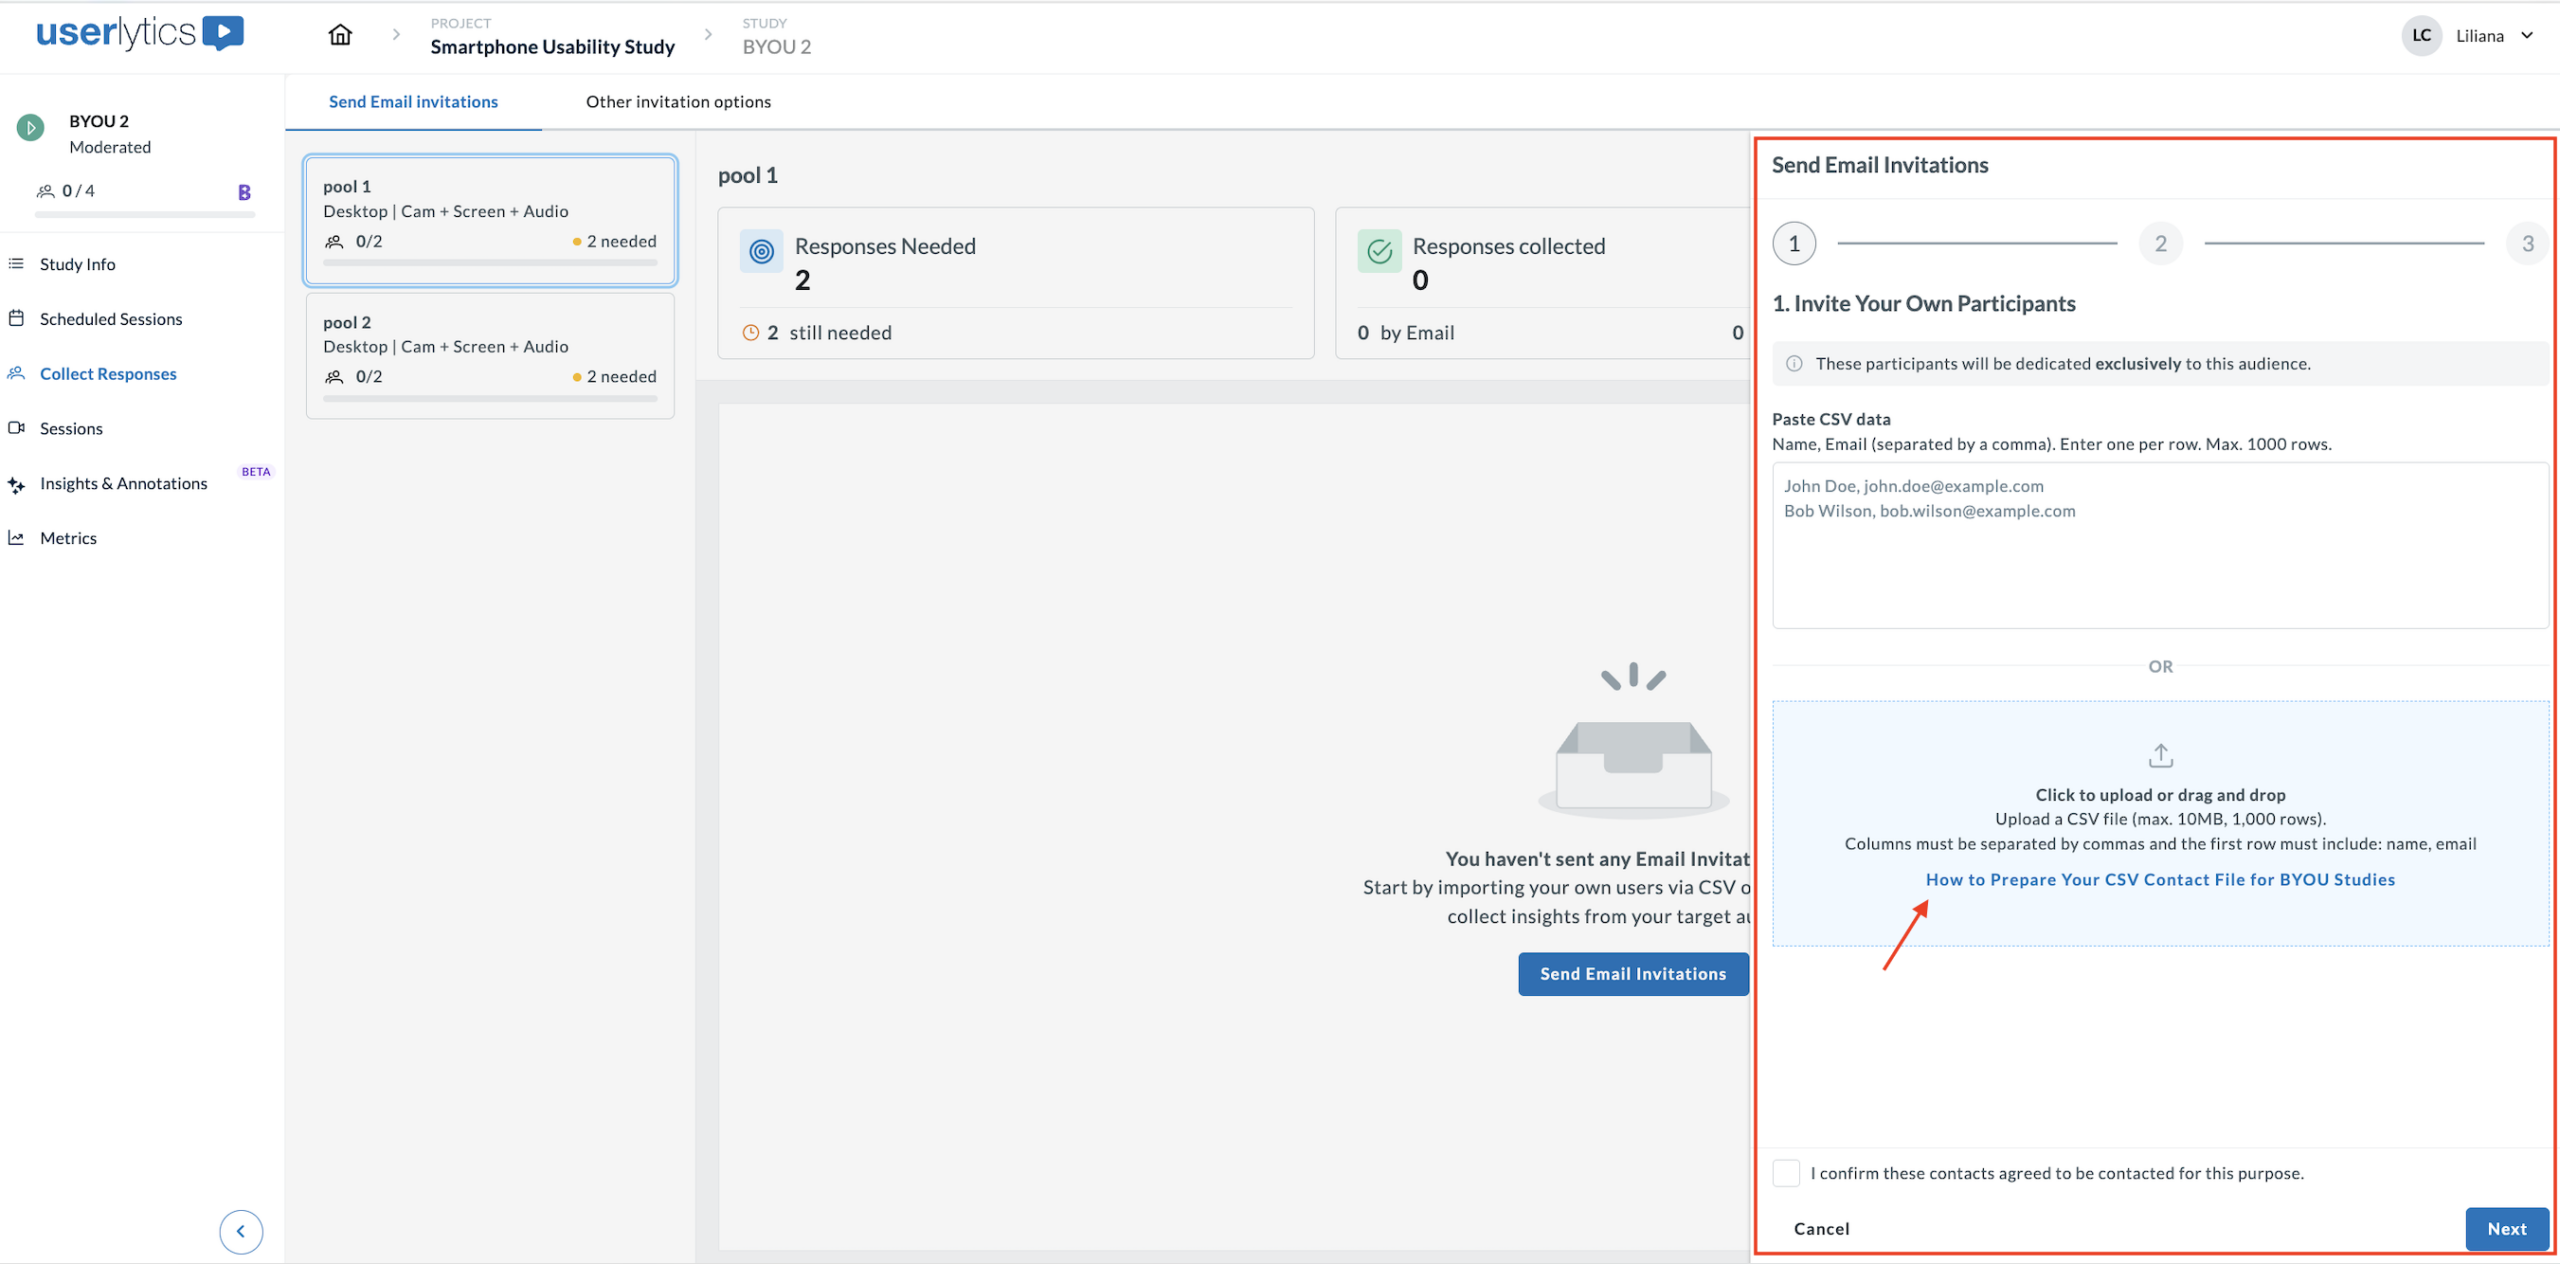
There are two options to add your participant list: Pasting the CVS data manually OR uploading a CVS file.
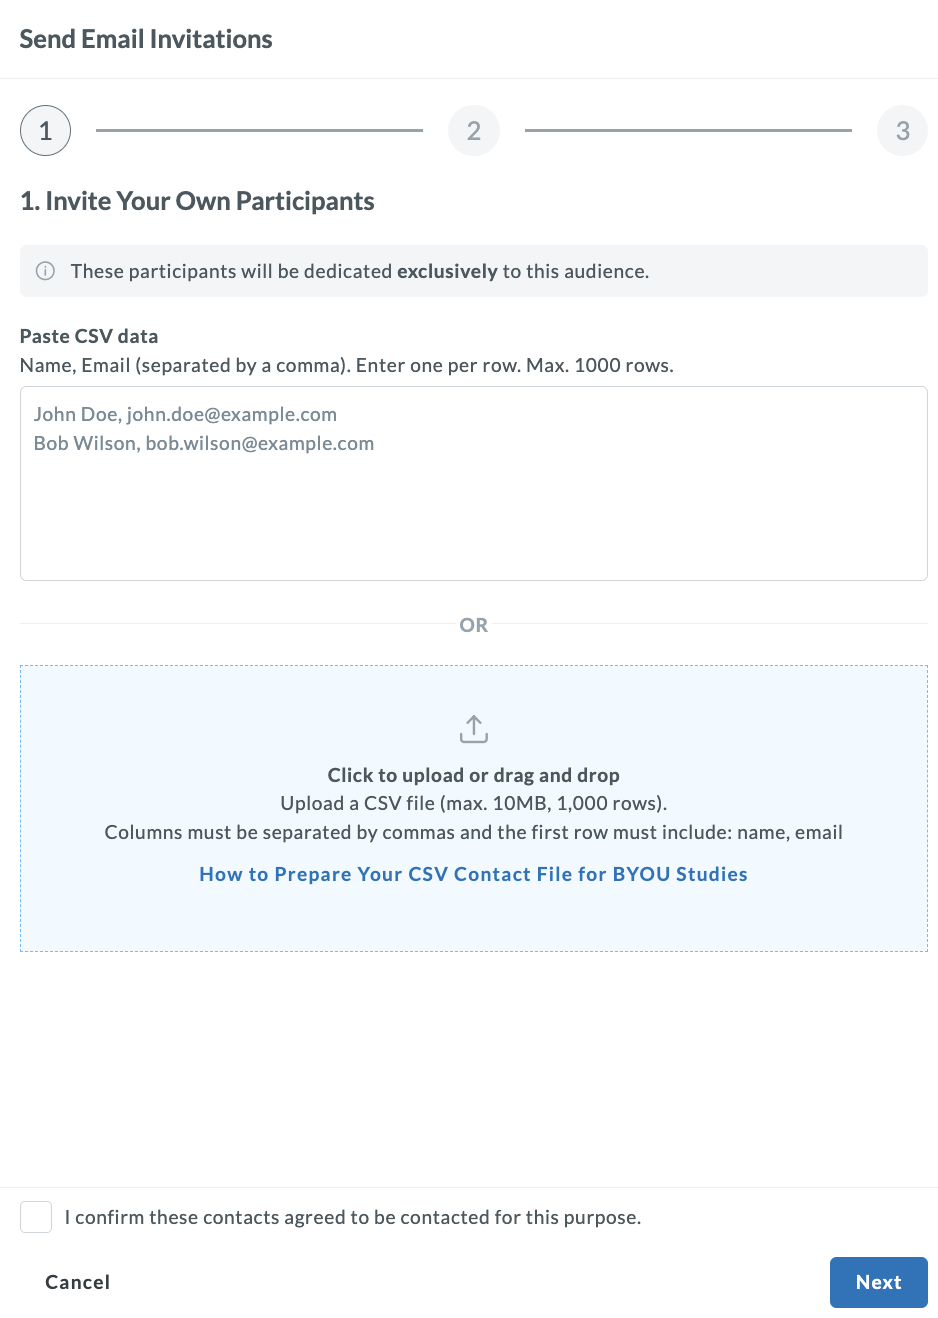
Option 1: Paste CSV data manually
In the Paste CSV data field, type or paste your contacts directly. Enter one participant per row in the following format:
Name, email@example.com
The system automatically detects name and email syntax. You can enter up to 1,000 rows.
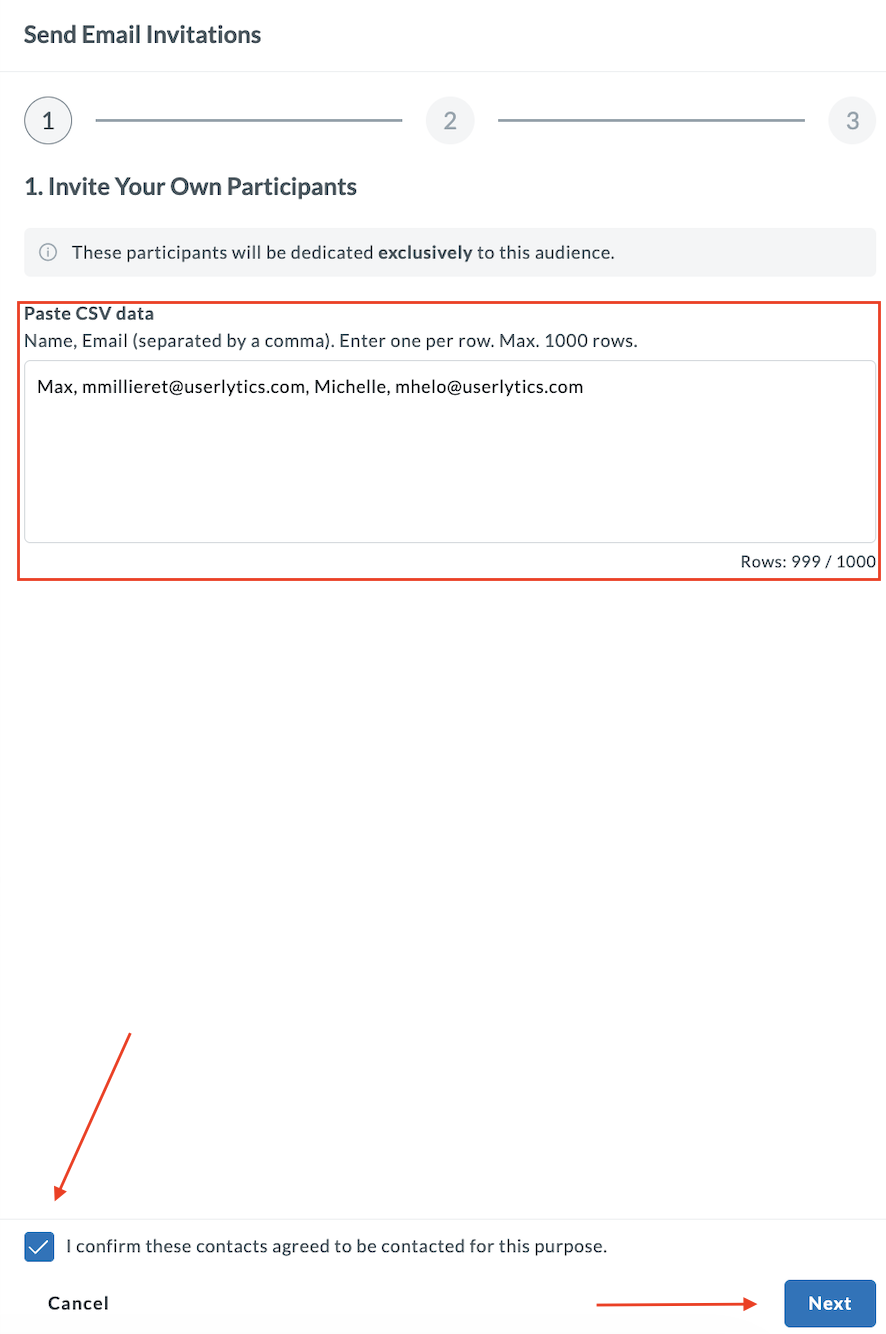
Once you participant name(s) and email address(es), check off the required fields and hit “Next”.
In step 2, you’ll be able to visualize and review the participant list. Hit “Next”.
Now you can prepare the email invitation. The system will provide a recommended subject line and email text, which can be edited.
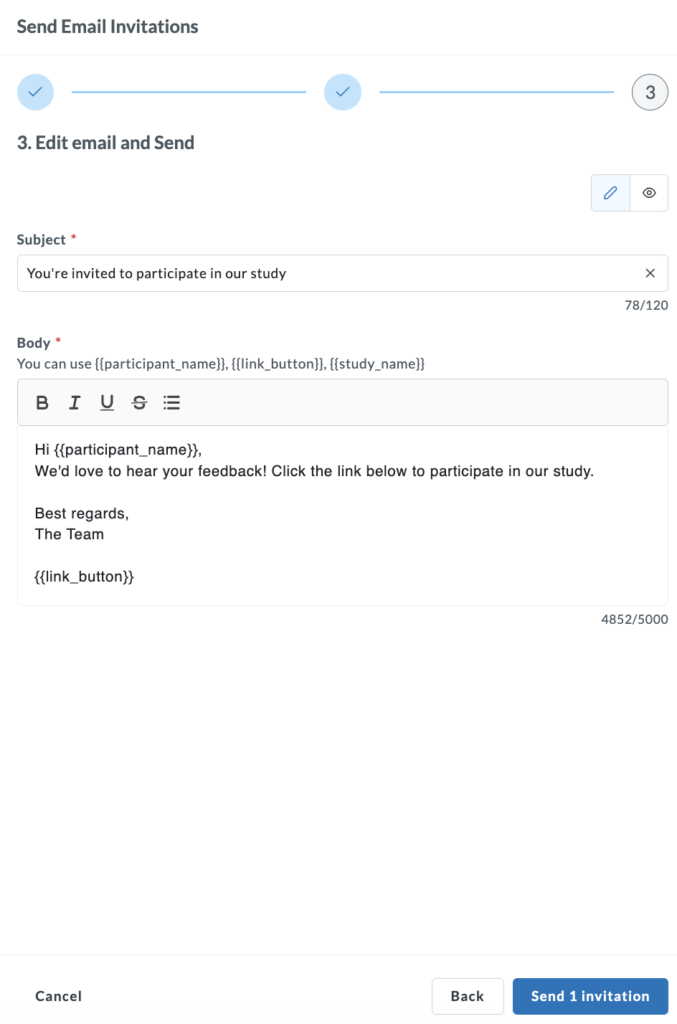
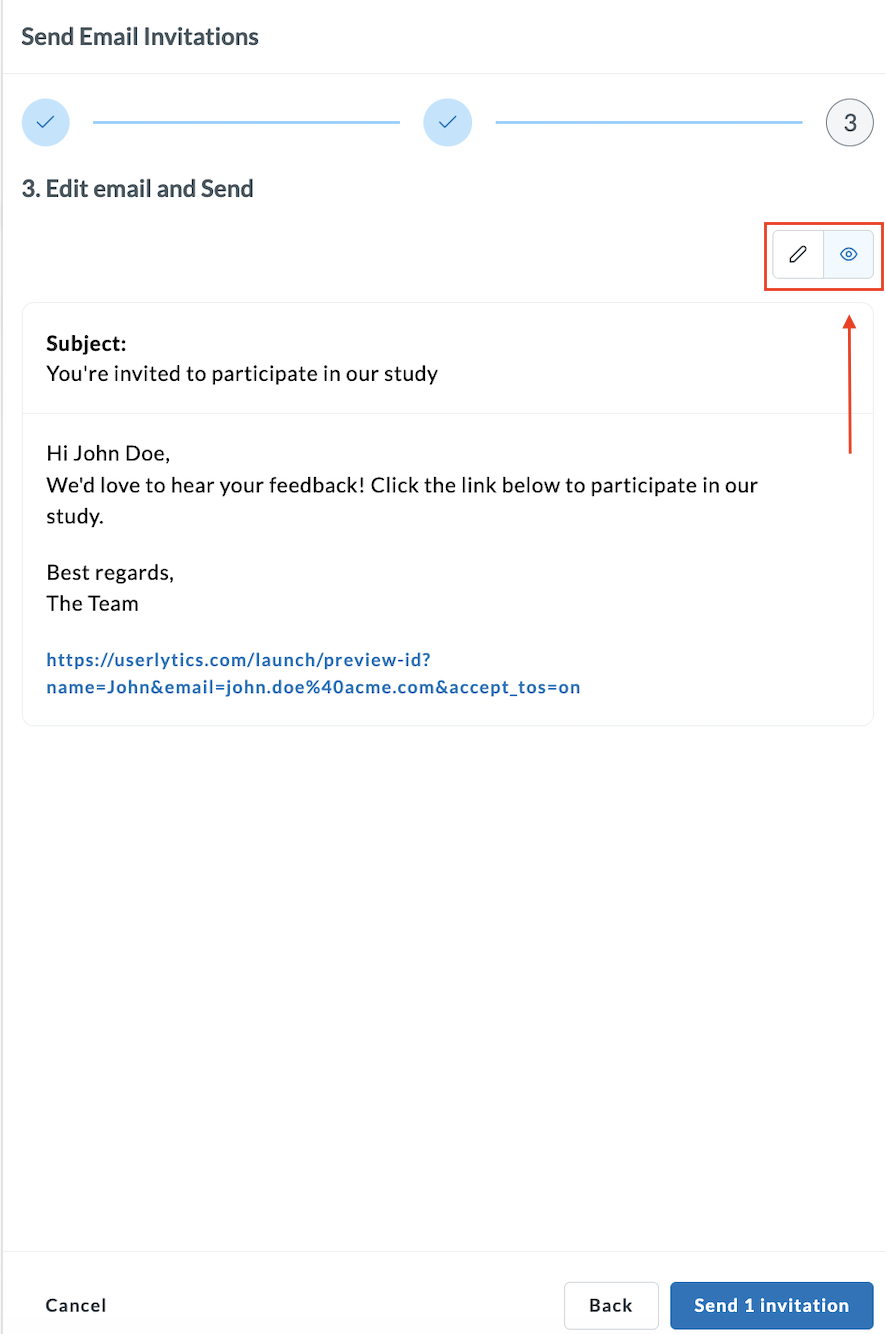
You can see how the final email will look like by clicking on the “eye” icon next to the pencil.
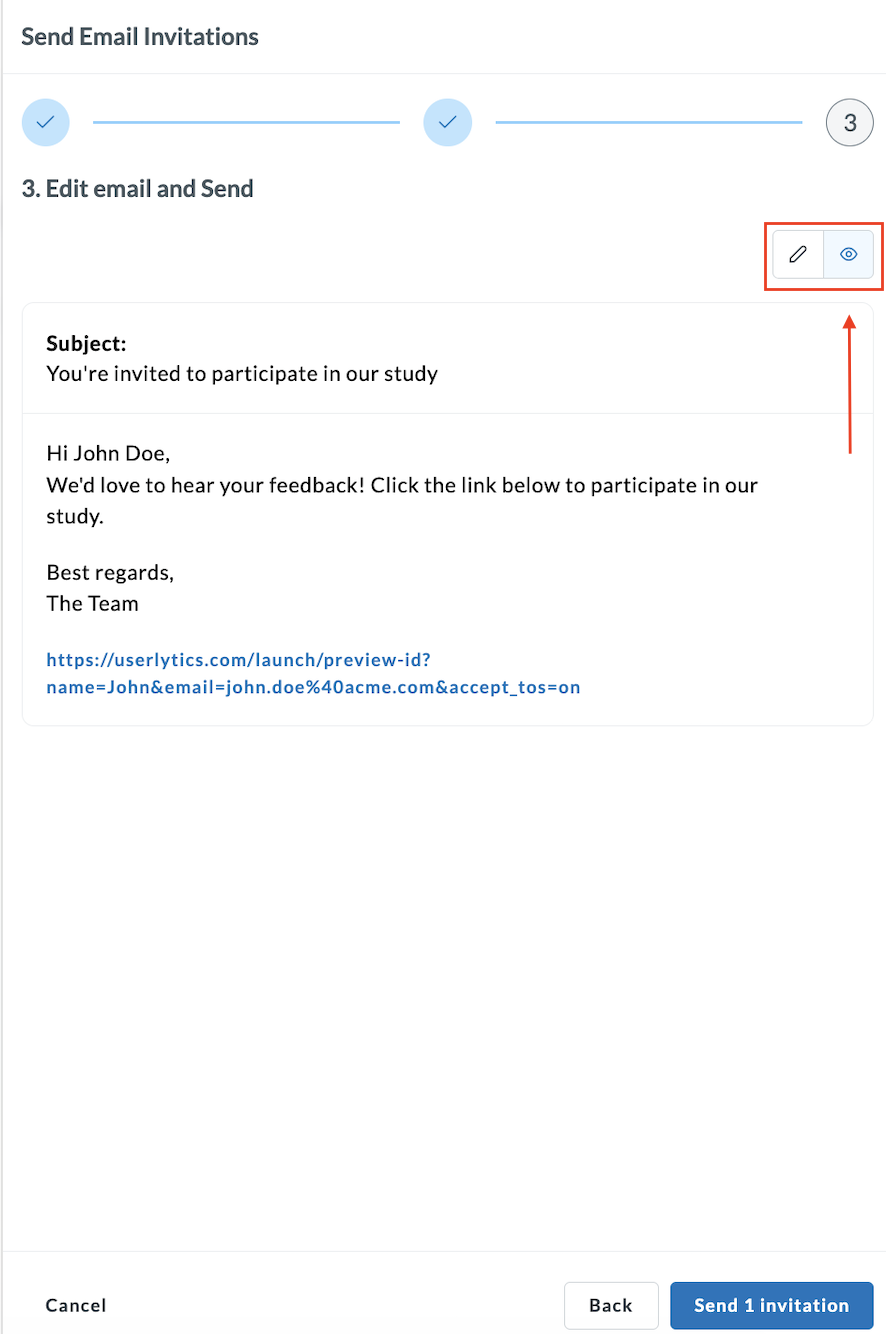
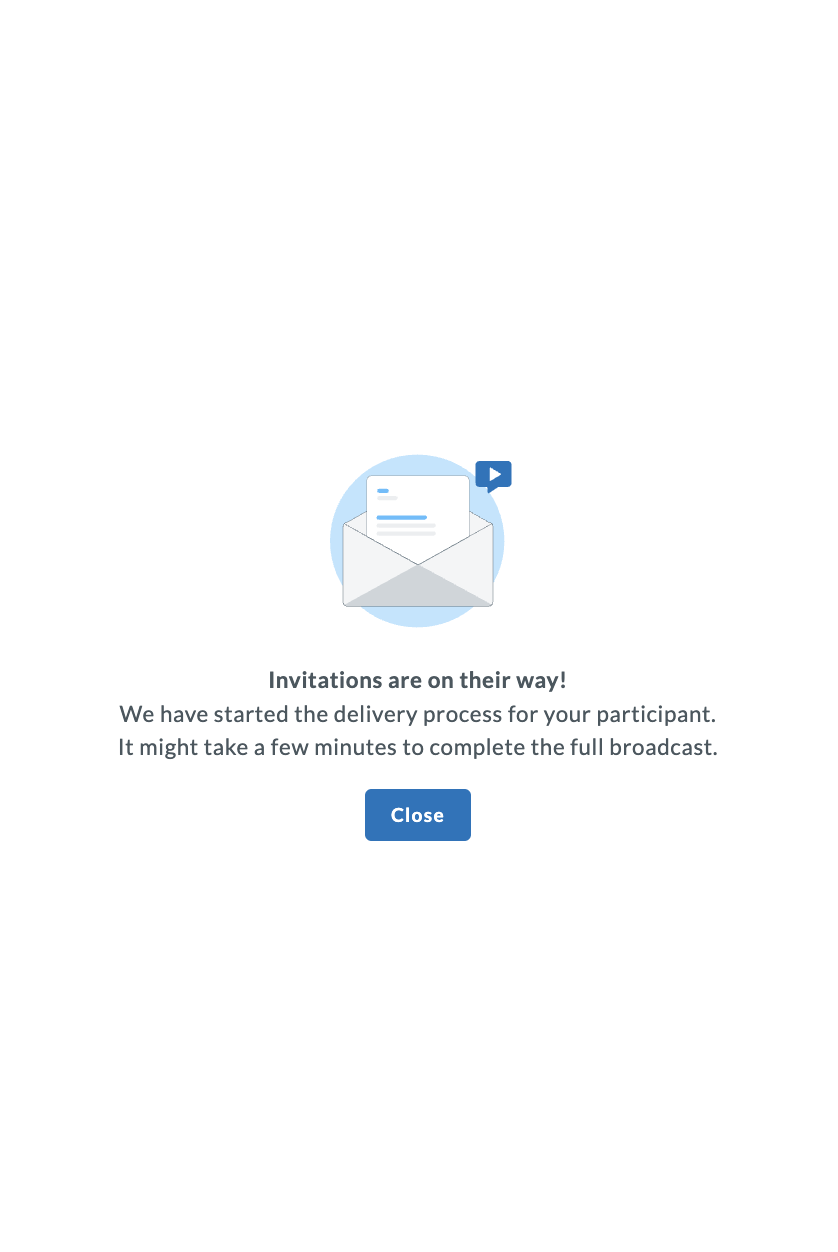
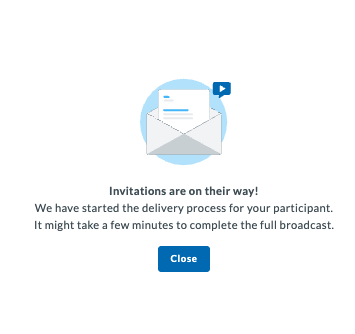
Once the email is ready to go, click on “Send Invitation”. The following screen will appear, which you can close.
Option 2: Upload a CSV file
You can also upload a CVS file to quickly import your participant list. To do so, click the upload area or drag and drop your CSV file.
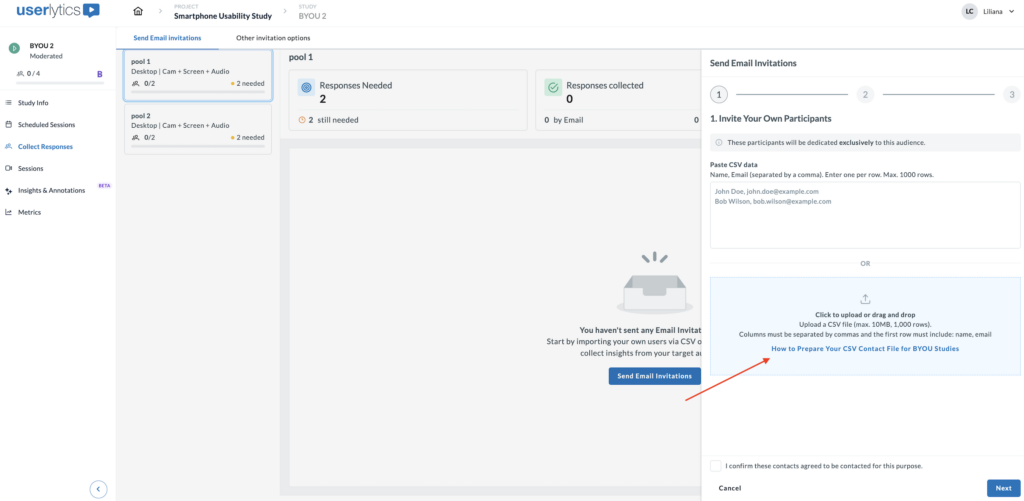
Need help preparing your CSV? See: How to Prepare Your CSV Contact File for BYOU Studies
Once your contacts are added, you’ll see your uploaded file. Make sure to check the box to confirm: I confirm these contacts agreed to be contacted for this purpose. Then, click Next.
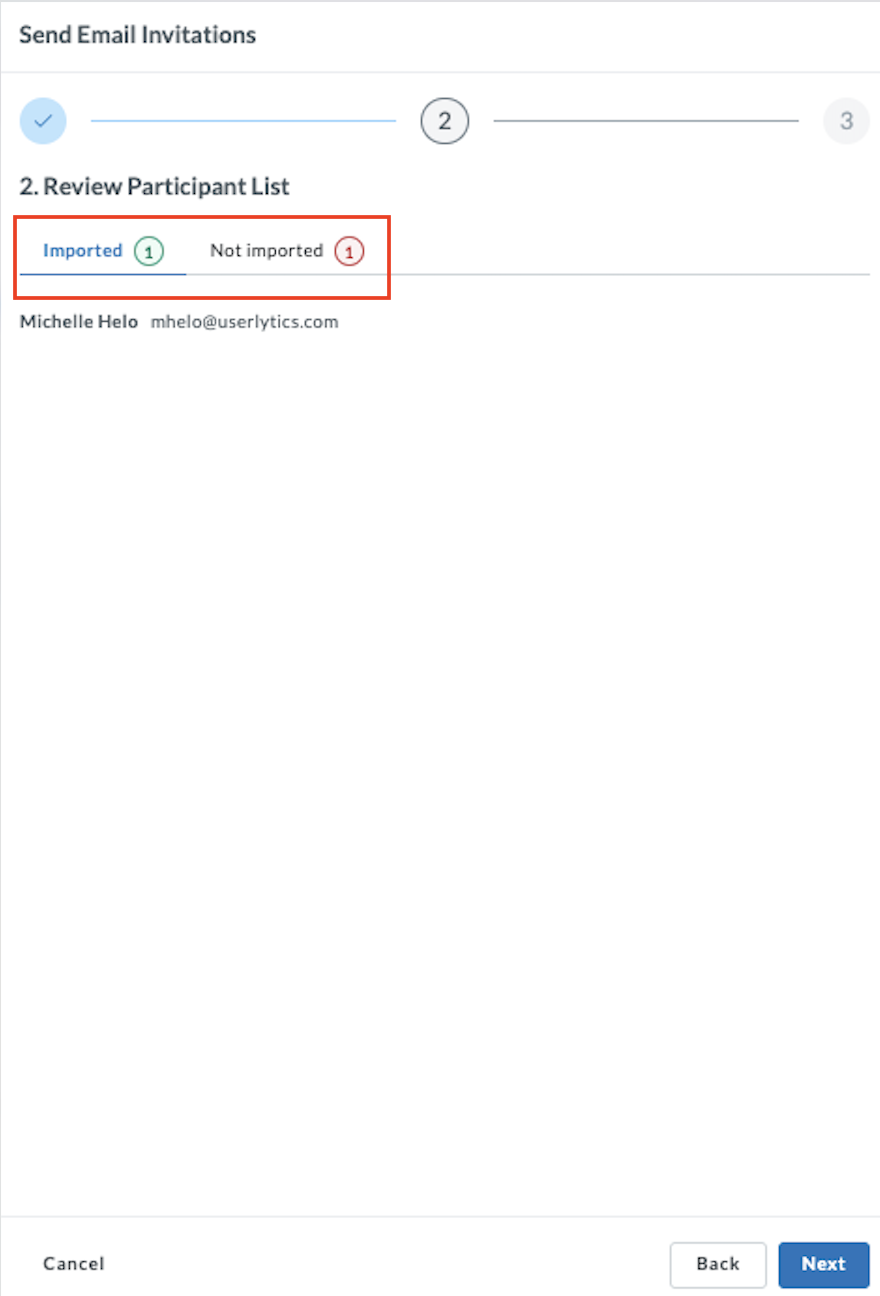
The platform automatically processes your list and separates contacts into two tabs:
- Imported: contacts with valid email addresses, ready to receive invitations.
- Not imported: contacts flagged as invalid or already assigned to another audience in this study.
Review both tabs before proceeding. Only participants shown under the Imported tab will receive an invitation. Click Next to continue.
On the final step, compose the invitation email your participants will receive.
A template suggestion is provided, which you can easily edit. The tool will handle the dynamic variables in brackets.
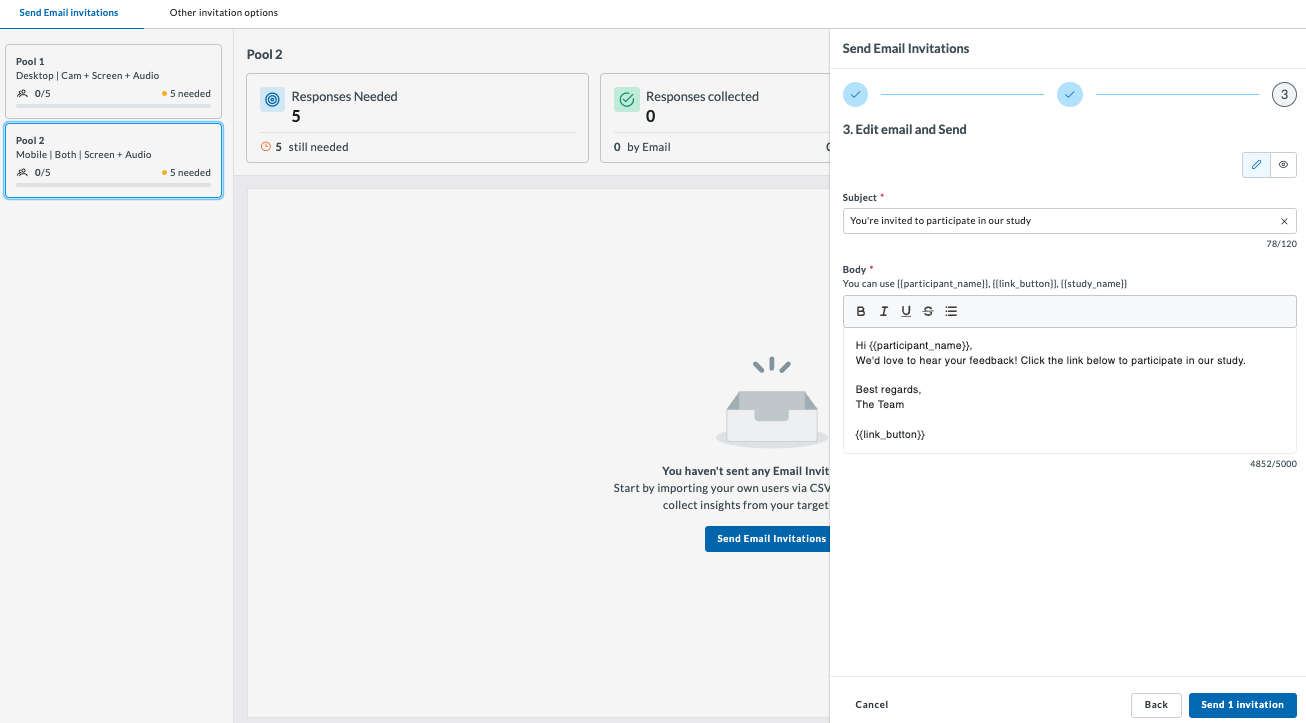
You can also click on the eye icon to switch to Preview mode. This shows exactly how the email will appear to your participant, with dynamic variables resolved using real data, including the personalized participation link. Review the email carefully and send.
Once you’ve sent your invitates, the following window will appear. Go ahead and close.
Tracking Your Invitations
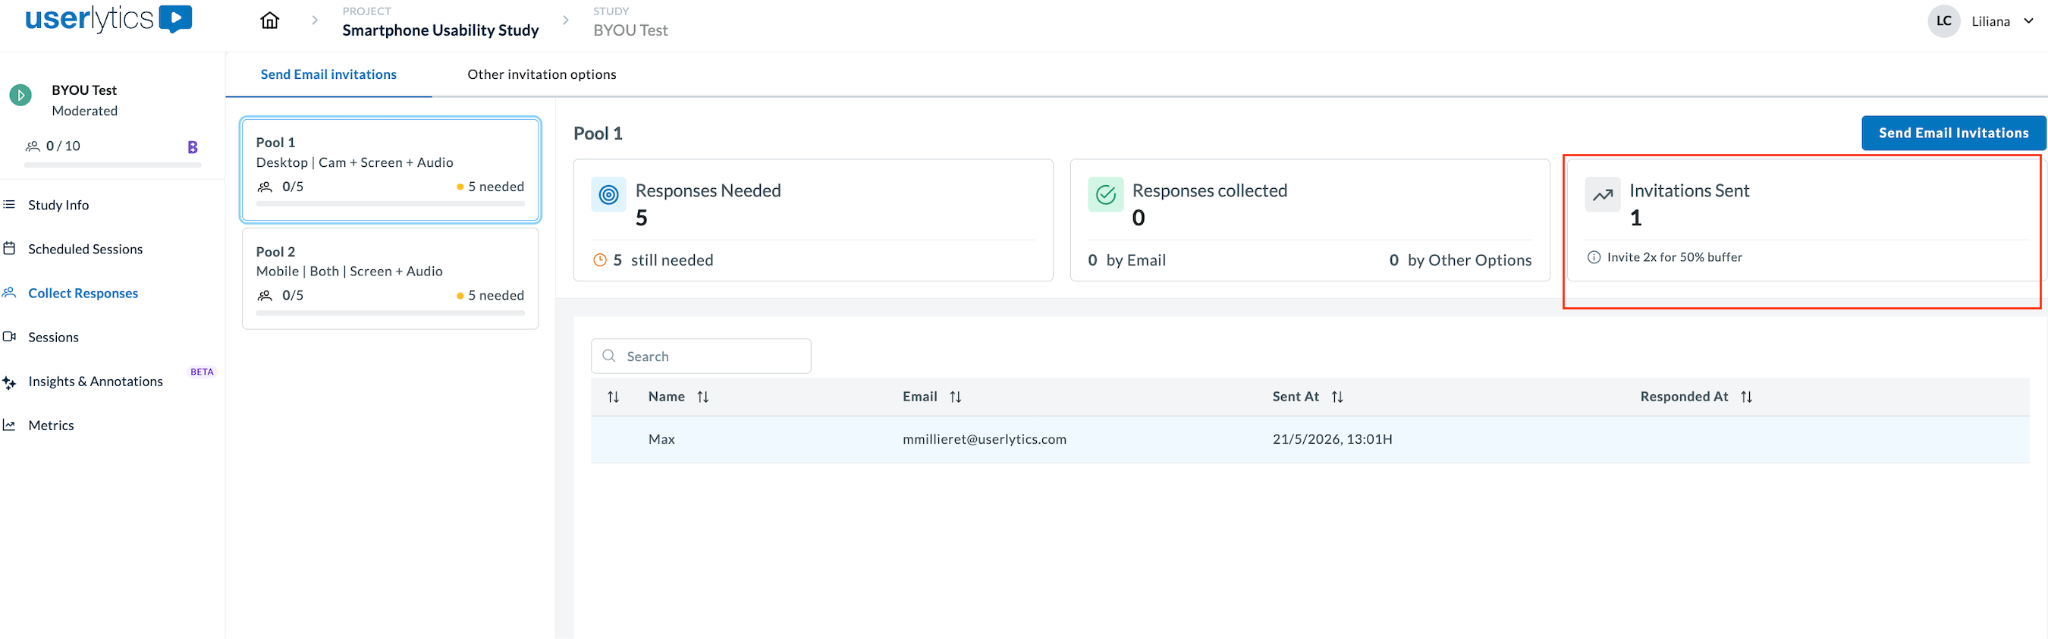
After sending, return to the Collect Responses page at any time to monitor invitation activity per audience.
For each audience, you will see:
- Responses Needed: the total number of participants you defined for this audience.
- Responses Collected: the number of completed sessions received so far.
- Invitations Sent: the total number of email invitations dispatched, with a note on the recommended buffer (Invite 2x for 50% buffer).
The table below shows each invited participant’s name, email, the time the invitation was sent, and when they responded.
If you have more than one audience, repeat the same steps to invite participants by clicking on the quota and proceeding to send out invitations.
Other Invitation Options
In addition to email invitations, the Other Invitation Options tab contains the traditional recruitment methods you already know.
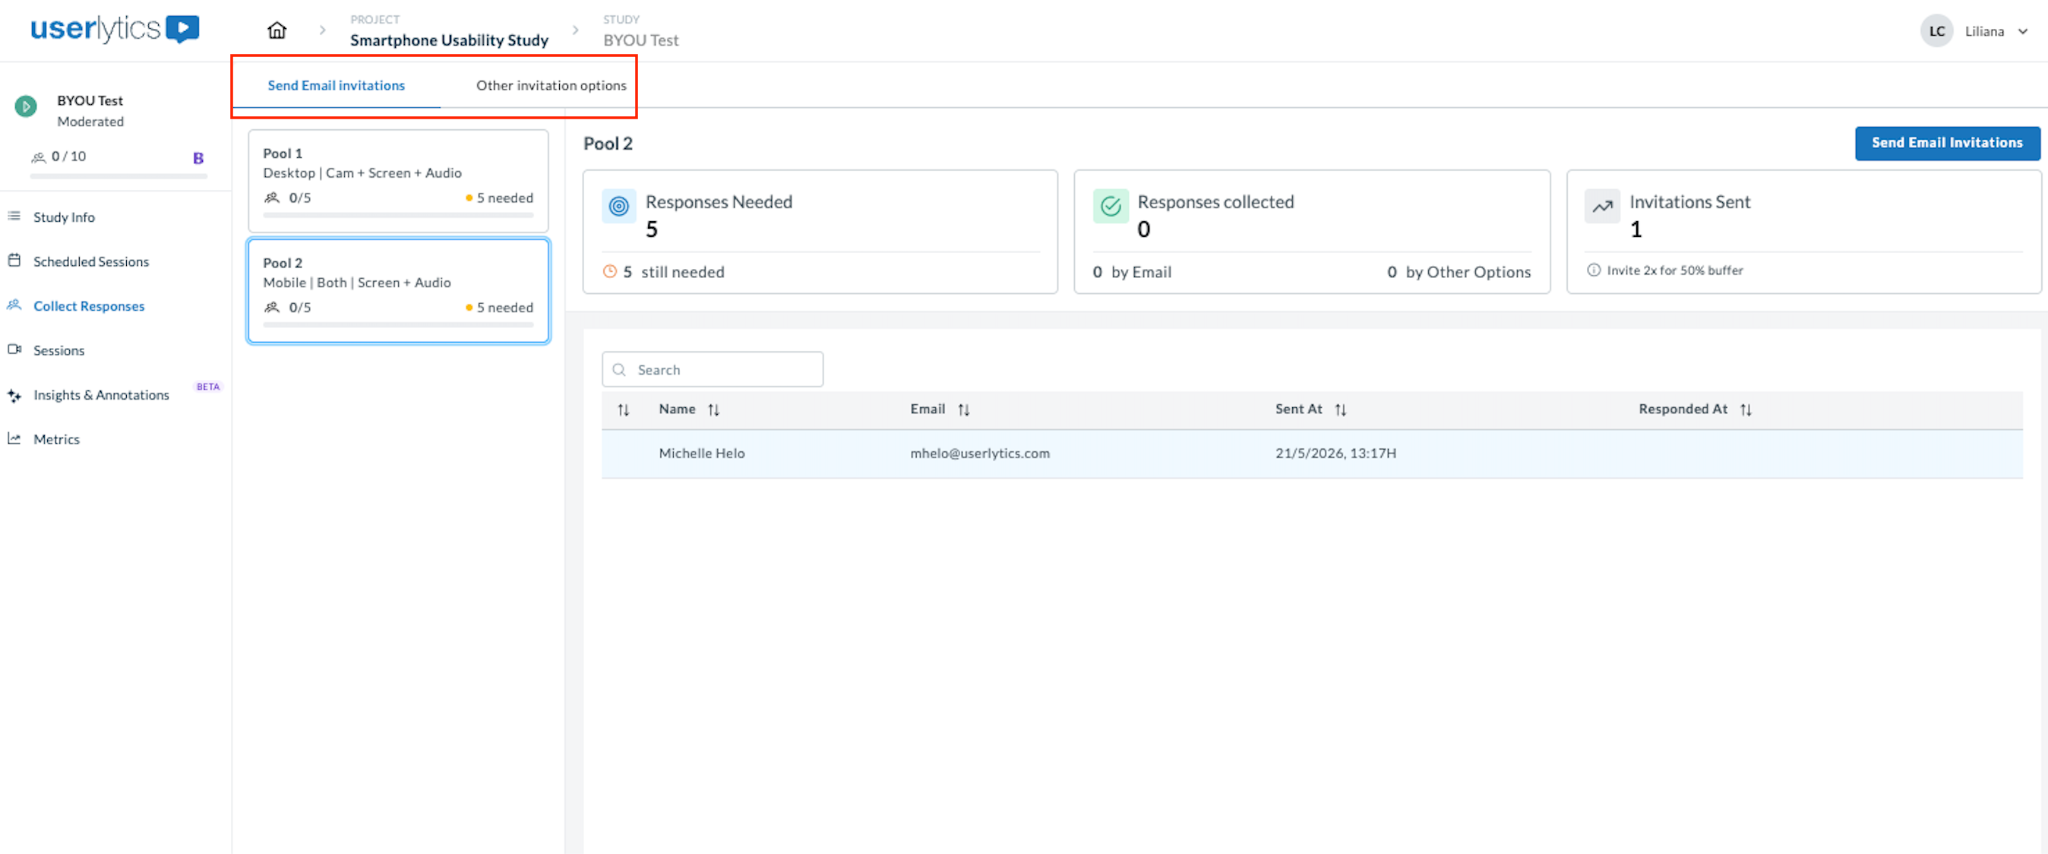
Simply go to the “Other Invitation options” tab:
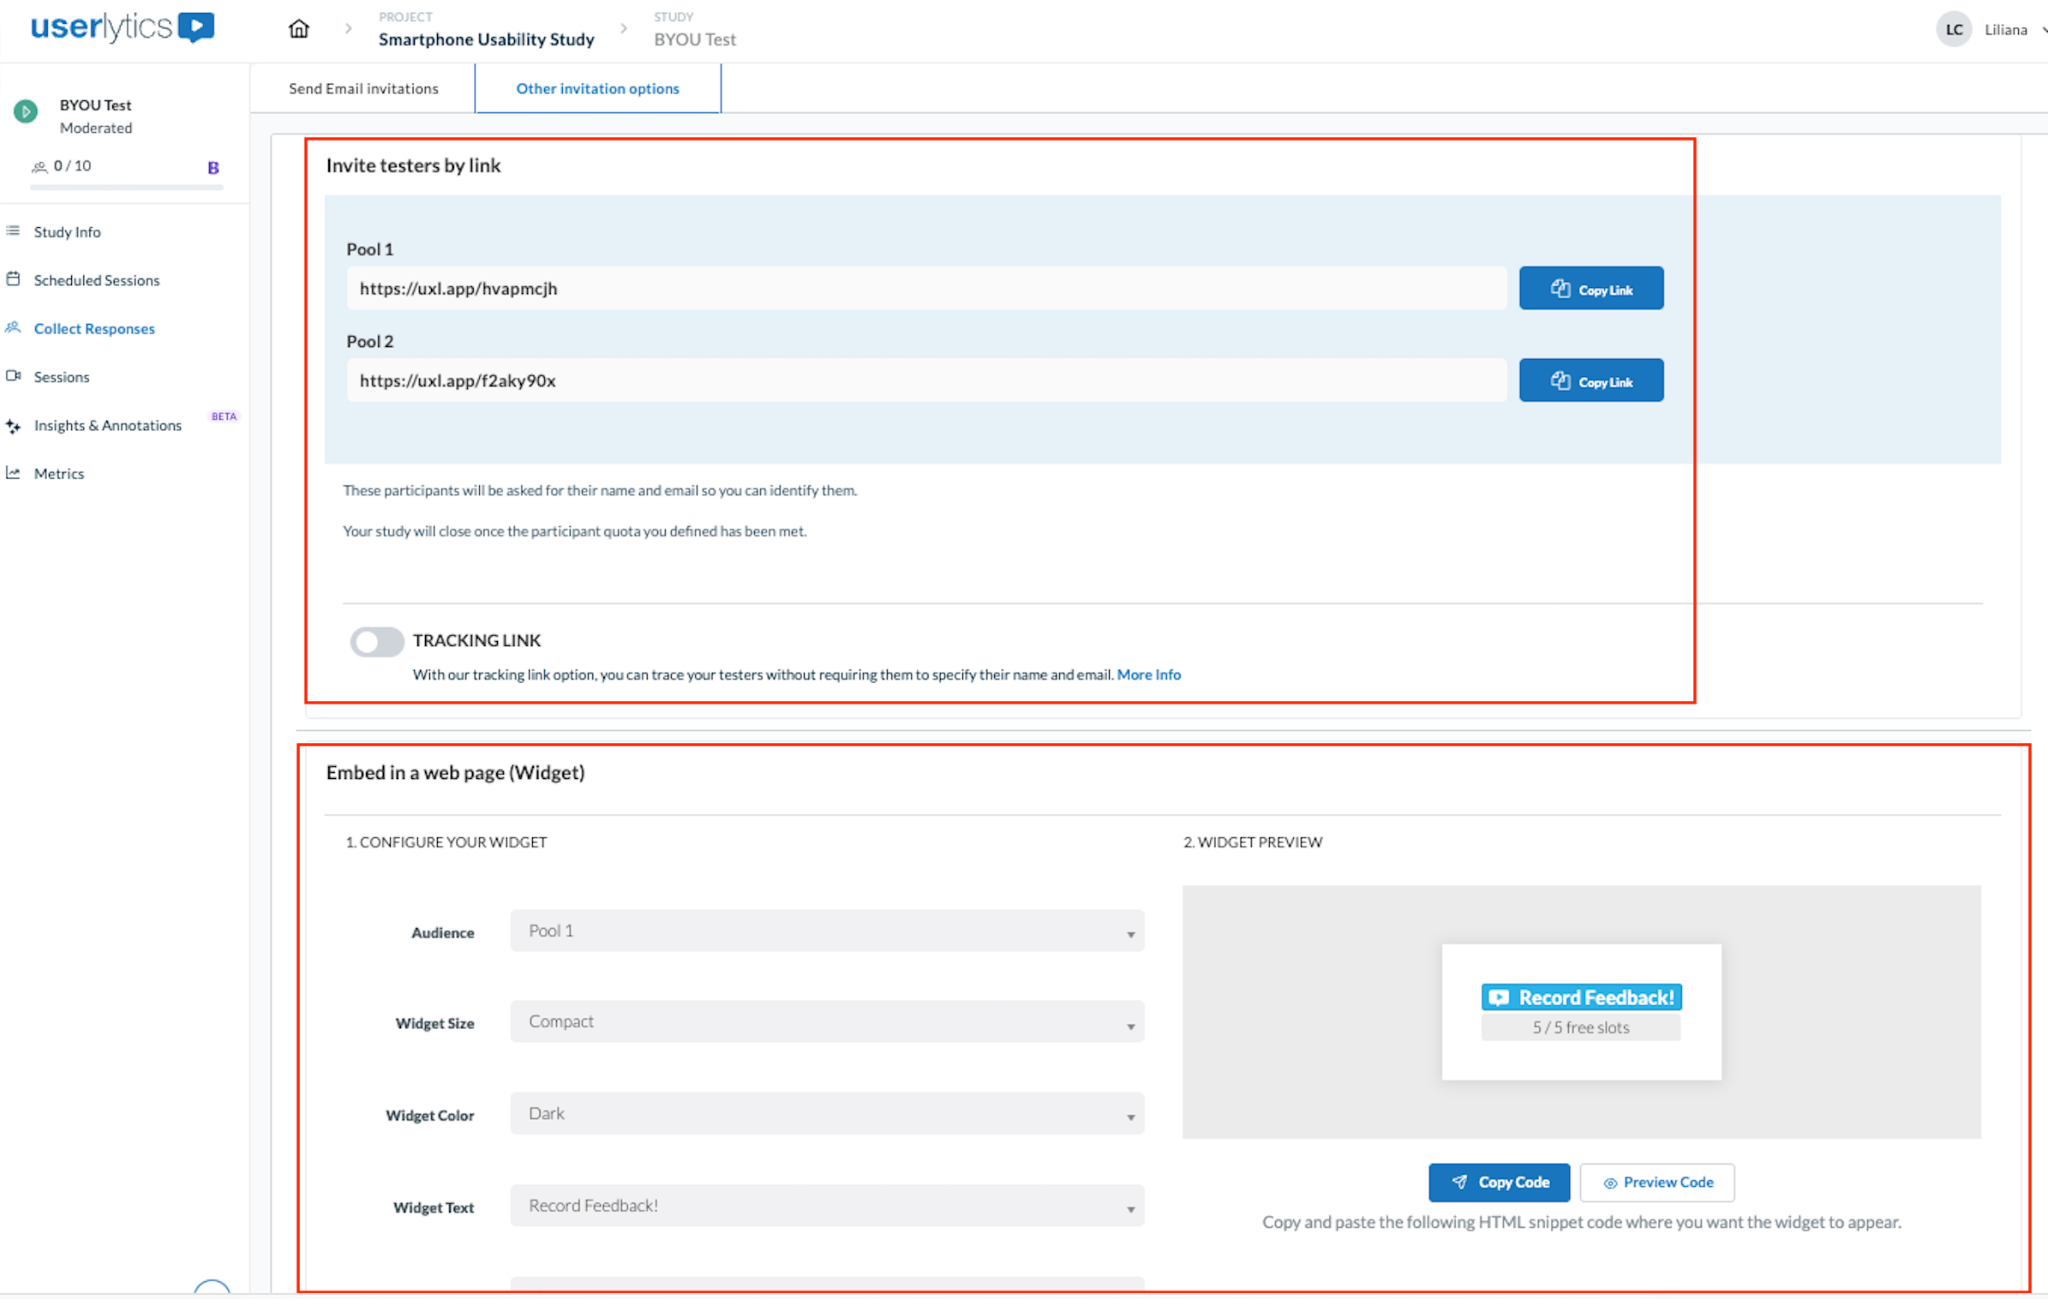
- Invite by link
Each audience has its own unique shareable link. You can copy and distribute the link via your own channels such email, messaging apps, internal tools, or anywhere else.
To copy a link, click Other invitation options, find the audience you want, and hit Copy Link next to its URL.
- Participants who access the link will be asked to provide their name and email for identification.
- The study will close automatically once the participant quota for that audience has been met.
2. Tracking Link
Enable the Tracking Link toggle to generate a link that identifies participants without requiring them to enter their name and email manually. This is useful when you already know who will be testing.
3. Embed in a web page (Widget)
The widget lets you embed the study invitation directly into your website or product. Configure the widget settings:
- Audience: select which audience the widget applies to.
- Widget Size: choose between Compact and other available sizes.
- Widget Color: select Dark or Light theme.
- Widget Text: customize the call-to-action label (e.g., “Record Feedback!”).
Once configured, click Copy Code and paste the HTML snippet into your web page where you want the widget to appear. Use Preview Code to see how it will look before publishing.
Note: Each audience quota has a unique link. Make sure to click on each audience separately and copy the correct link for each.