This guide will explore the specifics of the Figma Integration, its advantages, tips for maximizing its use, and the steps for testing your prototypes with Userlytics. Please note that this feature is exclusively accessible for desktop devices and unmoderated testing.
What Benefits Does The Figma Integration Offer?
The Figma integration presents several key benefits, most notably:
- An effortless testing experience: You can test Figma prototypes seamlessly using our no-download recorder, ideal for scenarios where company firewalls prevent extension installations.
- A streamlined user experience: Users can smoothly navigate without the hassle of managing extensions or switching tabs, making interaction with the Recorder simpler and more streamlined.
- Enhanced privacy protection: The privacy of clients is protected because the Figma prototype URL remains concealed, reducing accessibility for participants in comparison to alternative methods.
- No Userlytics Figma access required: Our solution does not require access or login credentials for Figma through Userlytics, unlike other integrations.
- A seamless detection: Our system is designed to instantly recognize Figma prototype links. Upon pasting the link, our platform promptly identifies it as a Figma prototype and seamlessly incorporates it into your workflow.
Creating a Study
Let’s review the various steps involved in the setup process.
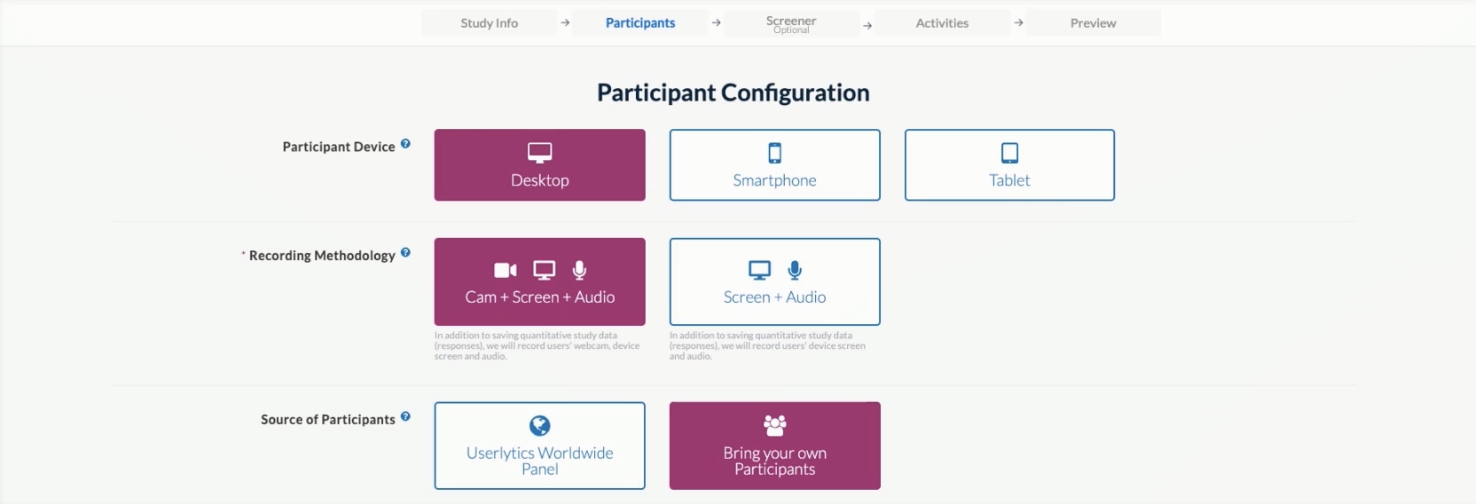
Set Up Parameters: Define the parameters of your study. Please note that the Figma integration is exclusively available for unmoderated testing on desktop devices.
Integrating Figma into Your Study
Introductory Task: Start your script with an introductory task that doesn’t involve Figma. This task will outline the flow of the study that the tester will follow.
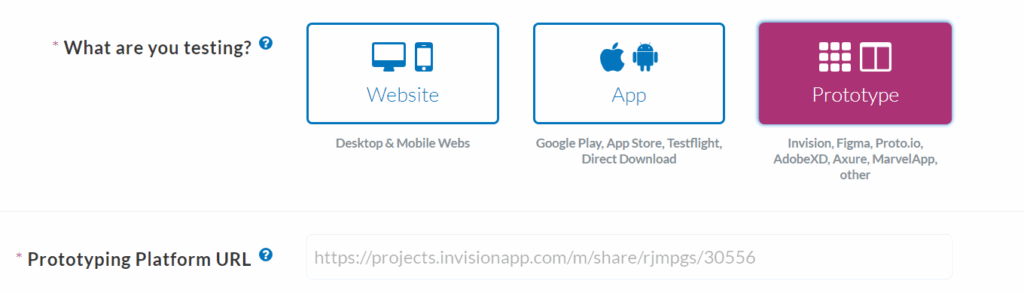
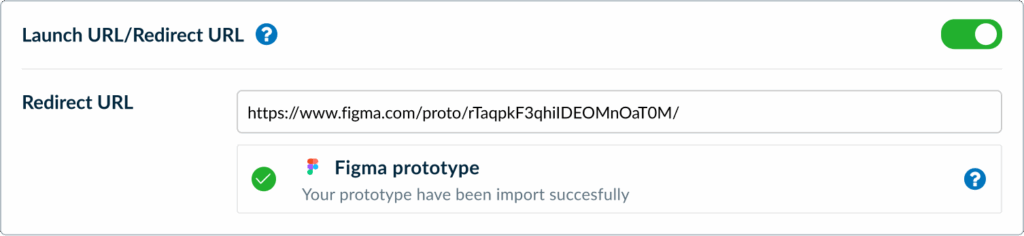
Tasks Requiring Figma: For tasks that require Figma, add the Figma prototype URL to the Redirect URL section. The system will verify it automatically as a Figma prototype.
Where to find your public Figma URL?
- Open your Figma file
- Click “Present” in the header
- Click the “Share Prorotype” button in the top right corner
- Select “Can view prototypes” in the dropdown menu of the dialog box
- In the “Get link” section, ensure “Anyone with the link” is selected
- Finally, click Copy Link
To include the Figma prototype link in your study, paste the link into the corresponding field. You have three options:
Prototype URL
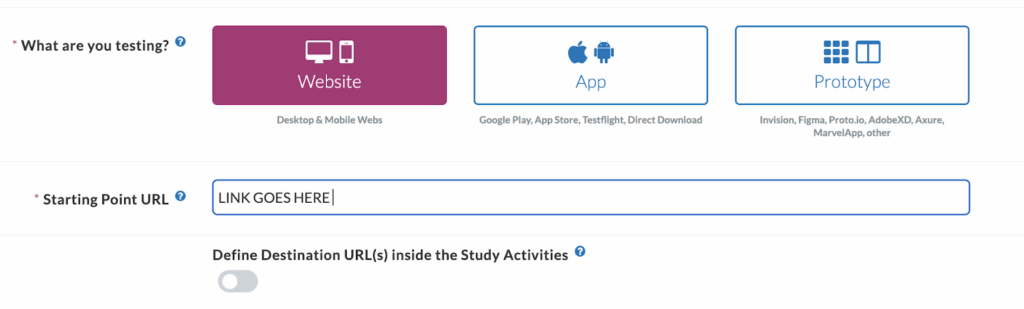
Starting Point URL
Redirect URL
Considerations for Study Flow
Depending on your study’s flow, consider the following:
- Use Case
- Device
- Type of Result
Scenarios and URLs
1. No URLs in Script
- For Desktop: Figma won’t load as there’s no Figma URLs provided.
- For Mobile: At the moment, the Figma integration is solely operational on desktop devices, meaning Figma won’t be accessible on mobile devices for now.
2. Mixed URLs (Figma and other prototypes)
- For Desktop: If there is both a Figma URL and an external URL, the Overlay Recorder will load.
- For Mobile: At the moment, the Figma integration is solely operational on desktop devices, meaning Figma won’t be accessible on mobile devices for now.
3. Multiple Figma URLs
- For Desktop: Figma will load successfully if the provided URLs, even if just one, direct to Figma. It’s crucial to remember that if Figma URLs are not consecutive, meaning they’re not placed in sequence, the prototype won’t load for tasks lacking a Figma URL. To include the Figma prototype link in your study, paste the link into the corresponding field
- For Mobile: At the moment, the Figma integration is solely operational on desktop devices, meaning Figma won’t be accessible on mobile devices for now.
Studies with Different Prototypes (desktop)
Single Standstill Prototype – view once in the study
Provide one prototype link, followed by rating/tasks/multiple choice questions. Optionally, if you want users to view the prototype before answering questions, include it in one question.
Single Standstill Prototype – view throughout the prototype
Include one prototype link, followed by rating/tasks/multiple choice questions. If users should see the prototype throughout, specify in the questions where it should be visible. If there are only Figma links, each Figma link will load separately in each activity where it is placed.
Interactive Prototype:
If users need to interact with a prototype throughout a “Flow,” each task needs an anchor link from Figma. Anchor links direct users to the specific page they should reach in that task or question. Ensure that a prototype link is added to each activity to ensure the specific Figma page appears. Follow the instructions below in Figma to create anchor links.
Creating Anchors in Figma
Here’s how you can go about creating Anchors in Figma:
- Select the layer triggering the navigation event.
- Enter Prototype Mode in Figma.
- Drag the link to the desired destination element within the frame.
- Ensure Interaction is set to ‘Scroll to‘.
- Preview or Sync your design to view the Interaction.
- Make sure to “Copy Link” and paste it into the activity on Userlytics.
User Prompt for Figma Tasks
At the beginning of the test, users will receive a prompt alerting them that they will be viewing a Figma prototype. They will also be instructed on how to use the task box while viewing the prototype.
In conclusion, the integration presents several key benefits for users. Firstly, it facilitates effortless testing by seamlessly integrating with our no-download recorder, which is particularly advantageous in environments where firewalls restrict extension installations. This streamlined approach ensures a hassle-free testing experience.
Moreover, the integration enhances the user experience by eliminating the need to deal with extensions or tab-switching, thus simplifying interactions with the Recorder. This intuitive design allows users to focus on their tasks without unnecessary distractions.
Additionally, the integration prioritizes privacy protection by keeping the Figma prototype URL hidden. This measure ensures that client data remains safeguarded and less accessible to participants compared to other methods, thereby instilling confidence in the security of the testing process.
Furthermore, unlike some other integrations, our solution doesn’t require Userlytics access or login credentials for Figma, offering a seamless and hassle-free experience for all users involved. Overall, these combined benefits make the integration a valuable asset for conducting efficient and secure testing procedures.
Related to