Hurry! Our Biggest Sale of the Year is On - Contact us to lock in prices and more
Skip to content

How to Invite Team Members to a Userlytics Account

Published:

Follow these steps to add new users to your organization’s Userlytics account and assign the appropriate role permissions. Let’s get started!

1. Log into your Userlytics dashboard. In the upper right corner, click your account initials to open the dropdown menu

Userlytics dashboard showing the account initials clicked in the upper right corner to open the account menu

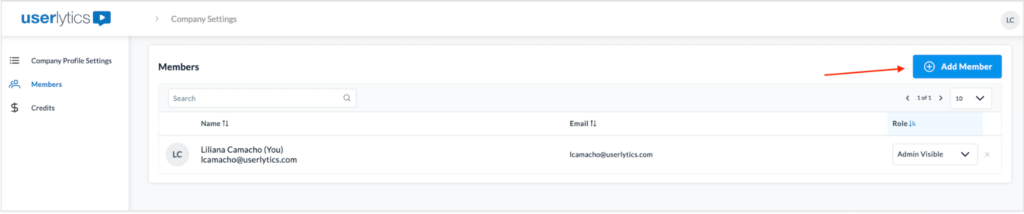
From the dropdown menu, select Company Settings.

Account dropdown menu expanded with the ‘Company Settings’ option highlighted.

Within Company Settings, click Members in the left-hand navigation menu. Company Profile Settings page displaying company information fields and navigation menu on the left highlighting the "Members" section.

Here you will see a list of existing team members (if there are any at this point) and their “Roles” within the account. Head over to the right hand-side of the screen and click on the blue Add Member button to begin adding members.

Members page showing the list of existing users and the Add Member button in the upper right.

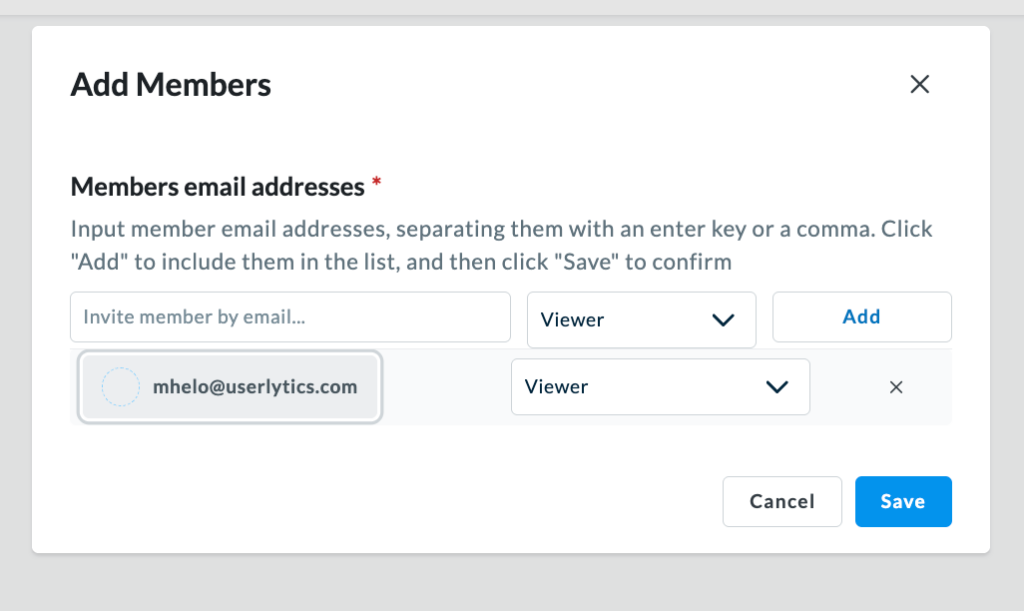
A pop-up window titled Add Members will appear. 

Add Members pop-up with empty email field, role dropdown, and Add and Save buttons.

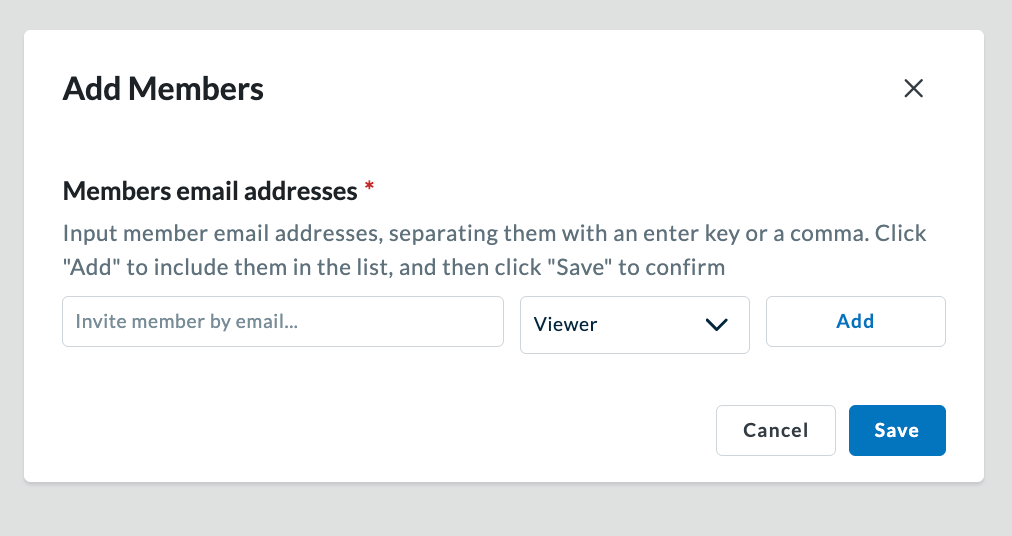
Type in the team member’s email address into the field labeled “Invite member by email…” assign a role to them from the following list:

  • Admin Visible – Admin privileges, visible to all project members.
  • Admin Invisible – Admin privileges, hidden from project member listings.
  • Creator – Can create, edit, and view their own studies and any they are invited to. Full credit access.
  • Viewer – Can view public projects and invited private projects.
Add Members pop-up showing an email entered and the role dropdown expanded with role options.

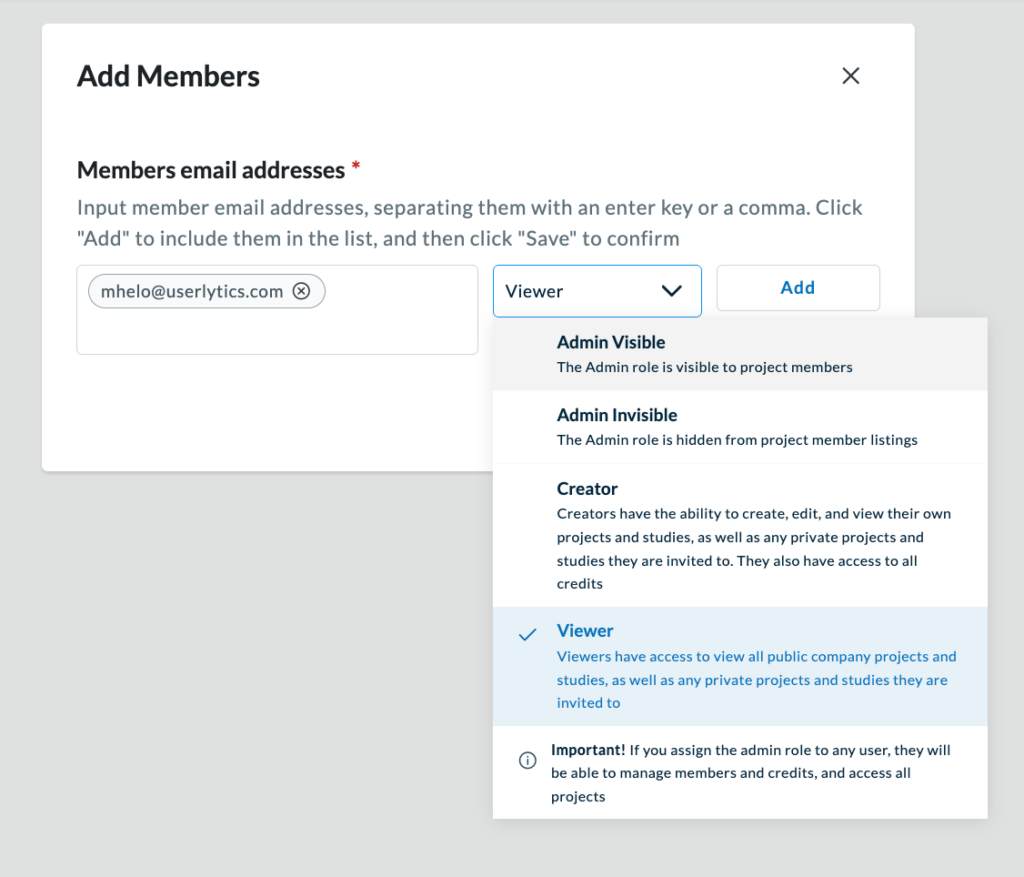
You can enter multiple email addresses by simply clicking on “Add” and repeating the process as shown below. Once you’re done, hit “Save”.

Add Members pop-up showing a pending new member added to the list, with role selection and Save button.

After saving, the new team member will appear in your Members list. 

To edit or delete Members from the account, head over to the three-dot menu next to a team member and click on it. 

Members list displaying user details with the three-dot menu expanded to show member management options.

Choose to either remove their role or delete them altogether. 

Members list showing the selected member’s role dropdown expanded to change the user’s role.

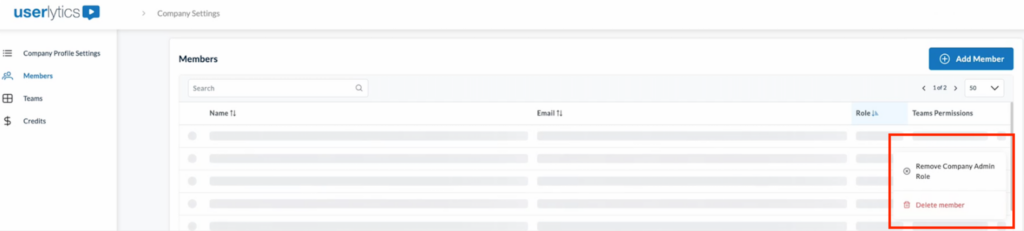
You can also use the toggle button to make a team member appear visible or not. 

Members page showing a user with the role set to Admin (Visible), with the visibility toggle highlighted and selected.

A confirmation message will appear when changes are saved successfully.

Members page displaying two success notifications stating ‘Admin role updated successfully.

That’s it! Once you invite members, they will receive an invitation email and gain access according to the role you assigned.

Didn’t find what you were searching for?

Related posts:

Clients
October 6, 2025

Unmoderated VS Moderated UX Studies

Differences and similarities of the role of a moderator, participant options, and access to video results of unmoderated & moderated studies.
Clients
October 6, 2025

Schedule Moderated Sessions

Learn to schedule moderated sessions for your user studies. Set up a calendar, invite observers, and notify participants of available time.
Getting Started
October 6, 2025

Is PayPal the Only Payment Option?

Help Center: Discover the available payment methods on Userlytics, including PayPal and alternative options depending on your account type.
Clients
October 6, 2025

How our Unmoderated Testing Recorder Works

Help Guide for Userlytics Clients: Learn in a few easy steps how our Unmoderated Testing Recorder Works on the Userlytics platform.

Ready to Elevate Your UX Game?