Userlytics allows testers the flexibility to take fun, easy, and PAID usability tests right from their mobile phones. Whether you’re an iOS user or an Android user, getting started with mobile testing on the Userlytics mobile app is quick and simple! Below, we’ll go over how to launch a Userlytics test on an iOS device if you are a Userlytics panel tester.
1. Locate Test
To begin a Userlytics test on iOS, you must first locate the specific usability test you wish to take. There are two ways you can go about doing this: entering a unique code associated with the test, or logging into your account and locating the test within your tester dashboard.
Method 1: Enter Unique Test Code
Once you have opened the Userlytics mobile app, click the button that reads “I have a code.” After clicking the “I have a code” button, you will be directed to a new screen with a placeholder for your test code. In the place
holder that says “Unique Code,” enter the code associated with the usability test you will be taking. Make sure to toggle the bar that indicates you accept the Terms of Service and Privacy Policy. Then, select the “Continue” button.
Method 2: Login into Tester Account and Locate in Dashboard
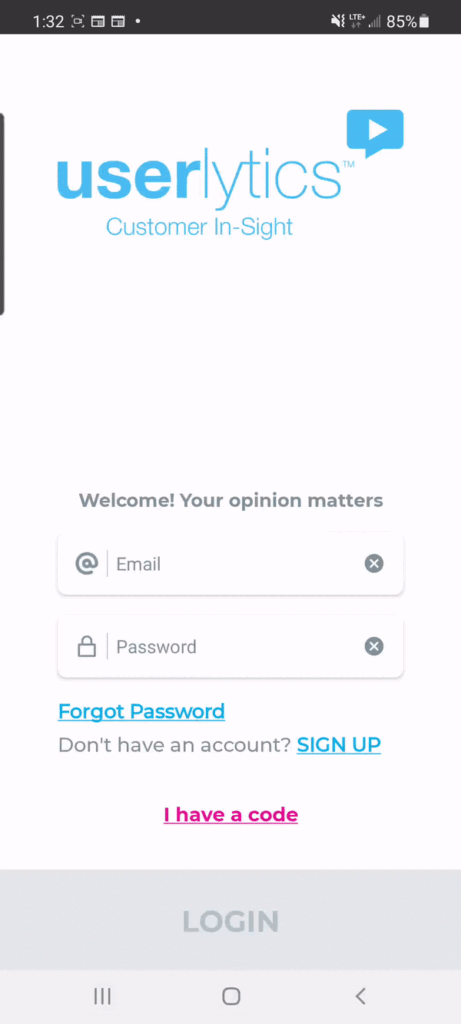
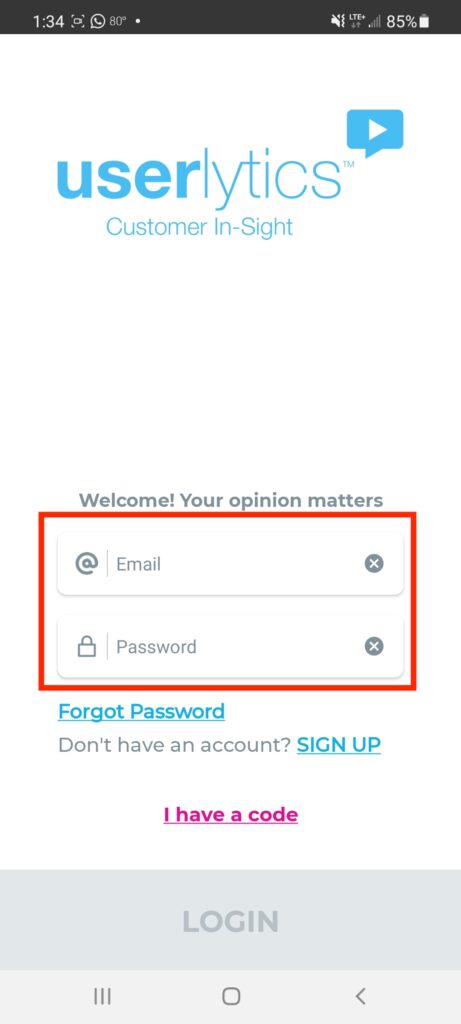
Alternatively, you can simply login to your tester account on the Userlytics app and locate the test within your tester dashboard. When opening the Userlytics app, enter the email address and password associated with your tester account on the home screen. Then, select the “Login” button.
Once logged into your account, click on the “Test Invitations” section of your dashboard.
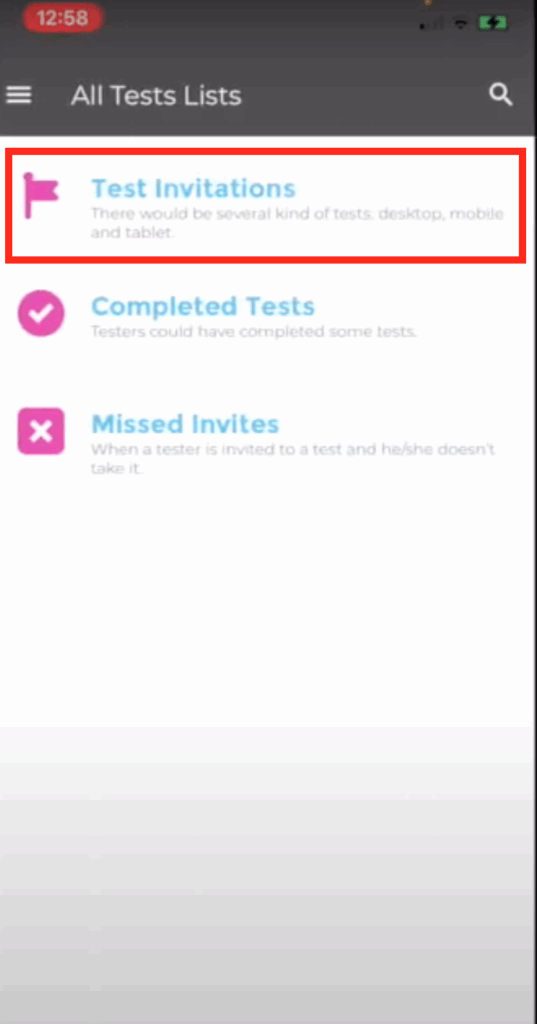
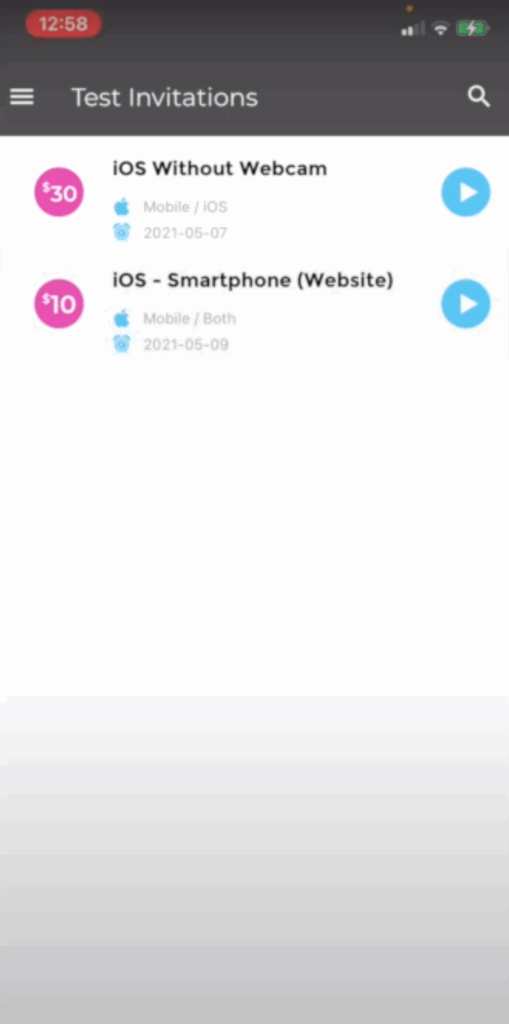
Then, select the usability test you wish to launch.
2. Begin Test Preview
After you locate the usability test you wish to take, click on the button at the bottom of the screen that reads “Preview” to begin the test preview.
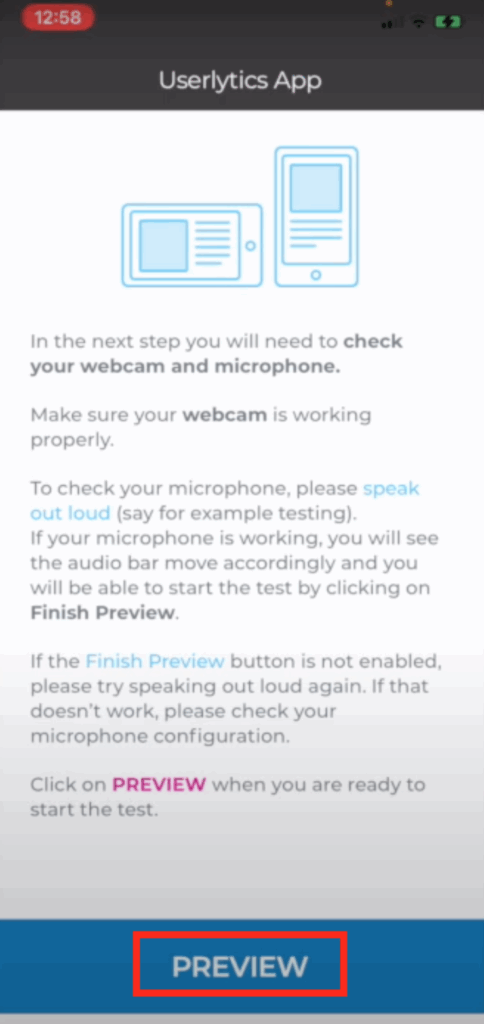
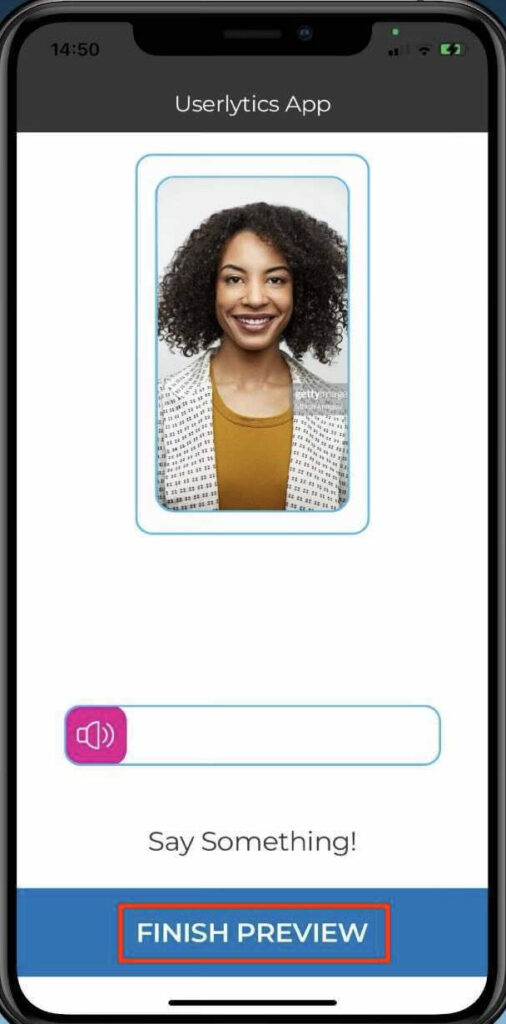
After clicking on the “Preview” button, the application will go through a series of system checks to ensure your screen recording, audio and video recording functions are working properly. After these are completed, you may click on the button that says “Finish Preview.”
3. Start Test
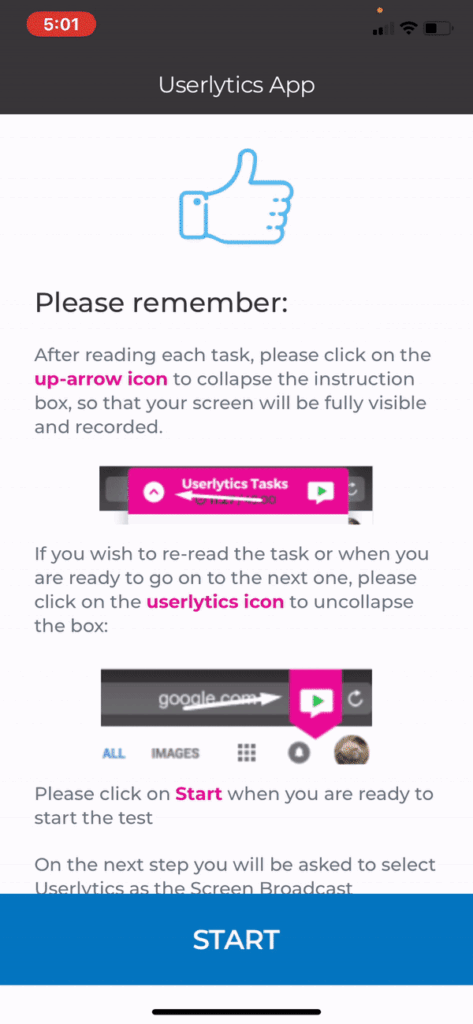
After completing the test preview, a new screen will appear detailing some instructions for what you can expect during the test. After reading through the instructions, click on the button that says “Start.”
4. Allow Screen Recording and/or Audio
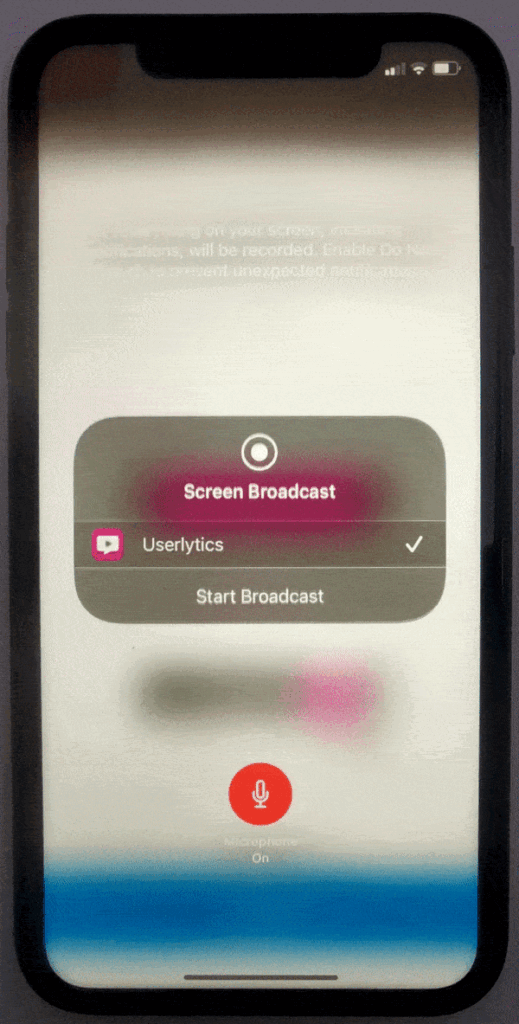
After clicking on the “Start” button, you will have to enable screen recording on your phone, as well as audio recording if the specific test you are taking requires you to speak aloud. A pop-up will appear that says “Screen Broadcast.” If the test you are taking requires you to speak aloud, make sure the microphone icon appears in red with the words “Microphone On” beneath it. Click on the button that says “Start Broadcast” to continue. Once the Screen Broadcast begins, you can click anywhere outside of the pop-up to close it.
After you have begun the Screen Broadcast, be sure not to click on the red icon at the top left-hand corner of your screen at any point throughout the duration of the test. Doing so will prematurely end the screen recording, and render your test results invalid.
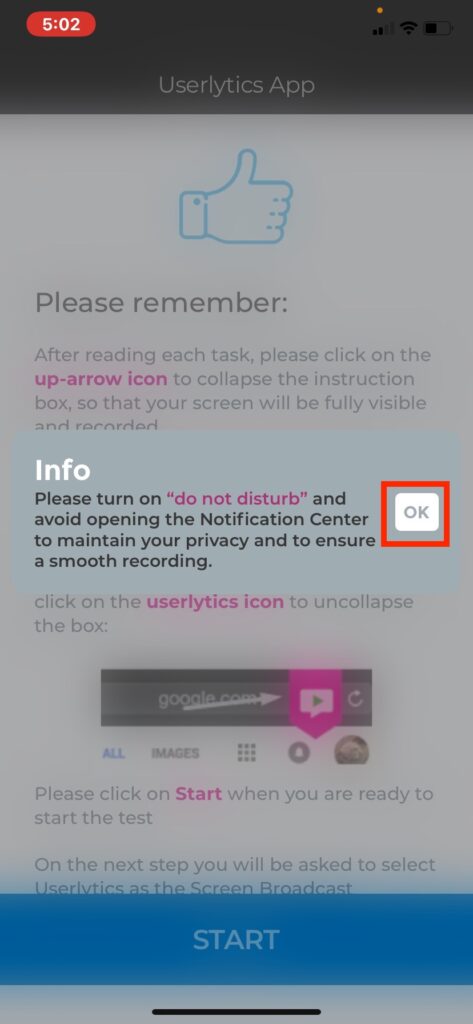
5. Put Phone on “Do Not Disturb” Mode
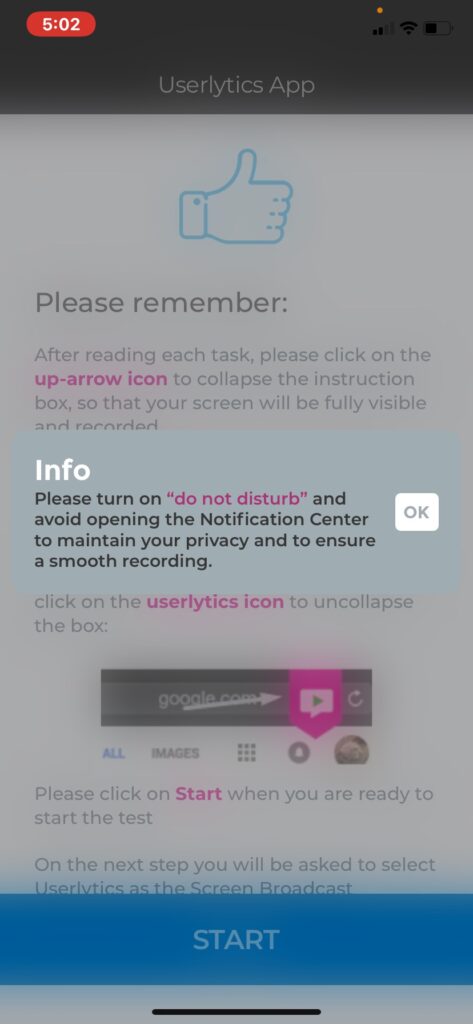
After the Screen Broadcast has begun, a warning will appear reminding you to set your phone to “Do Not Disturb” before continuing with the test.
To set your phone to “Do Not Disturb,” first open up your iPhone’s control panel by swiping down from the top of your screen. By default, “Do Not Disturb” should be set to off, as indicated by the gray moon icon and the text that reads “Do Not Disturb: Off” at the top of your control panel screen. To turn on “Do Not Disturb,” simply tap the moon icon on your control panel so that it appears white. The text at the top of your control panel should now read “Do Not Disturb: On.” Once you have turned on the “Do Not Disturb” setting, simply swipe up to close the control panel and return to the test.
Userlytics requires you to set your phone to “Do Not Disturb” during usability tests because exiting the test screen at any point may cause your test to end prematurely, thus rendering your test results invalid. The “Do Not Disturb” function ensures that an unexpected phone call or text will not disrupt your test. Once your phone is set to “Do Not Disturb.” select the button that says “OK.” If the test does not automatically begin at this point, select the “Start” button at the bottom of the screen.
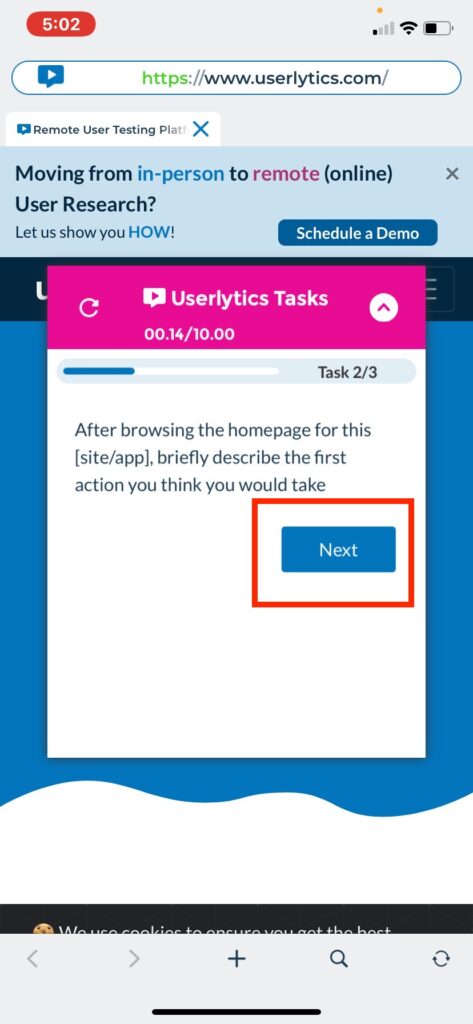
6. Begin Tasks
After clicking the “Start” button, your first test task will automatically populate. Be sure to read the instructions thoroughly, and speak out loud if the task asks you to do so. Click the button that says “Next” when you are ready to move on to the next task. Happy testing!.