


Inviting Userlytics testers to Testflight is easy. All you have to do is use a public link. Here are the steps to follow:
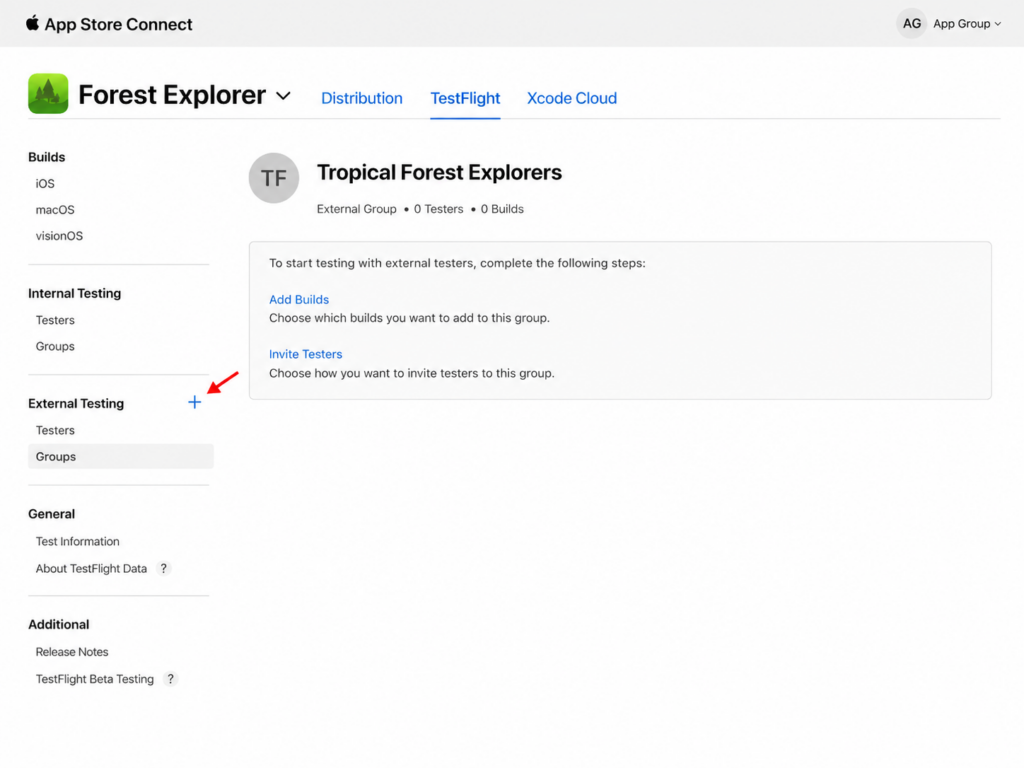
1. Go to App Store Connect, go to Apps, and select the app you want to test. Then, open the TestFlight tab and click the + button next to External Testing to create a new external testing group.
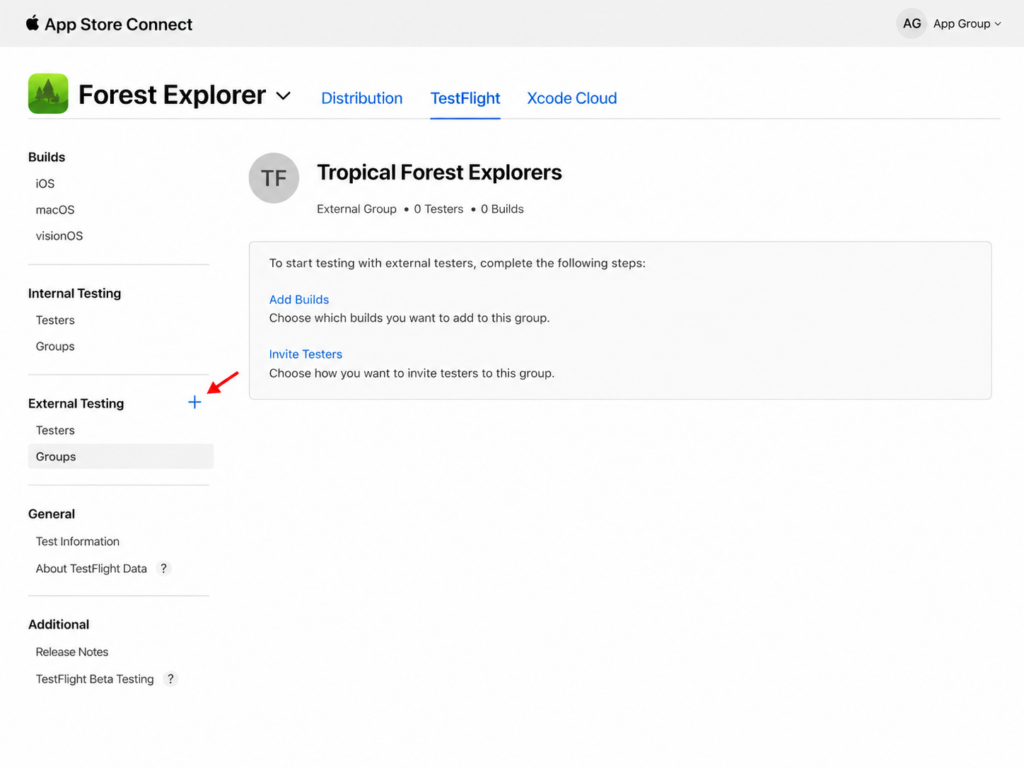
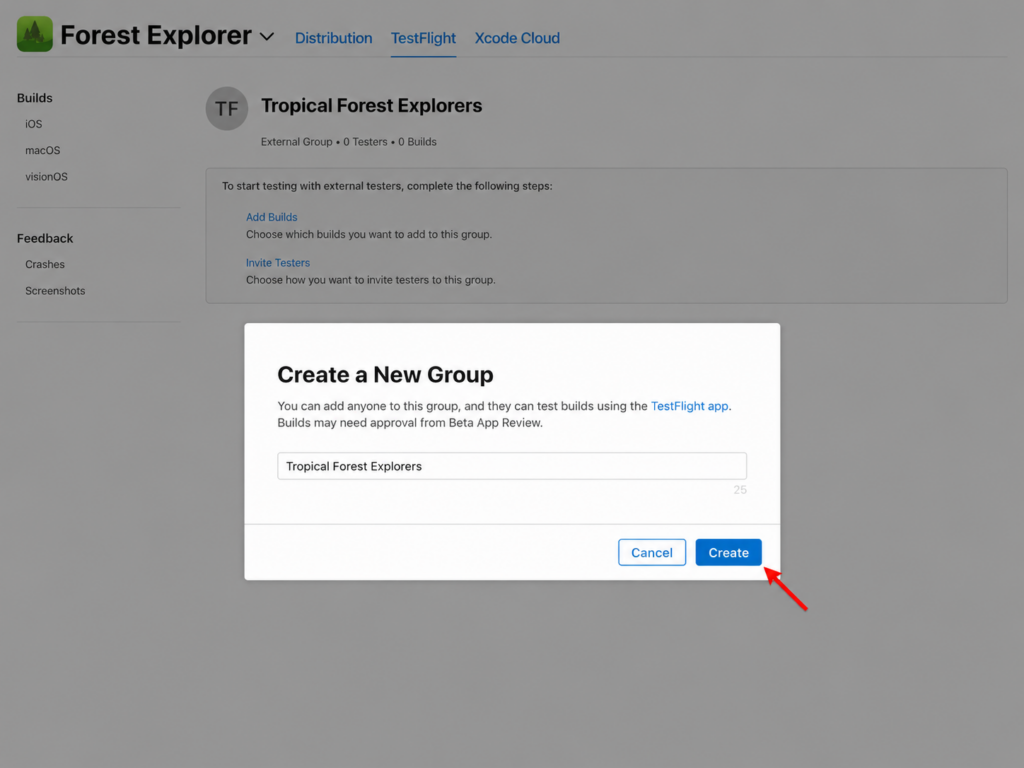
2. Enter a name for your external testing group, such as Tropical Forest Explorers, and click Create.
3. Once the group has been created, open it and click Add Builds to choose the build you want your Userlytics participants to test.
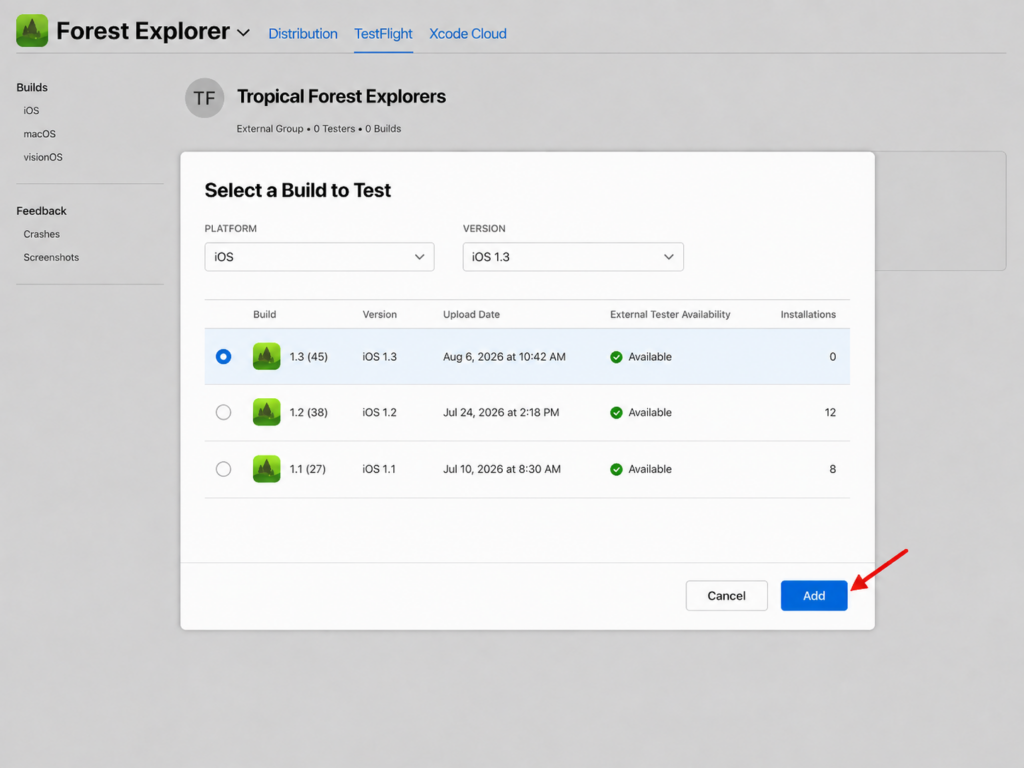
4. Select the appropriate platform and version, choose the build you want to use, and click Add. You may then be asked to provide What to Test information and, depending on the build status, submit it for review or start testing.
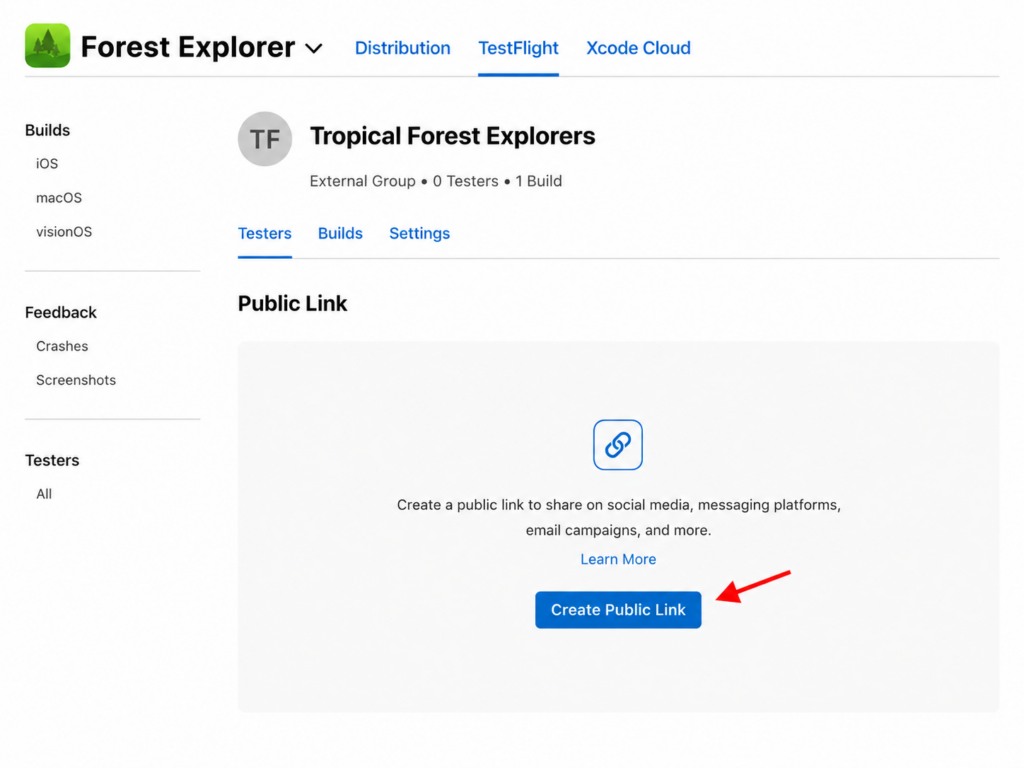
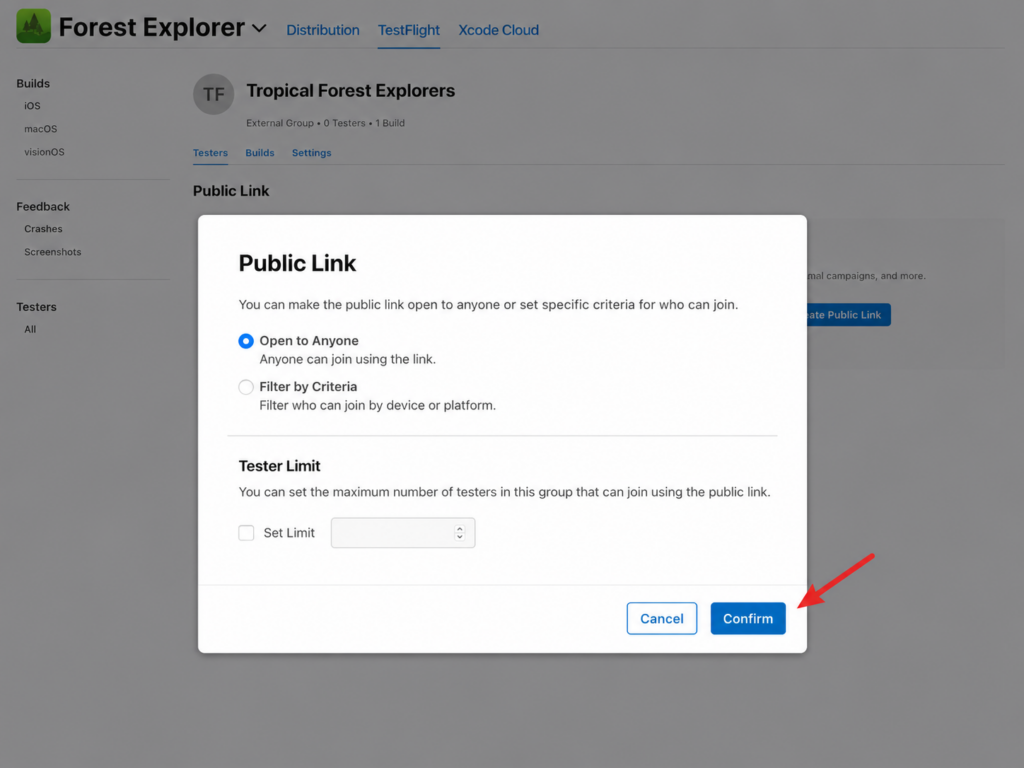
5. After the build has been added to the group and is available for testing, go to the Testers tab and click Create Public Link.
6. Choose Open to Anyone if you want anyone with the link to be able to join the test, or select Filter by Criteria if you want to restrict participants based on device or platform requirements. You can also optionally set a Tester Limit. Once everything is configured, click Confirm, then copy the generated TestFlight link and share it with your Userlytics participants.
7. Add Your TestFlight Link to Your Userlytics Study
Once you have created and copied your public TestFlight link from App Store Connect, you can add it to your Userlytics study.
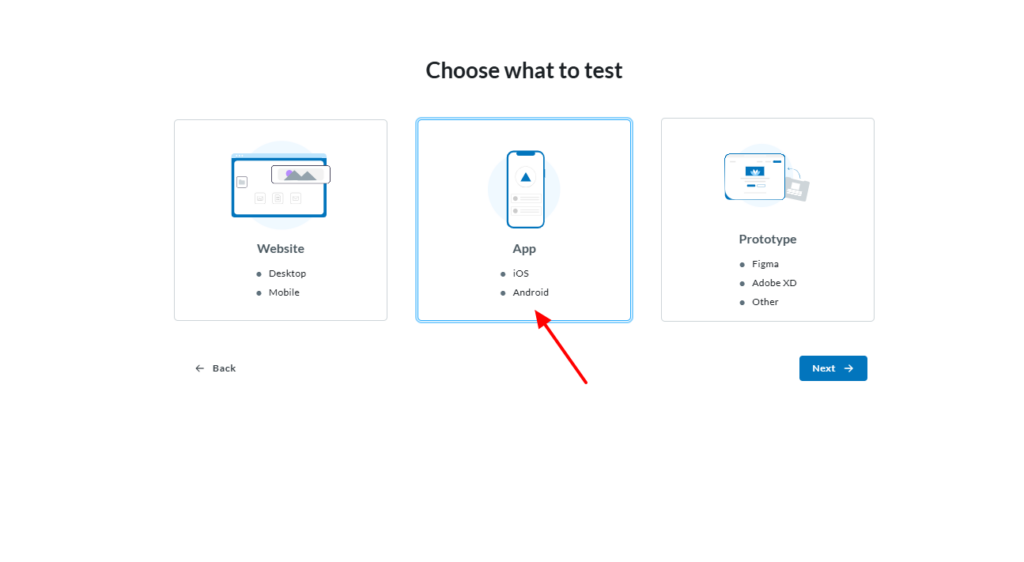
When creating your study, you will first be asked to Choose what to test. Select App, then click Next to continue.
In the Study Details section, scroll down to the app settings. Under App OS, select iOS, then select Unreleased under Status.
Userlytics now uses the broader Unreleased option for apps that are not yet publicly available, including apps being distributed through TestFlight.
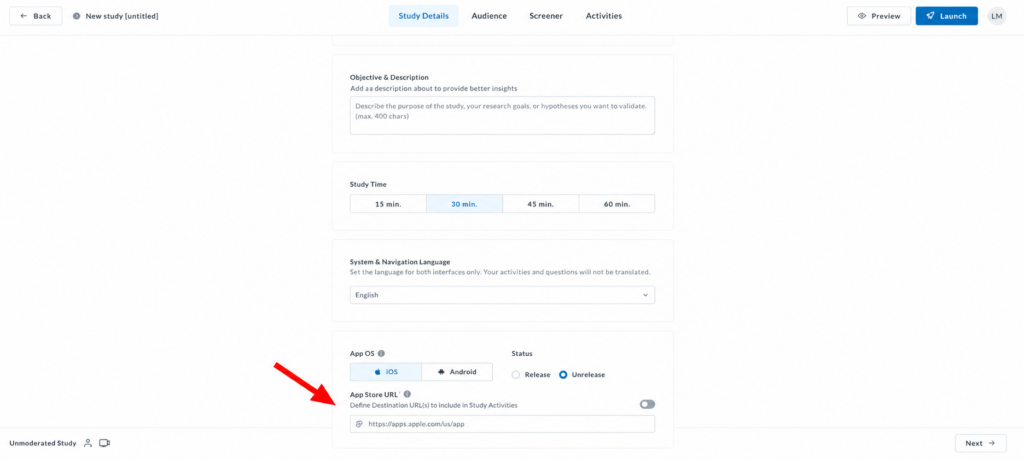
Paste the public TestFlight link you created in App Store Connect into the App Store URL field.
If you want to use different destination URLs for individual study activities, enable Define Destination URL(s) inside the Study Activities. Otherwise, leave this option disabled and use the TestFlight link entered here as the main app URL for the study.
Add a Screener Question to Ensure Testers Have TestFlight Installed
To make sure participants are ready to test your unreleased iOS app, you can add a screener question before they begin the study.
In the Screener section of the Study Builder, add a question such as:
Have you installed the TestFlight app and accessed the provided link?
Yes
No — Please install TestFlight and access the app before continuing.
This helps ensure that participants have TestFlight installed and are able to access the unreleased app before beginning the main study activities.
Final Review and Launch
Before launching your study, confirm that your TestFlight build is approved and available for testing, your public TestFlight link is active, and the correct link has been added to your Userlytics study.
You should also review your study instructions, activities, screener questions, audience settings, and any other study configuration before selecting Launch.
Note: Participants must have the TestFlight app installed on their iOS device to open the public TestFlight link and install your unreleased app.