How to Launch a Moderated Study
Userlytics offers moderated testing, which lets you run remote user experience studies with the help of a trained facilitator or moderator. These studies have advanced features like picture-in-picture, customizable task templates, Card Sorting, Tree Testing, and more.
Moderated testing can help you better understand your customer base’s thought process and use that knowledge to enhance your product design and overall customer experience.
What is a Moderated Study?
Moderated studies let you conduct real-time interviews and screen/webcam sharing with participants who match your target audience’s characteristics. You can select participants from our large global panel of over two million people, or you can use your own participants or those from a third-party recruitment panel.
The best part is that participants don’t need to download any software, application, or extension to join a moderated testing session, making it easy to onboard both B2C and B2B participants.
How Do I Create a Moderated Study?
- Go to the Userlytics Project and Account Management System (PAM).
- Click “Create Study” in the top right-hand corner.

- Then, you will be prompted to select the team and project to which your study belongs.

- Next, select “Moderated Testing” as the study type.

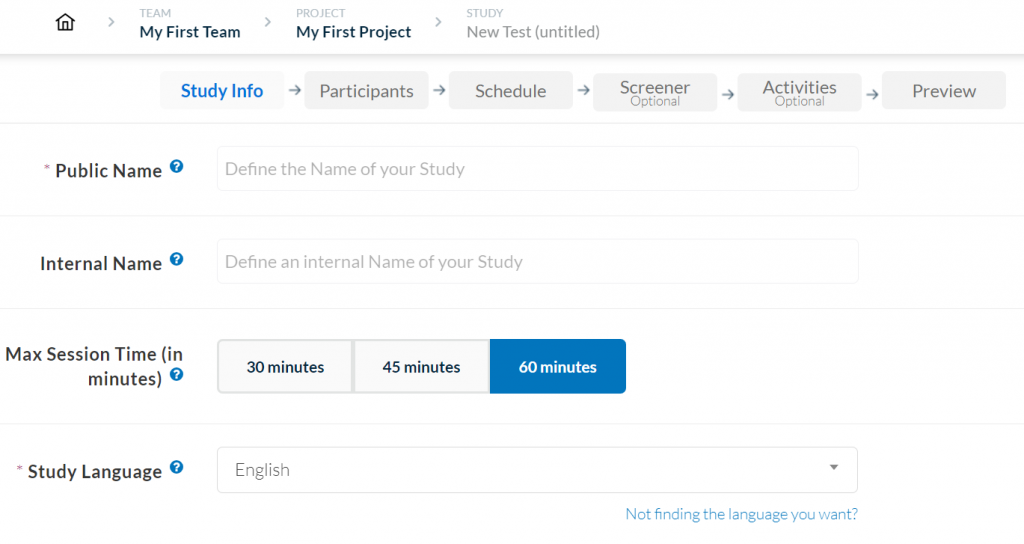
After clicking “Continue” you’ll land on the first page of the study builder. Here, you’ll find several sections to fill out to begin creating your UX study.
- First, pick a “Public Name” for your study. This is what your participants will see, so we recommend you to make it reflect the brand and asset you’re testing.
- Optionally, you can also set an “Internal Name” for your study. This name will only be visible to you and your colleagues.
- Next, choose the “Max Session Time” and the “Study Language.”
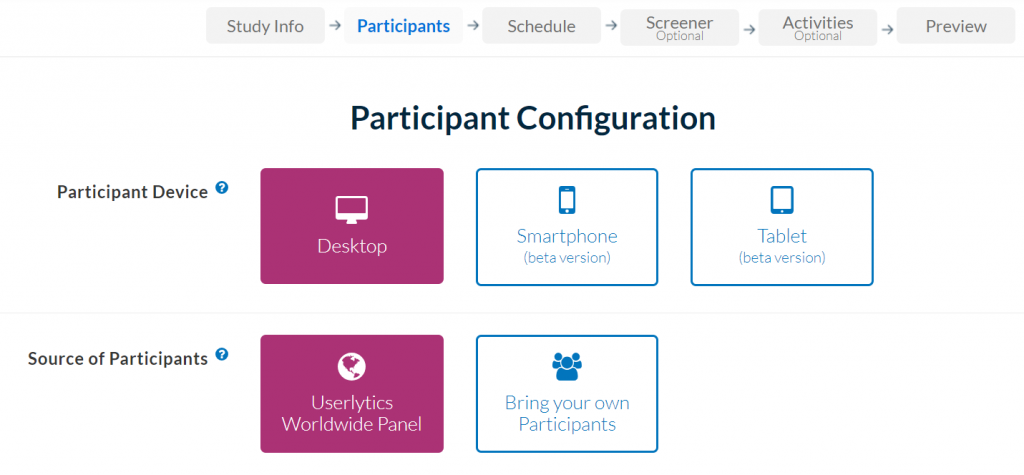
After clicking “Next”, you will be directed to the Participants section of the study builder. Select the participant device
- Select the source of participants. This is where you can specify if you’re bringing your own or not.
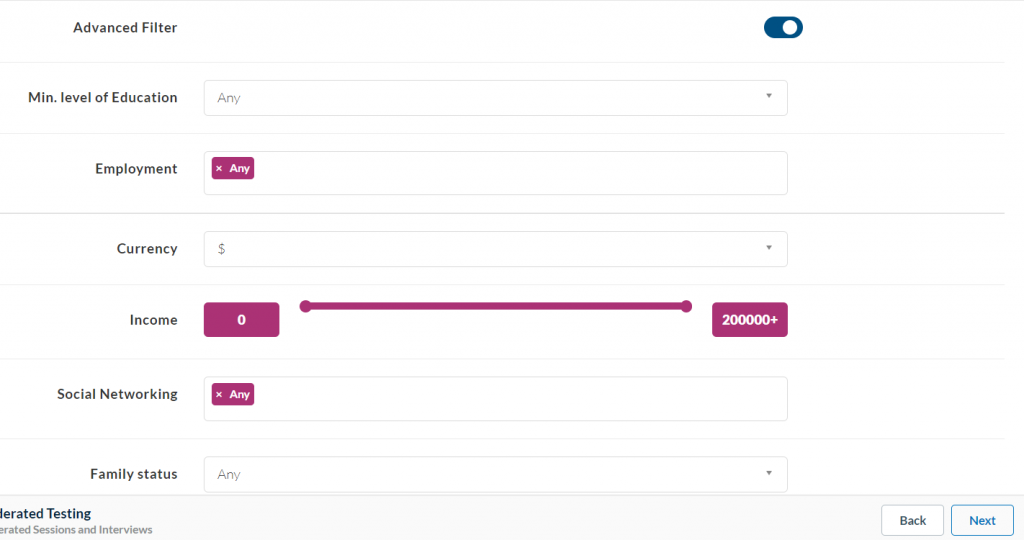
- Finally, if you want to select participants from Userlytics’ panel, you can define your desired demographic criteria, such as country, gender, and age range. Select the “Advanced Filter” option if you would like to filter further by education level, income, etc.

How Do I Schedule my Moderated Study?
To schedule your moderated sessions, click on the “Schedule” menu item at the top of the screen. Then, a window will appear where you will be prompted to select your time zone.

After selecting “Save Info,” a calendar will appear. Click on any available time slots within the calendar to schedule a moderated session during that time.

Once you select a time slot, a dialog box will appear with various session details. Choose the date and time of your session, and list any observers you would like to invite. Once you have finished entering the details for your moderated study, select the button that says “Create.”
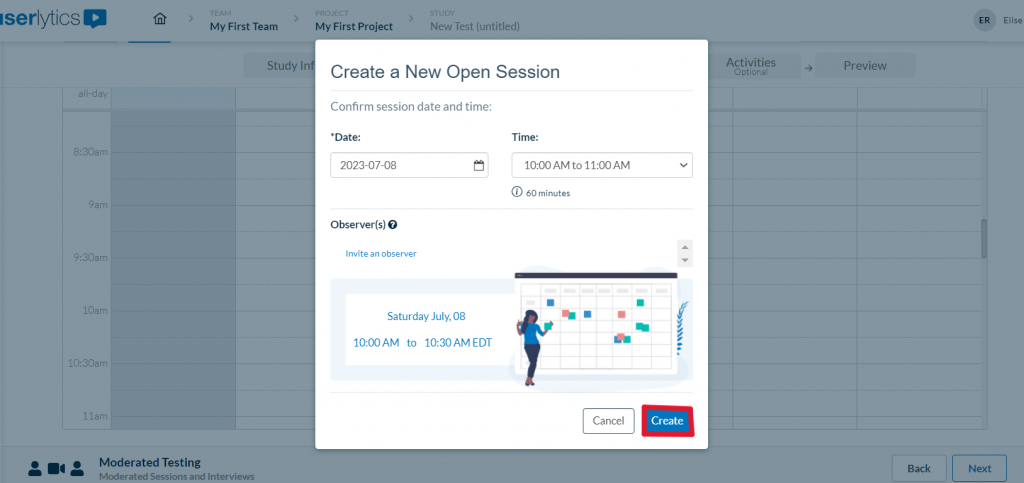
Once you click “Create,” a new block will show up on your calendar, showing that you’ve scheduled a moderated study.
When participants are invited to your usability study, they can pick from the open moderated sessions you’ve created based on when they’re available. It’s a good idea to create more slots than the number of participants you want to test with, so there’s more flexibility.
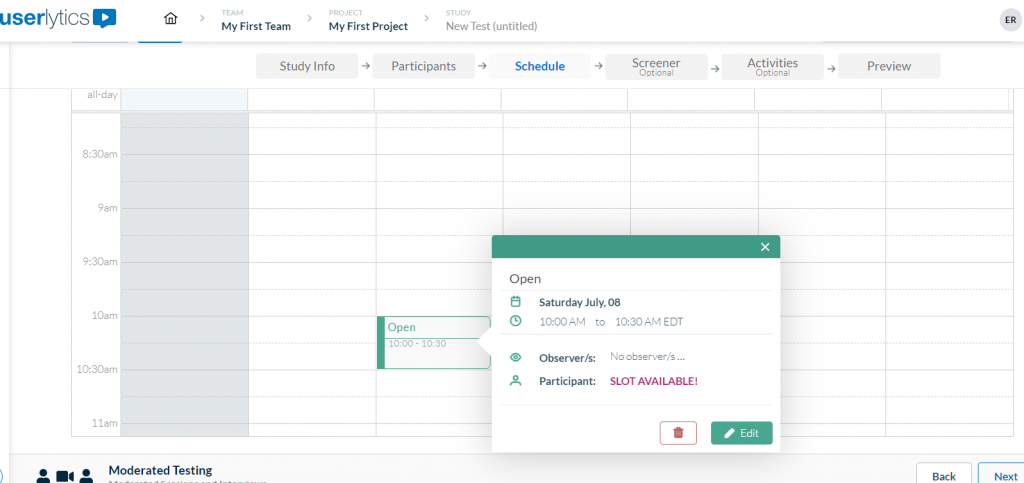
If you click on the block in the calendar, it will open a new window with details about that moderated study. This includes the date and time, any invited observers, and whether a participant has booked the session yet. You can click the “Edit” button to change session details or use the trash can icon to delete the session.
How Do I Invite Participants to my Moderated Study?
If you’re using our global participant panel, Userlytics will take care of inviting participants to your study. They can then pick from the time slots you’ve set up.
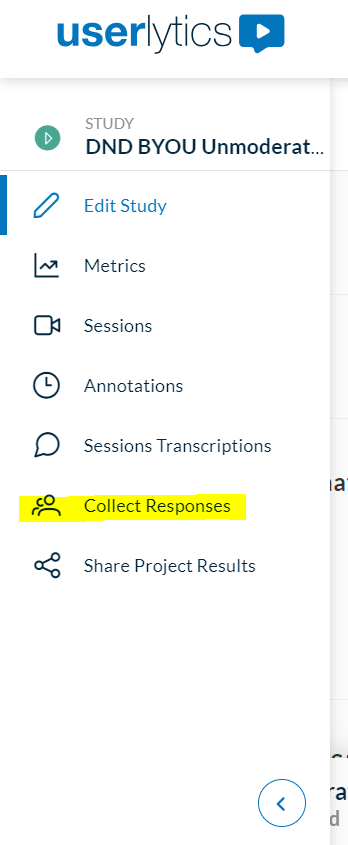
If you prefer to Bring Your Own Users (BYOU), it’s quick and easy. After you’ve created and launched your study, you can find an option called “Collect responses” on your Userlytics dashboard. Here, you can invite participants to your moderated study using different methods.
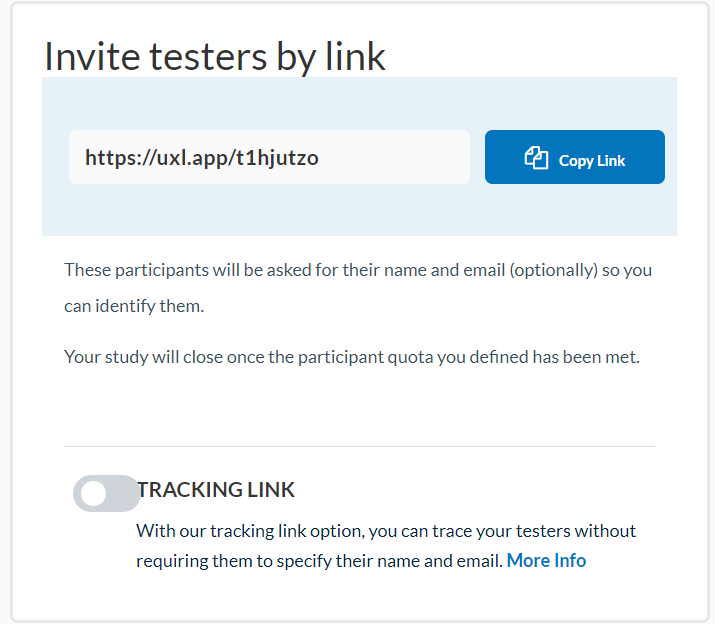
Invite your participants via URL
The first way to invite participants to your moderated study is to send them a recruitment link. Copy it and share it through the platform of your choice.
You can also use our “Tracking Link” feature, which is an advanced redirect and unique identifier (UID) system. This feature is handy when you’re working with participants from third-party panels. It helps ensure that each visitor is unique and that your study results are precise and dependable.
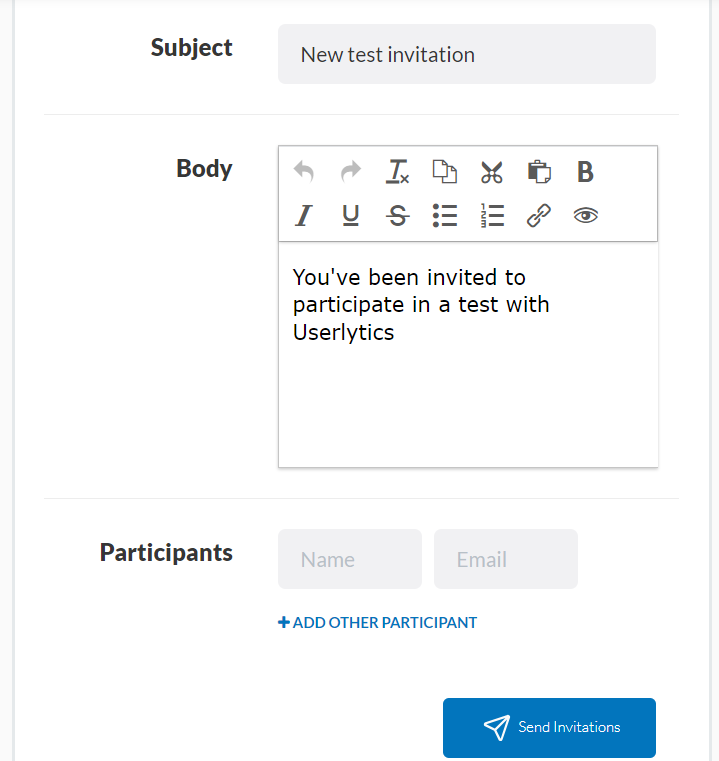
Invite your participants via email
You also have the option to invite participants to your moderated study through email. On that page, you’ll see a section labeled “Invite by email.” In this section, you can enter the email subject and content, select the participants, and then click the send button.
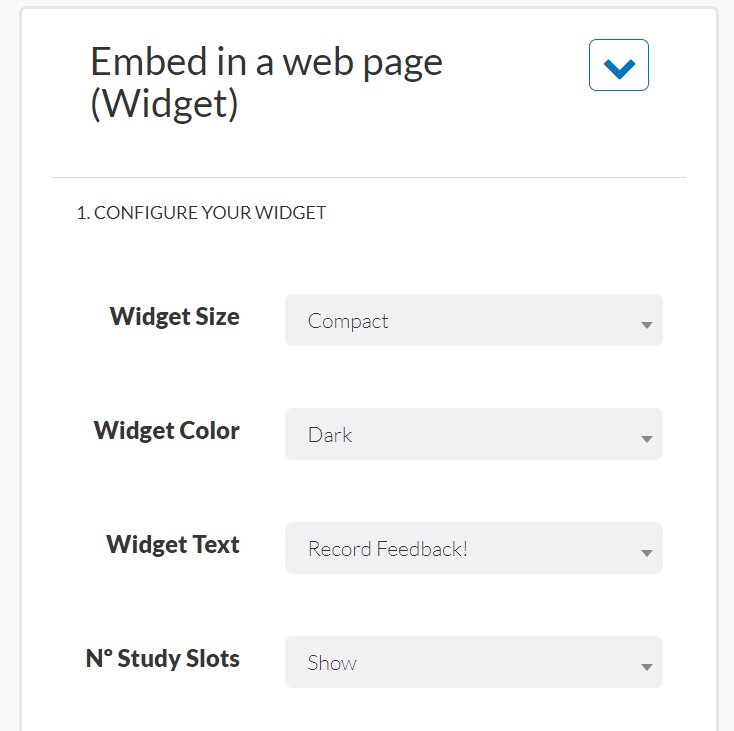
You can also invite your own participants to your moderated study using a widget on your website. You can find this option titled “Embed in a web page (Widget)” on the same page. Here, you’ll be able to copy a piece of code (HTML & JS) and add it to your website. You can even customize the widget’s appearance to match your website’s style.
How Do I Add Observers to my Moderated Study?
To include observers in a moderated session, follow these steps:
- Visit the “Schedule” section in the study builder.
- Click on the open session you want to add observers to on the calendar.
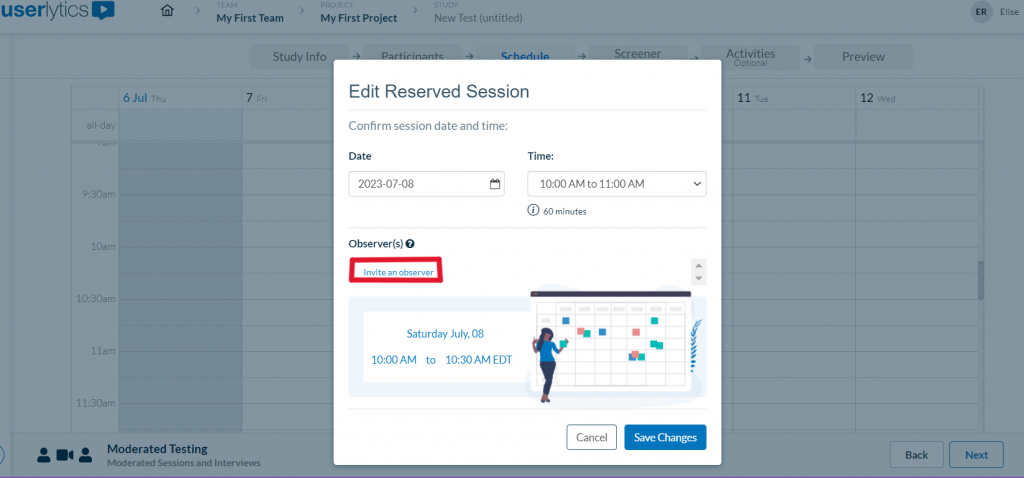
- In the dialog box displaying your session details, click the “Edit” button.
- A new dialog box will pop up, enabling you to edit your session details. In this box, select the “Invite an observer” button.
The default settings limit to a maximum of five observers during your study, however, this can be easily increased to 25 by getting in touch with our operations team at operations@userlytics.com.
You can assign observers to specific sessions here, and they’ll get an email notification once a participant books the session.

How Can I Cancel a Moderated Study?
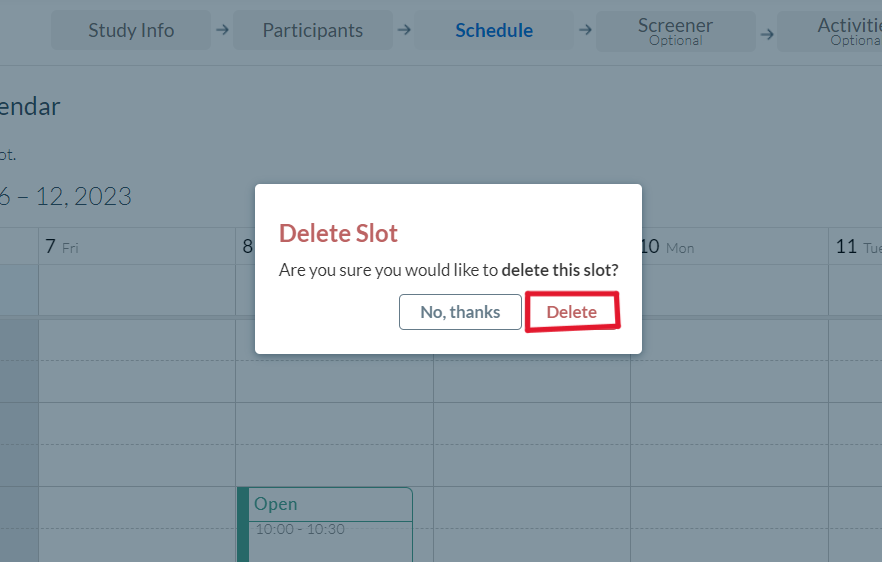
To cancel a moderated session, select the open session on your Userlytics calendar that you wish to cancel. Then, select the trash can icon.

After selecting the trash can icon, a new dialog box will appear asking you to confirm your selection. Select “Delete” to cancel your moderated session. The participant and the moderator will be notified of the cancellation via email.
Please note that you will still be charged for the moderated session unless you cancel it at least 4 hours in advance.
How to Launch a Moderated Study, How to Launch a Moderated Study, How to Launch a Moderated Study, How to Launch a Moderated Study