
Live Conversations
What is a Moderated Session?
Our moderated sessions allow you to conduct a one-on-one live interview session with a participant, with your colleagues as hidden observers interacting with the moderator as needed. This allows you to receive real-time feedback and do a deep dive into motivations and reasons behind participant actions and commentary.
What should I know before launching a Userlytics moderated session?
- This feature works best with the latest versions of Google Chrome and Microsoft Edge.
- Each participant and observer should have their unique link to join the session; multiple users should not use the same link.
- For optimal experience, wear headphones, and try to avoid using multiple monitors.
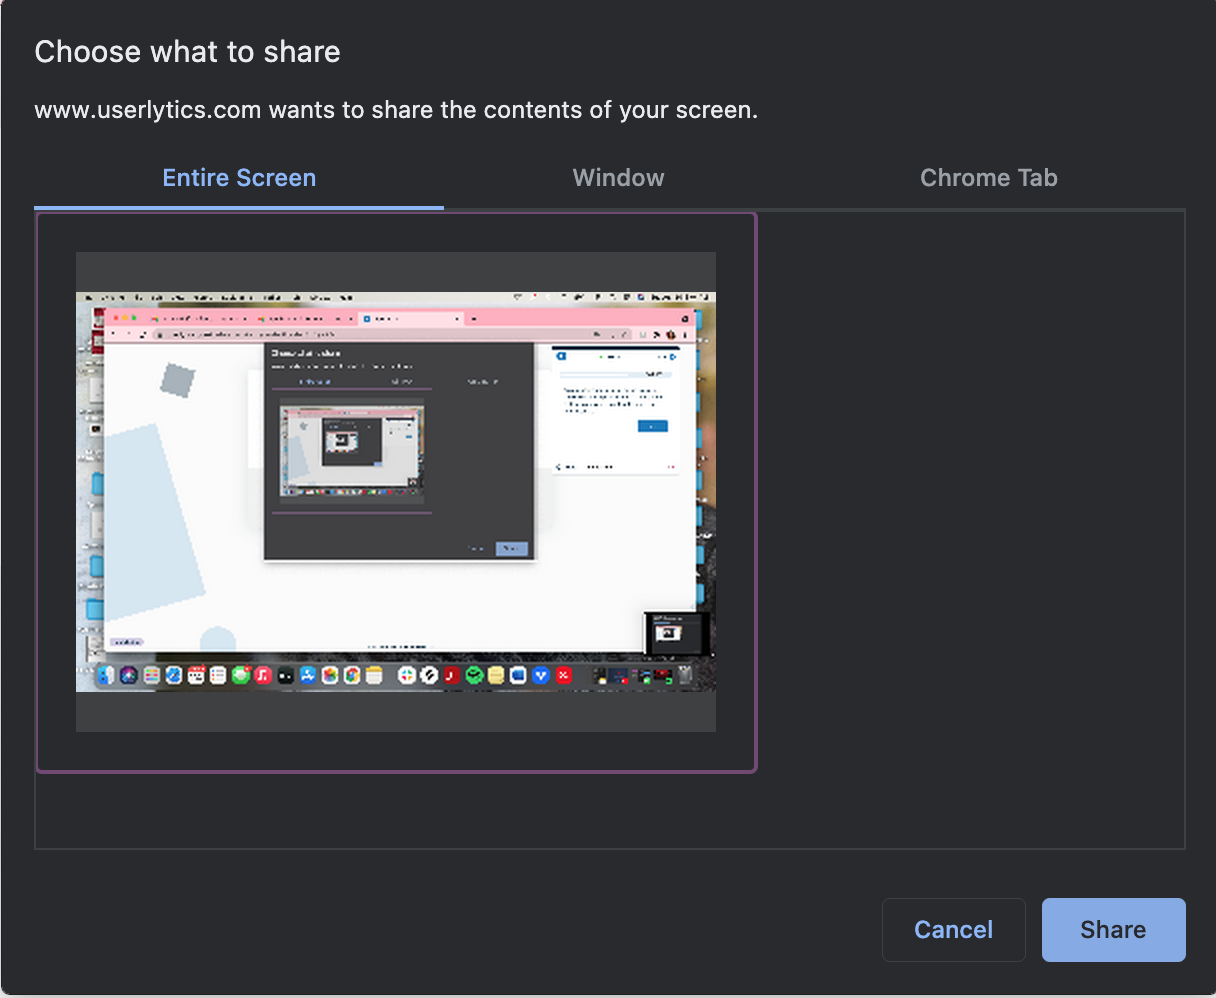
- Make sure the participant’s screen is shared. The participant will receive a prompt to share their screen at the beginning of the moderated session, and this action triggers the automatic recording.
- Moderated sessions can last up to 60 minutes.
How do I launch a moderated session?
Very easily! Follow the steps below:
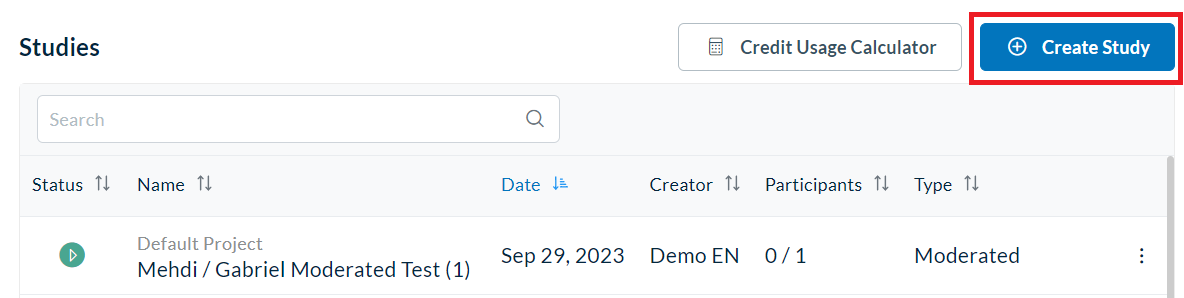
1 – Create a new study
First, click “Create Study” on your Userlytics dashboard.
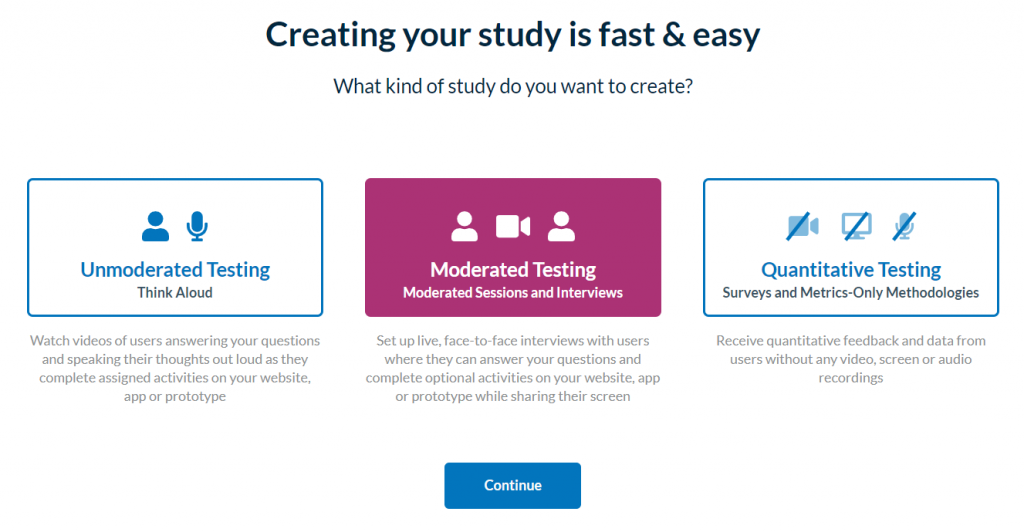
2 – Select “Moderated Testing” as your study type
3 – Schedule moderated sessions
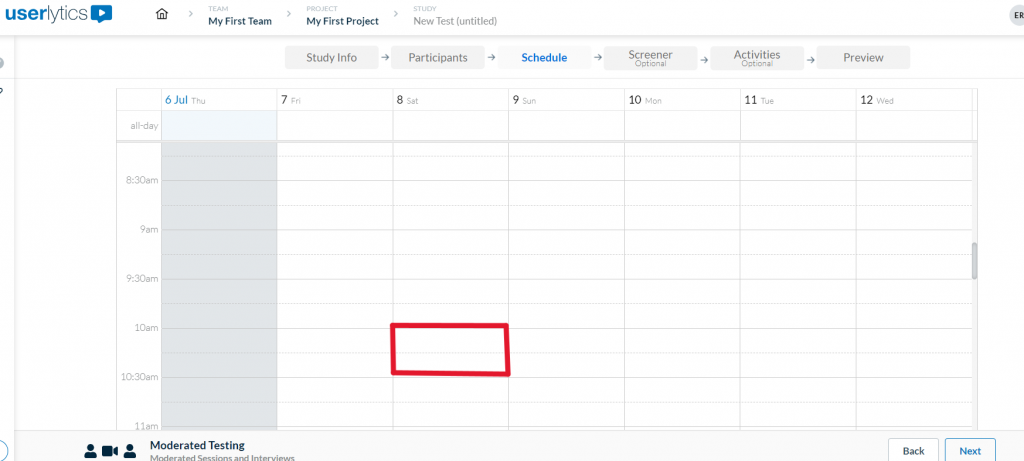
Continue through the study creation process until you reach the “Schedule” step.

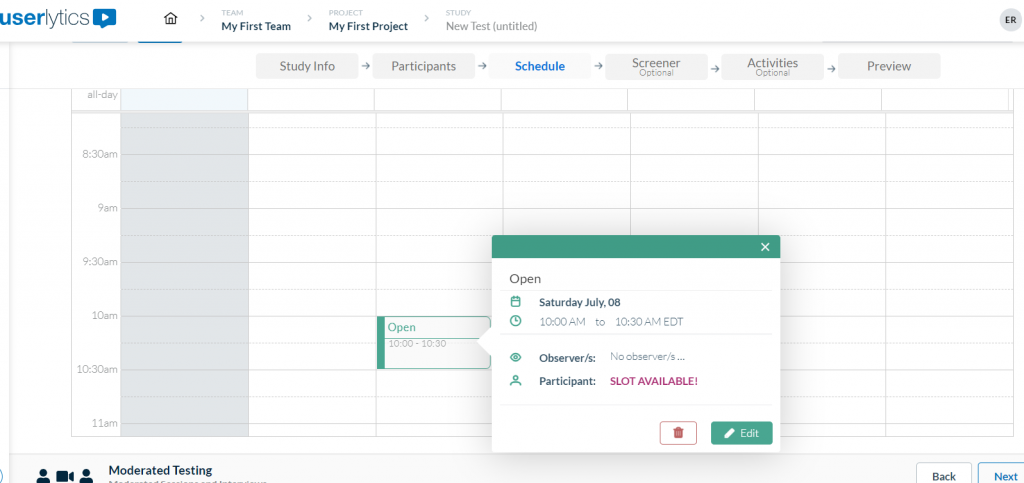
To schedule the date and time for your moderated session, click on “Schedule” in the menu at the top of the screen. A calendar will appear. Select any available time slots on the calendar to schedule your moderated session for that time.
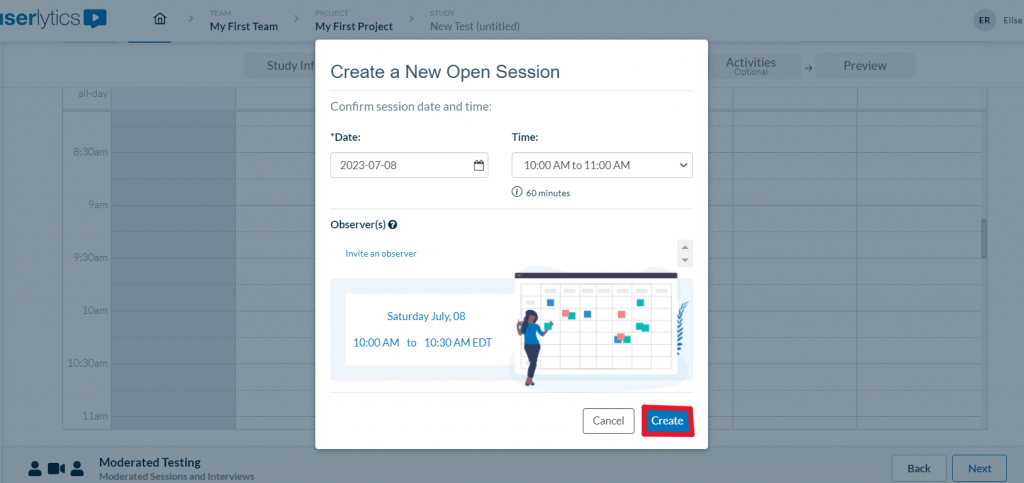
Once you select a time slot, a dialog box will appear with various session details. Choose the date and time of your session, and list any observers you would like to invite. The default limit of observers is 5, but you can reach out to operations@userlytics.com if you’d like to increase to up to 25.
Once you have finished entering the details for your moderated test, select the button that says “Create.”
After clicking “Create,” a new block will appear on your calendar indicating the open moderated sessions you have scheduled. When participants are invited to your usability study, they will be able to choose from all the open sessions you have created based on their availability.
We highly recommend adding more slots than the number of participants you’re looking to test with, in order to provide more flexibility.

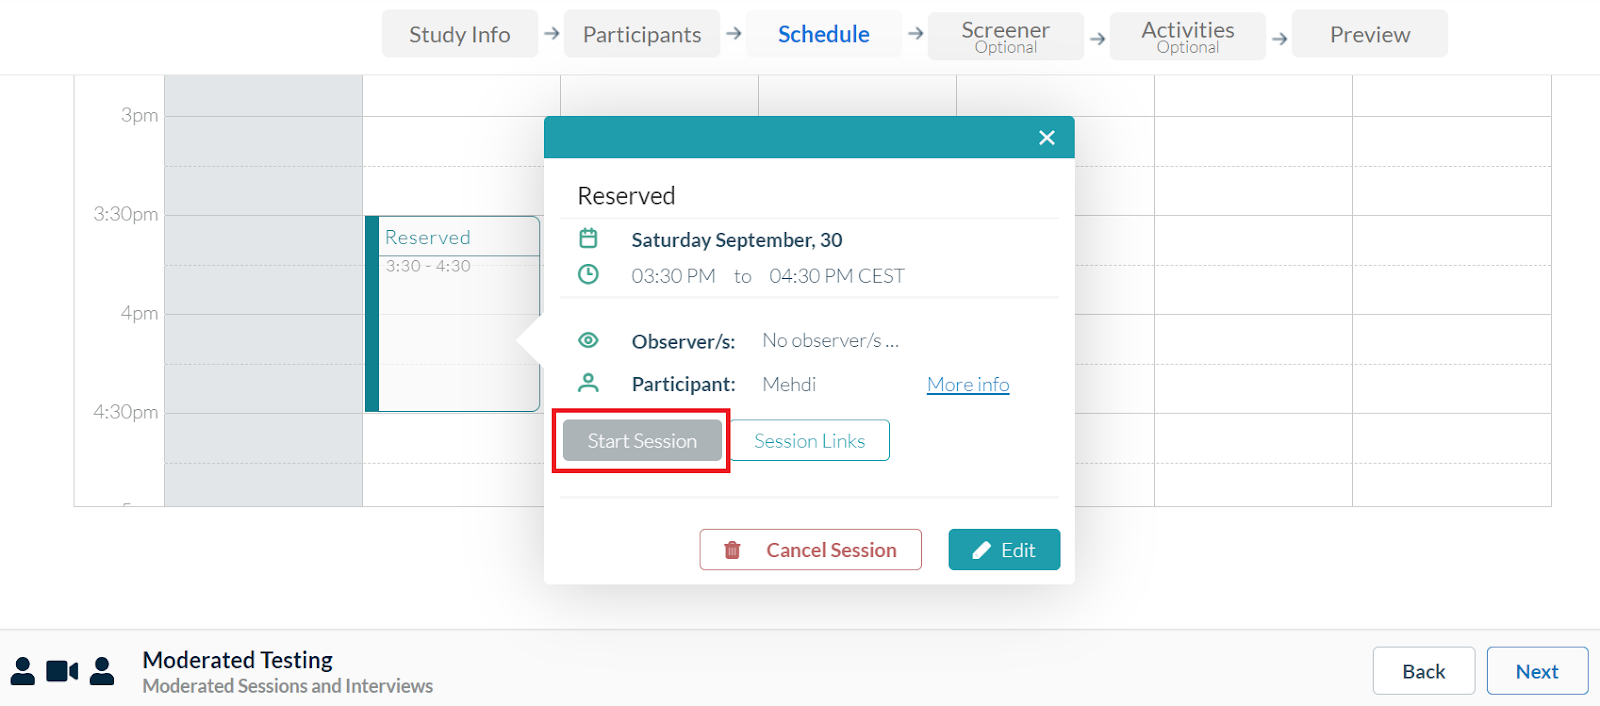
Selecting the block on the calendar will open up a new dialog box that shows information about that session, including the date and time, any invited observers, and whether or not a participant has booked your session yet. You can click the “Edit” button to change any session details, and click the trash can icon to delete the session.
There are a few things you should bear in mind when scheduling participants:
- Verify that the listed time zone for each study session matches your own time zone.
- Every session includes a 15-minute buffer at the end.
- When recruiting your own users, you can only open a slot for a session up to 20 minutes before it’s scheduled to begin. If you’re using participants from the Userlytics global panel, the minimum time is up to 3 hours before the session starts.
4 – Create a screener (optional)
As an added way to ensure your testers fit the exact profile of your target demographic, you may optionally add a screener to the beginning of your study by clicking on “Screener” from within the menu at the top of the screen.
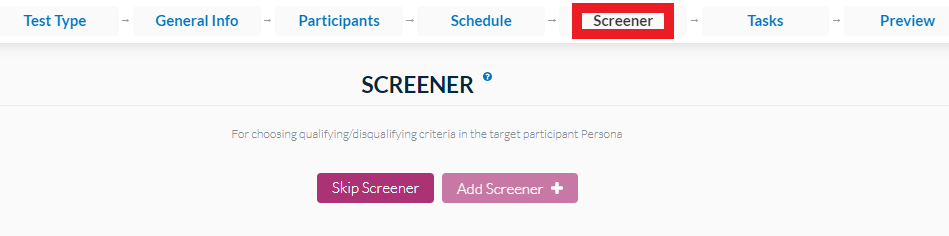
The screener is totally customizable, and allows you to ask participants a very specific question that will either include or exclude them from your test. Learn more about screeners here.
5 – Define study activities (optional)
Next, you can define your study activities and create a study script by clicking on “Activities” from within the menu at the top of the screen.
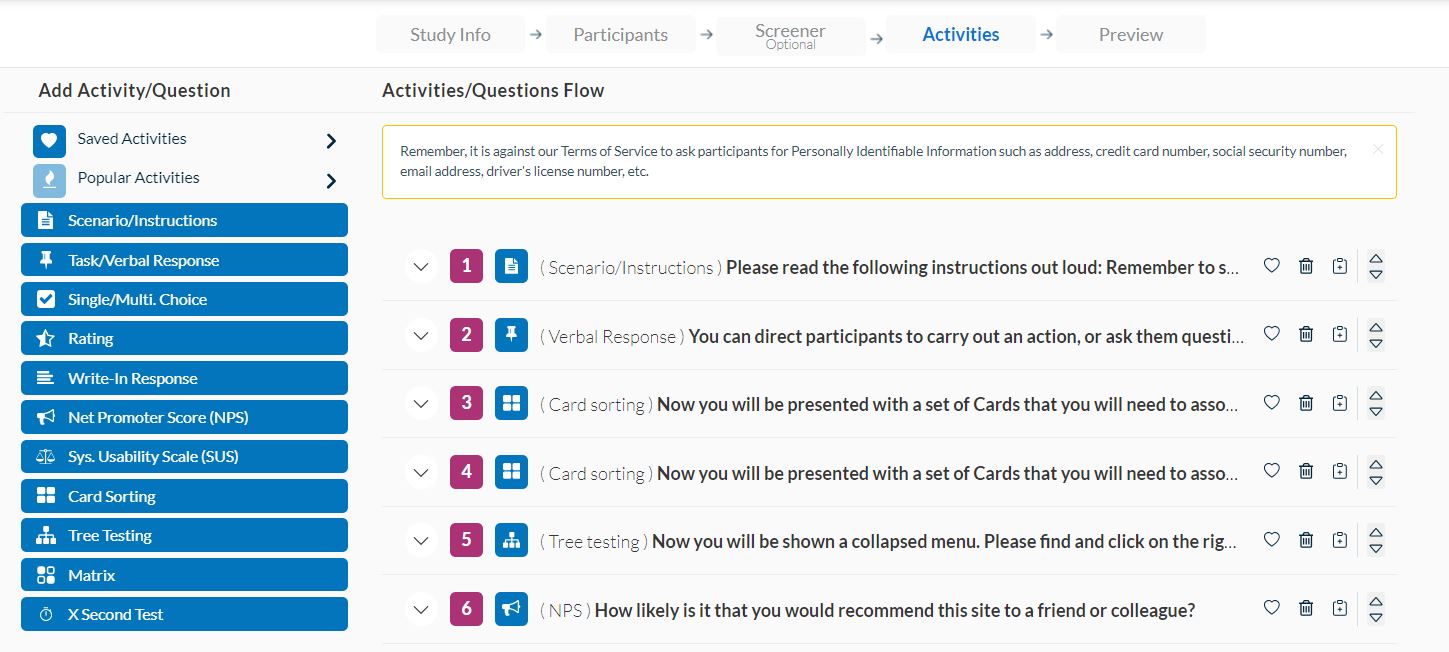
It is not necessary to create a script for moderated tests, although we do recommend it if you’re looking to add quantitative questions. Learn more about creating test activities here.
6 – Preview study
You may review your study using the Preview option if you wish. Click “Study Flow Preview” to ensure everything looks good.

7 – Launch study
Once everything is correctly set up, you may go ahead and launch your study by clicking the “Confirmation Step” button at the bottom right-hand corner of the “Preview” page.
You will then be directed to a summary page with details for your moderated study. Once everything looks good, click on the button on the bottom right-hand corner that says “Publish Study.”
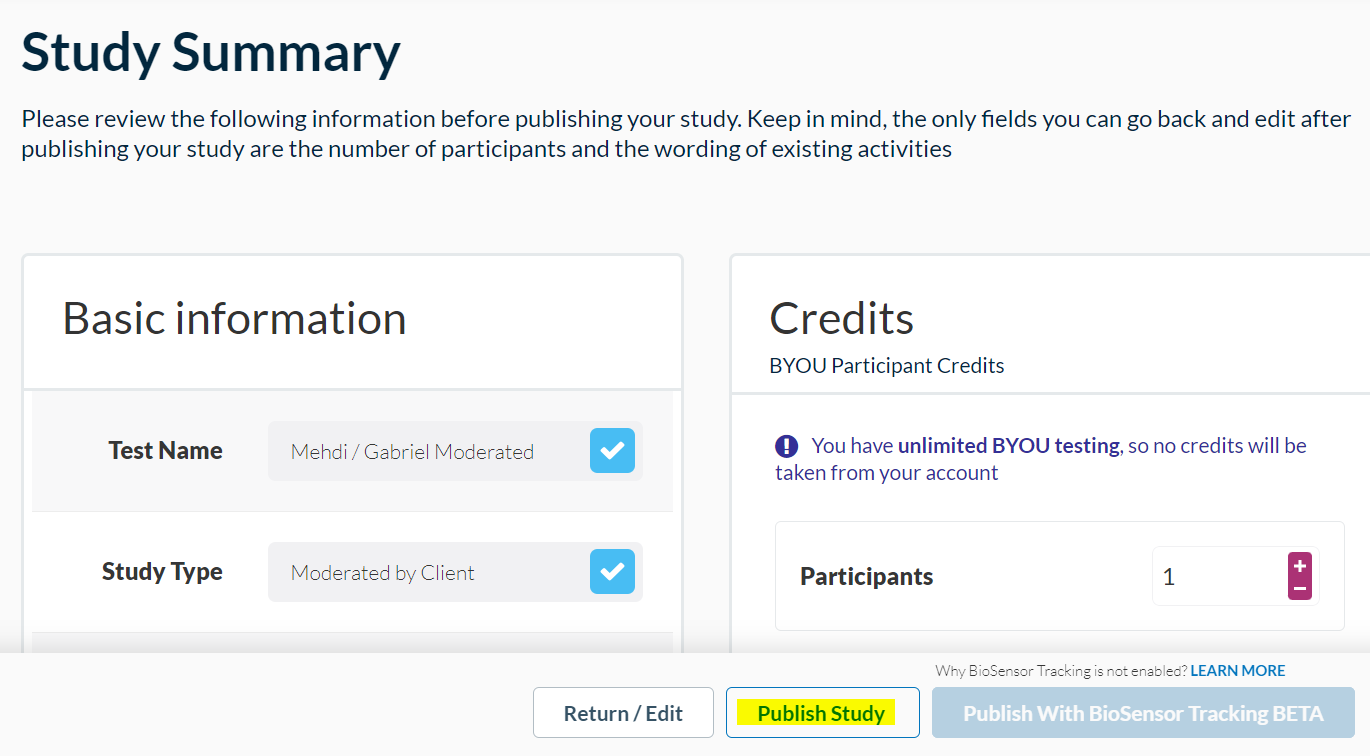
At this point, your moderated study will be live. You are now ready to onboard study participants and conduct your study sessions!
How Do I Invite Participants to my moderated test(s)?
If you’re using our global participant panel, Userlytics will take care of inviting participants to your study. They can choose from the time slots you’ve provided. However, if you’re bringing your own users (BYOU), inviting them to join your study is quick and immediate.
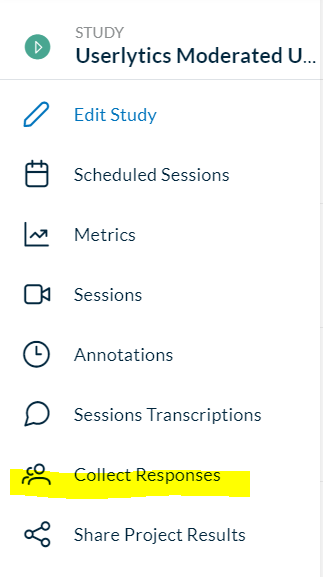
After you’ve created and launched your study, go to the “Running Studies” section of your Userlytics dashboard. You’ll find an option that says “Collect responses.” Here, you’ll have various ways to invite participants to your moderated study.
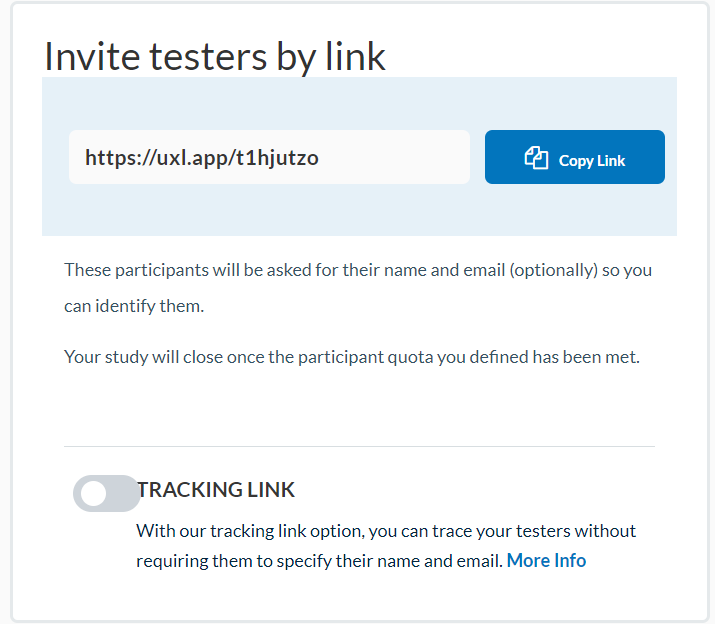
The first way to invite participants to your moderated test is to send them a recruitment link through the platform of your choice.
You can also use our “Tracking Link” feature, which is an advanced redirect and unique identifier (UID) system. This feature is handy when you’re working with participants from third-party panels. It helps ensure that each visitor is unique and that your study results are precise and dependable.
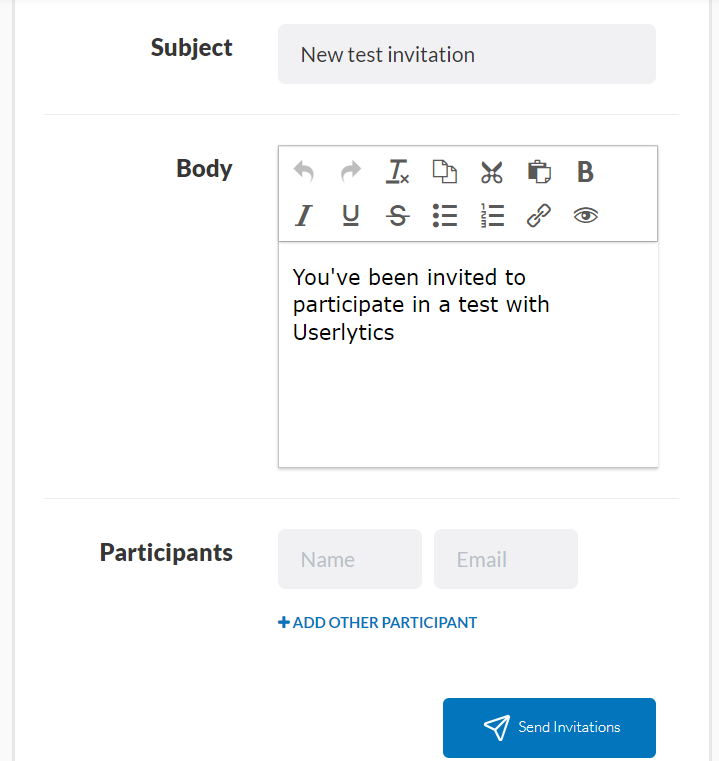
You also have the option to invite participants to your moderated study through email. On that same page, you’ll see a section labeled “Invite by email.” You can enter the email subject and content, select the participants, and then click the send button.
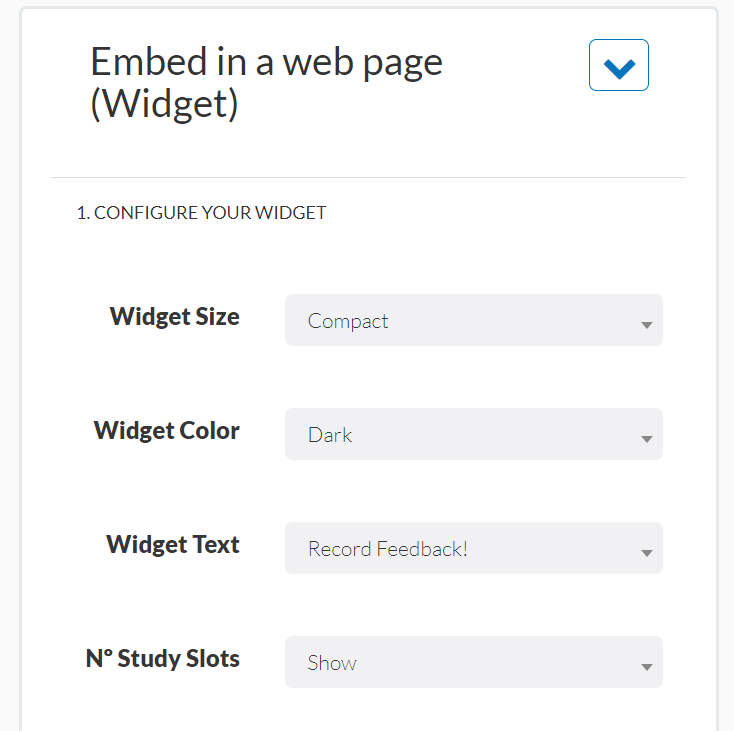
You can also invite your own participants to your moderated study using a widget on your website. You can find this option titled “Embed in a web page (Widget)” on the same page. Here, you’ll be able to copy a piece of code (HTML & JS) and add it to your website. You can even customize the widget’s appearance to match your website’s style.
We recommend that you tell participants to:
- Join 10 minutes prior to the scheduled time
- Use Google Chrome or Microsoft Edge as it works best with our system
- Double check their microphone and webcam
- Use headphones
How do I start a moderated session?
There are two ways to start the moderated sessions:
- Using the email confirmation and clicking on the link provided.
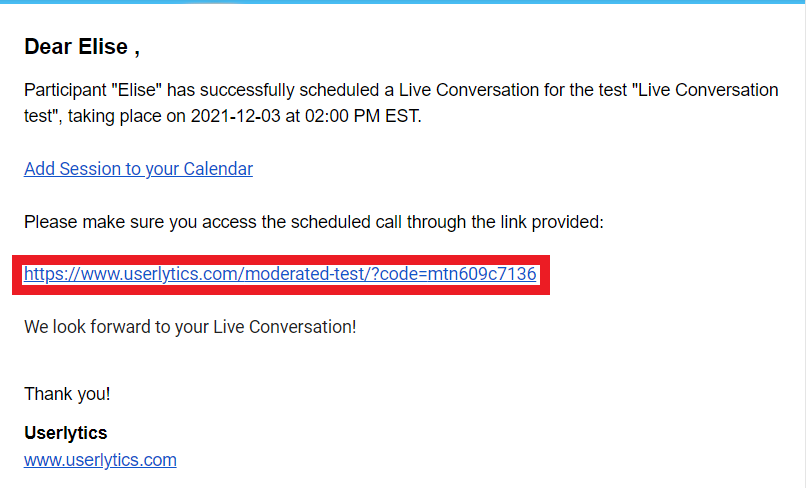
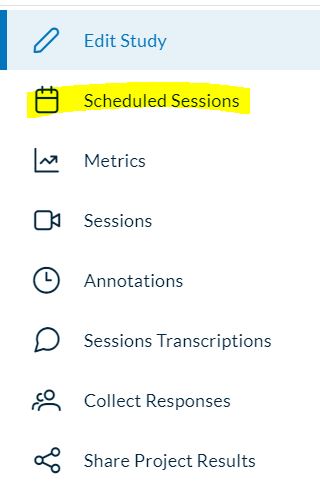
- Using the “Scheduled Sessions” page and clicking on the upcoming session
What do I do once I’ve joined the session?
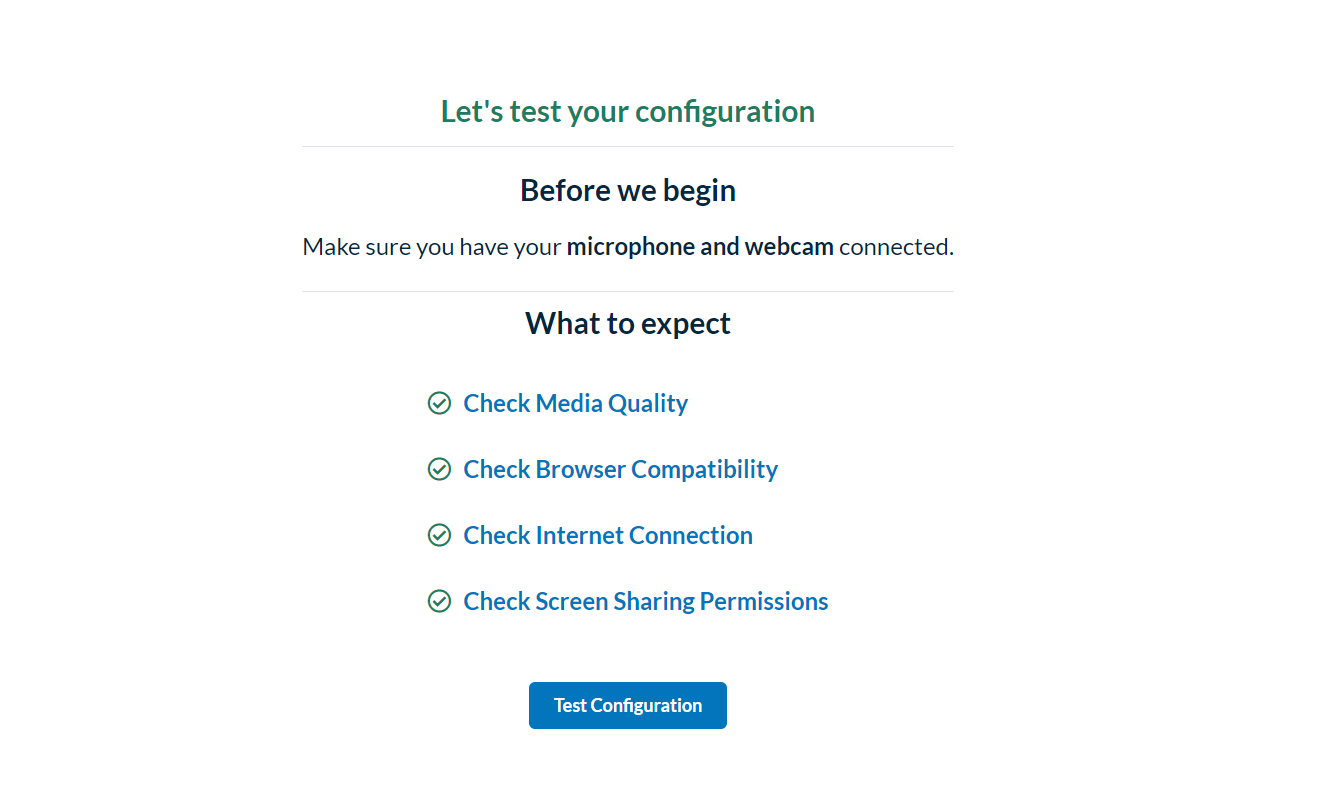
Once you’ve joined the moderated session, you will be prompted to complete a “Test Configuration” to make sure everything on your computer is working properly.
As the pre-test is running, a pop-up will appear asking you to share your screen in order for the session to run properly.
How do I navigate the web recorder?
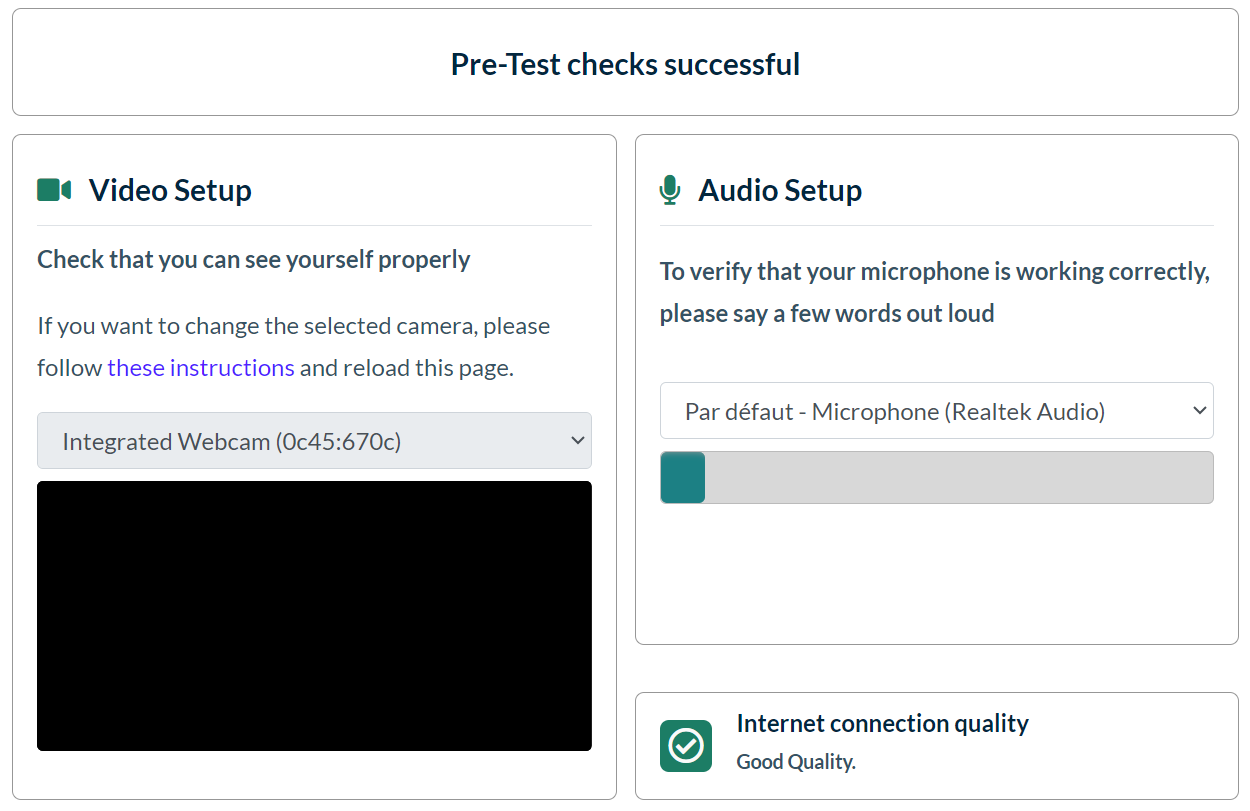
After the pre-test is complete, a new screen will appear going over the pre-test results. If there are any issues with your system, the pre-test will provide instructions on how to correct them. Once everything checks out, the top of the screen should read “Pre-test checks successful.” Then click the “Continue” button to begin the moderated testing session.
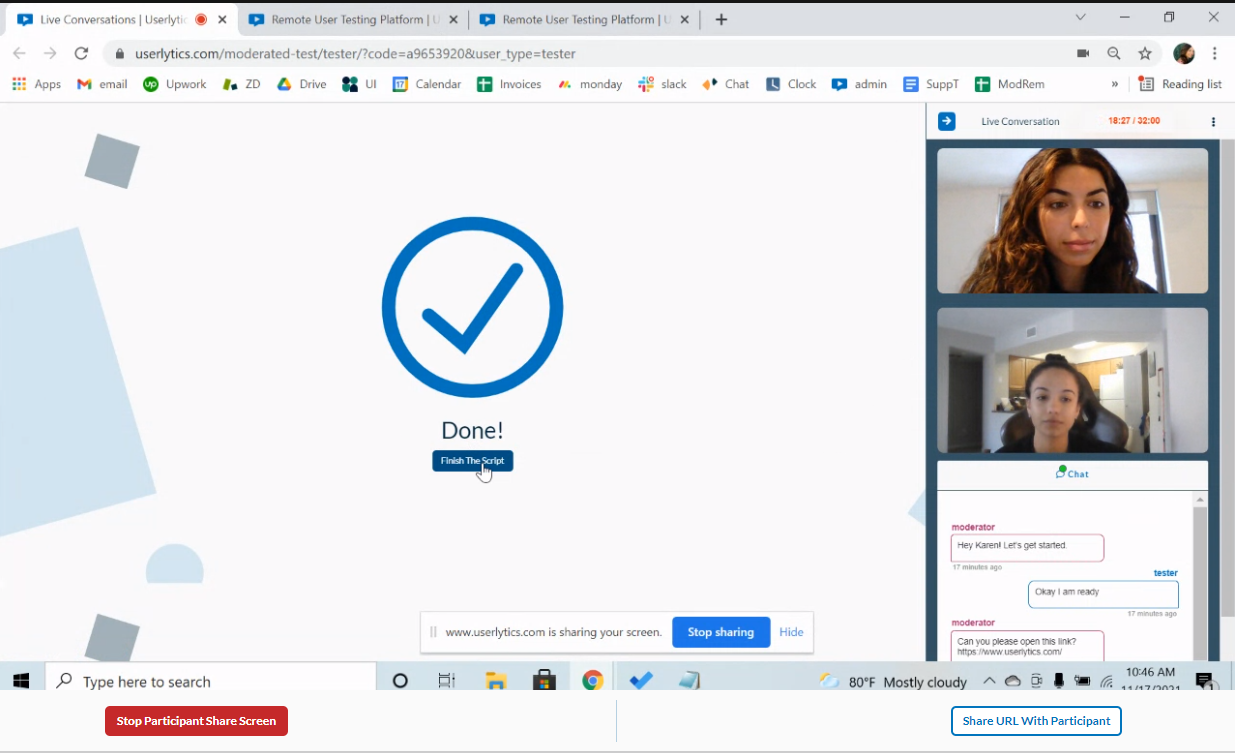
Once you’re in the session, you’ll notice your participant in the center of the screen, with your own face displayed in the top right-hand corner.
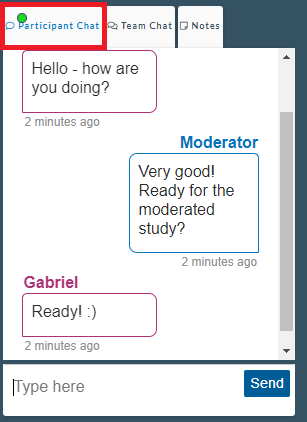
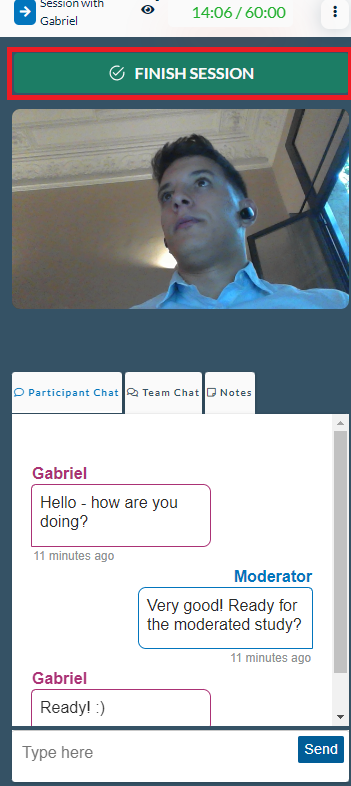
At the bottom right-hand corner, there’s a box that lets you chat with the participant, communicate with any invisible observers you’ve invited, and make time-stamped notes during the session. These notes can be later transformed into highlight reels. Importantly, your participant will only see the chat between you and them and won’t have access to your Team Chat or your Private Notes.
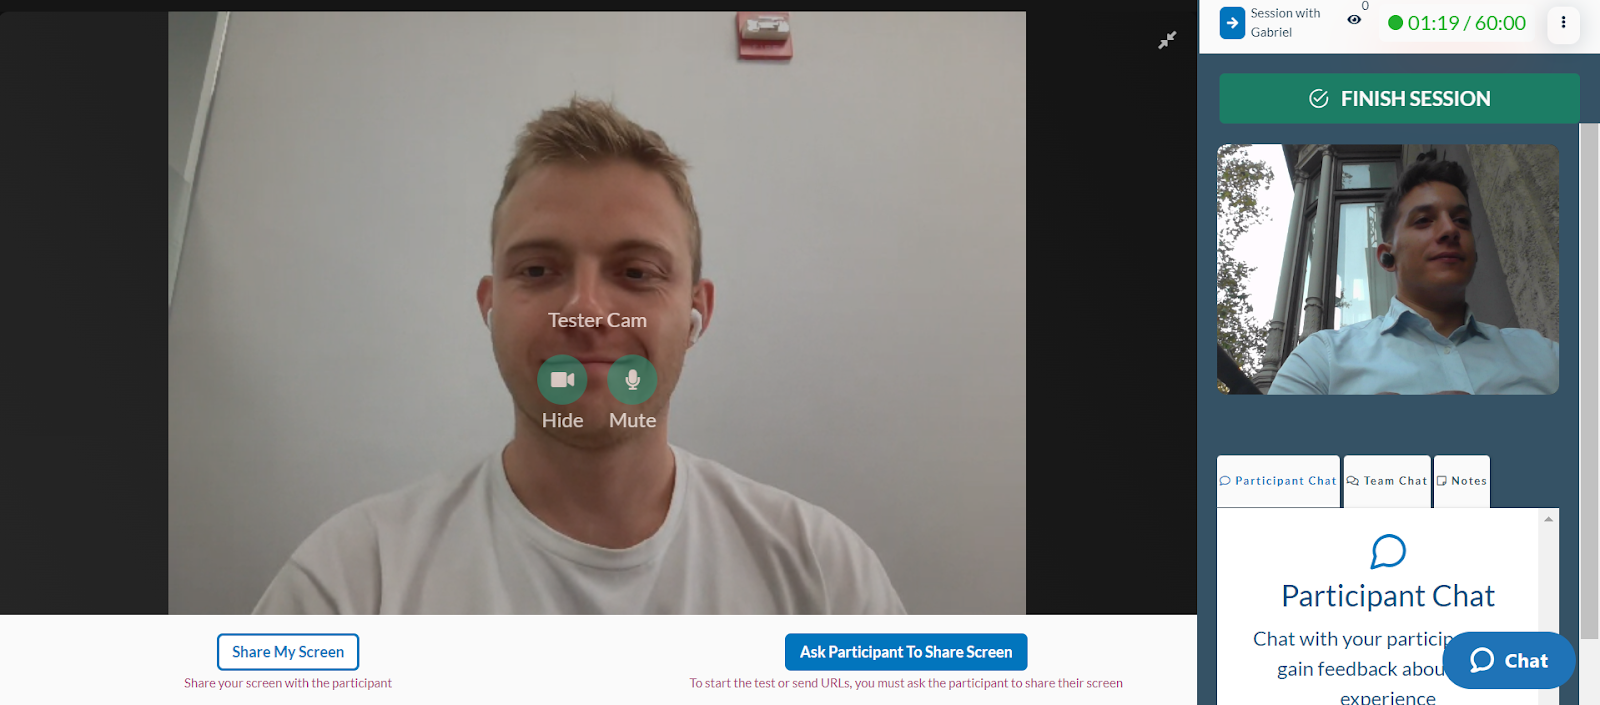

After you’ve greeted the participant and completed any introductions, click the button labeled “Ask participant to share screen.” This step is necessary to initiate the study script and provides you with a clearer understanding of how the participant is engaging with your digital asset.
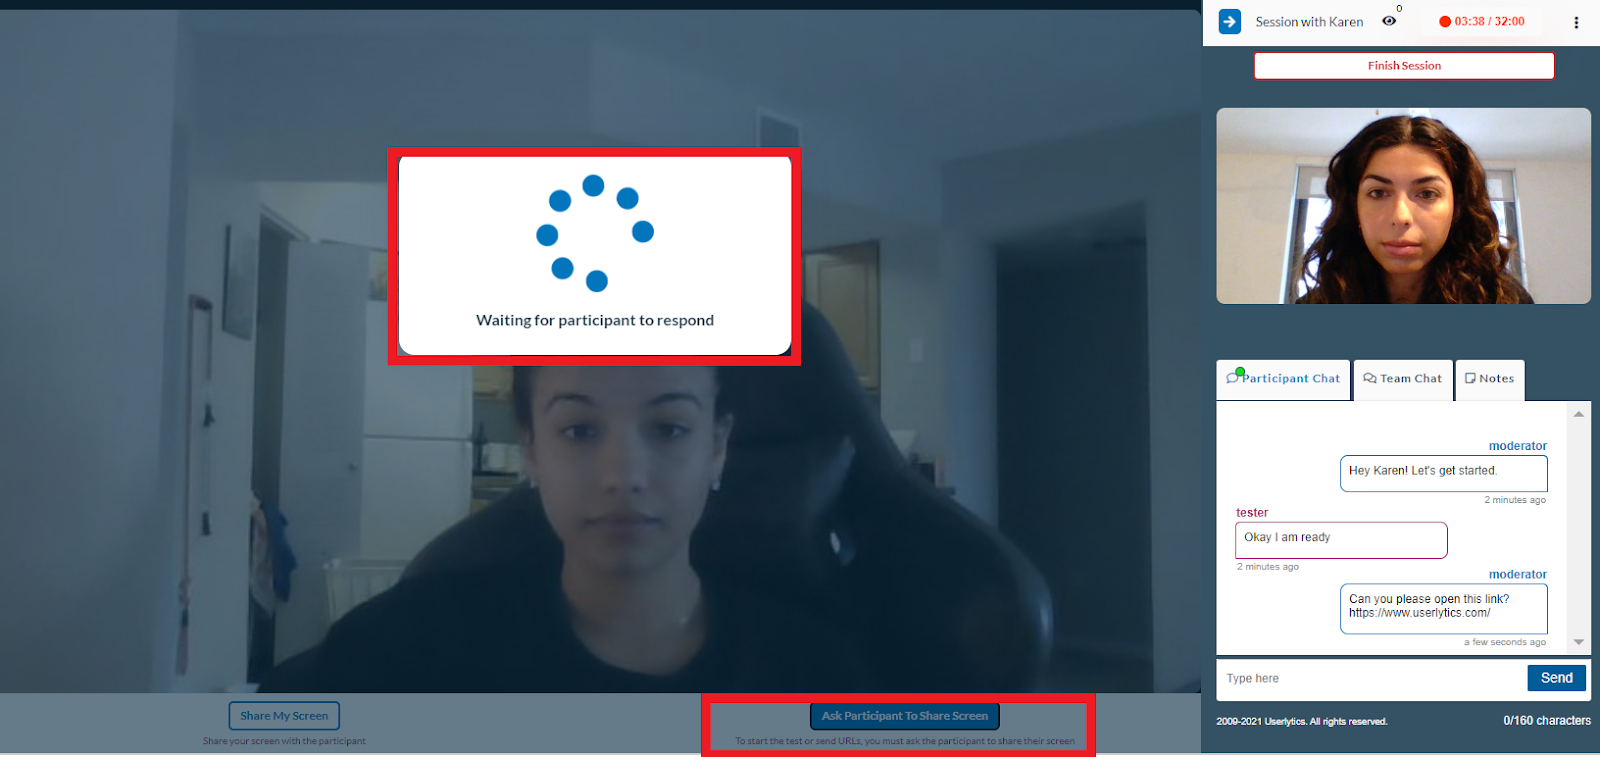
Once the participant has shared their screen with you, you can easily share the link to the digital asset you’ll be reviewing by clicking the “Share URL with Participant” button at any point during the session.

At any point during the study, you can launch the study script, allowing your participant to complete any of the activities you’ve assigned for them.
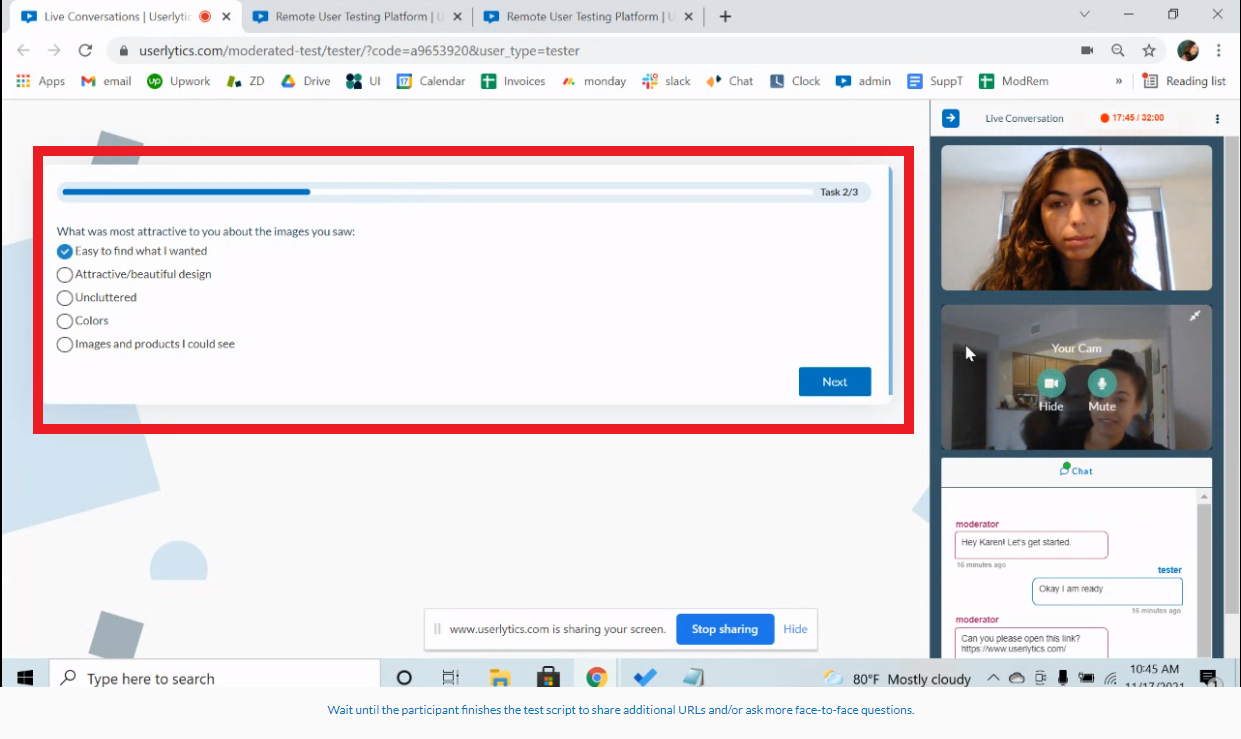
And as an added new feature, you now have the ability to share your own screen with the participant by clicking the button that says “Share my Screen.”

When the participant has completed all their activities, a new page will appear with a button that says “Finish the Script.”
When you’ve completed your session, including any final questions, you can wrap it up by clicking the “Finish Session” button located in the top right-hand corner of the screen.
Then, click “Finish Now” on the pop-up screen. The result, along with the metrics (if any), will be uploaded to your dashboard soon after.
Can I cancel a scheduled session?
If you need to cancel a scheduled session, follow these steps:
1. Select the slot you want to cancel.
2. Click on the trash icon.
Please keep in mind that canceling a session may have a negative impact on participants, so we request that you do this only if absolutely necessary. If you provide less than 4 hours’ notice of cancellation, credits will still be used as participants will still receive their incentive.
How Do I Add Observers to my moderated test(s)?
To include observers in a moderated test, follow these steps:
- Navigate to the “Schedule” section of the study builder.
- Click on the open session you wish to add observers to within the calendar.
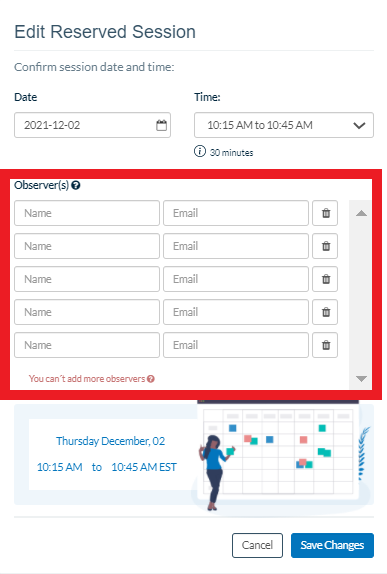
- In the dialog box displaying your session details, click the “Edit” button.
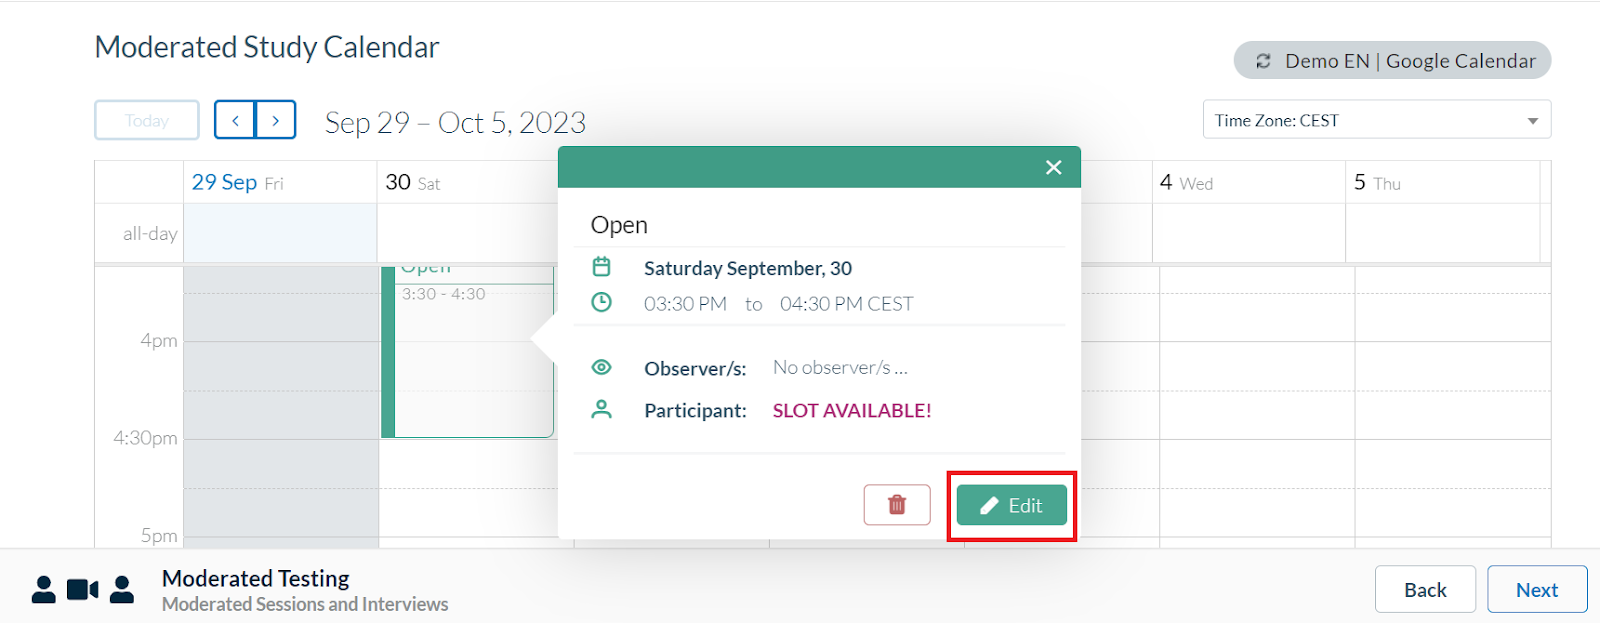
A new dialog box will appear, enabling you to modify your session’s details. To invite an observer, click the button labeled “Invite an observer.”
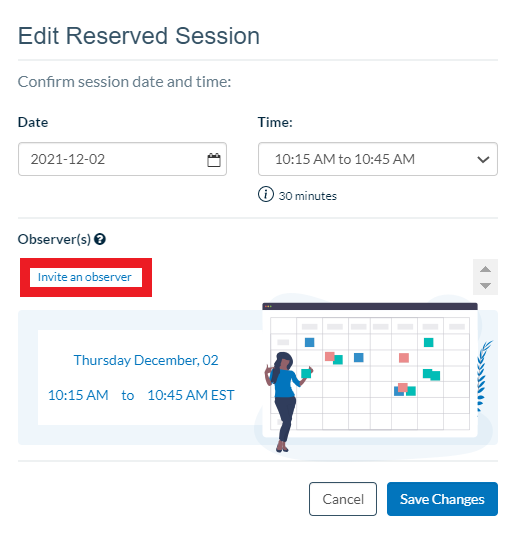
By default, you can have up to five observers during your study, although this default setting can be easily increased. Add your observers to specific sessions here, and they will receive an email notification as soon as a participant books the session.
Moreover, you can now share the session link just minutes before it begins, optimizing your observers’ time, by email or any other communication channel of your choice. Go to your moderated study dashboard, enter the Scheduled Sessions menu, and click on the scheduled session you want to share the link of.
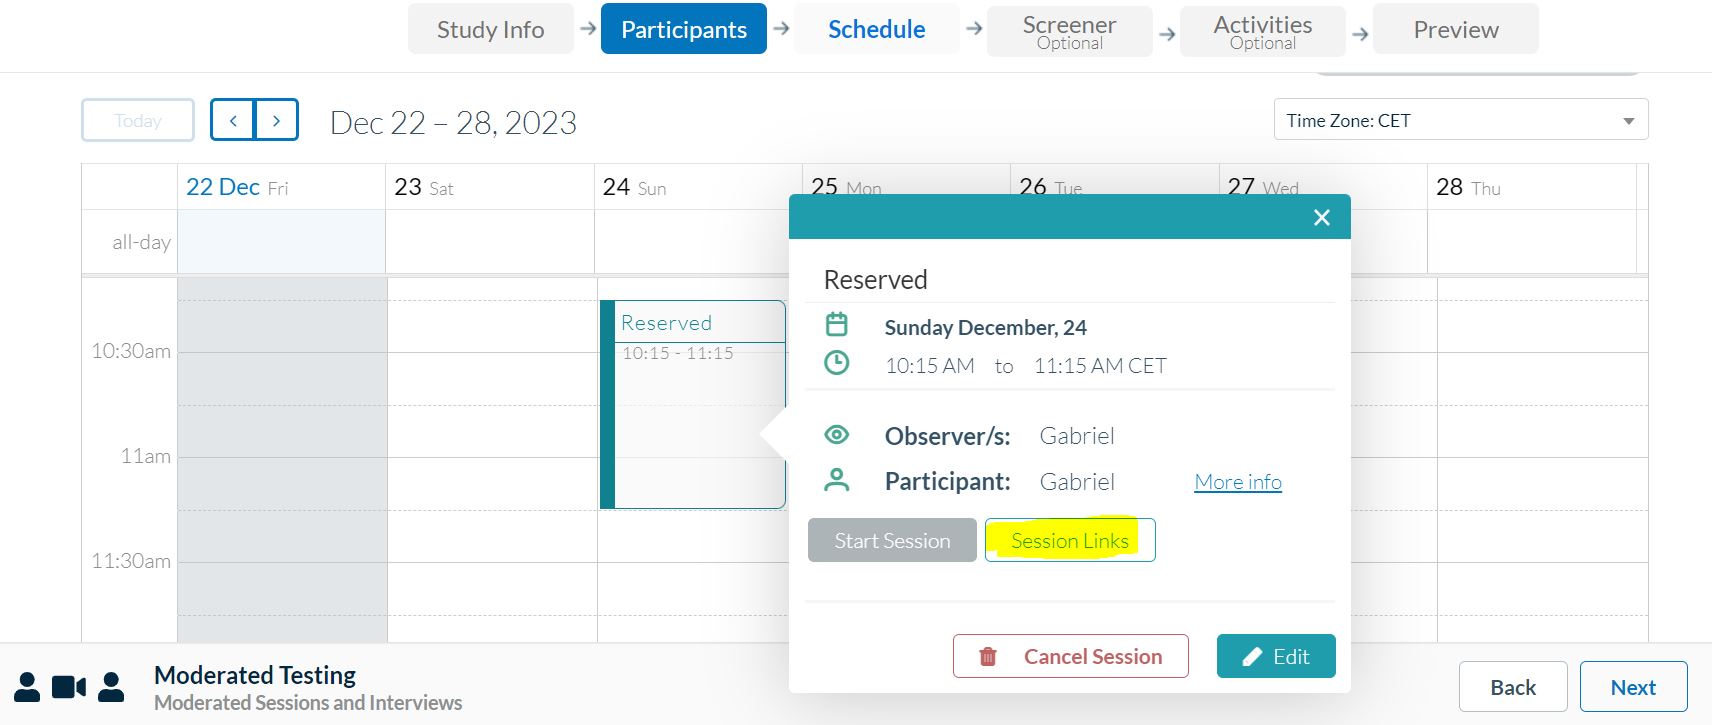
You’ll find the links that redirect to the session in the menu that pops up after you click on “Session Links”.
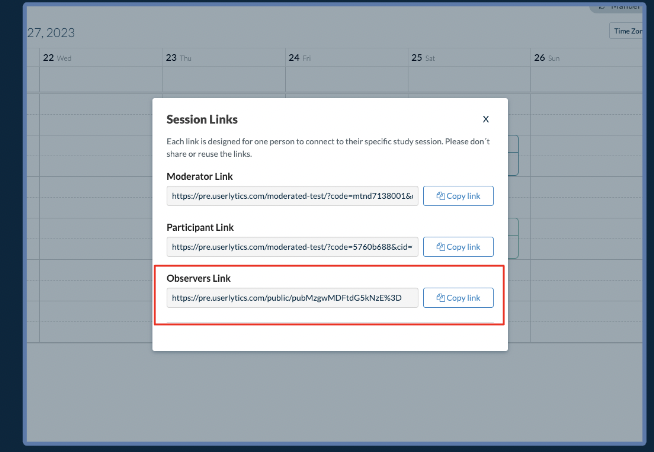
If you require more than five participants, please get in touch with our operations team at operations@userlytics.com and we can easily increase the default setting.
Can Userlytics moderate the session?
Yes! If you’d like someone from our UX Consulting team to moderate the session, please contact your Account Manager or Account Executive or operations@userlytics.com.
Can I share my webcam with the participant?
If your webcam is detected, it will be automatically shared with the participant. If you need to disable your webcam, hover your mouse over the image of your face in the webcam view, and then click on the button with a camera icon.
How do I mute myself?
You can mute yourself by hovering your mouse over the image of your face on your webcam view, and then clicking on the button with a microphone icon.
What happens if we encounter a technical issue or the session cannot continue?
If you encounter an issue during your moderated study, please contact your Account Manager or send an email to operations@userlytics.com with the problem you experienced.
Live Conversations, Live Conversations, Live Conversations Live Conversations, Live Conversations, Live Conversations,