How to Enable Screen Recording on Windows?
Enable Screen Recording on Windows
If you are a tester using the Windows operating system, you must ensure that you share you screen at the start of a Userlytics study so that the session is recorded properly.
Before beginning a study, first ensure that you are using a browser that is compatible with our system.
Below is a list of all browsers compatible with Userlytics:
- Google Chrome
- Microsoft Edge
- Firefox
- Safari
Once you’ve joined a study with the invitation link you received via email or another messaging platform, you will be prompted to complete a “Test Configuration” to make sure everything on your computer is working properly.

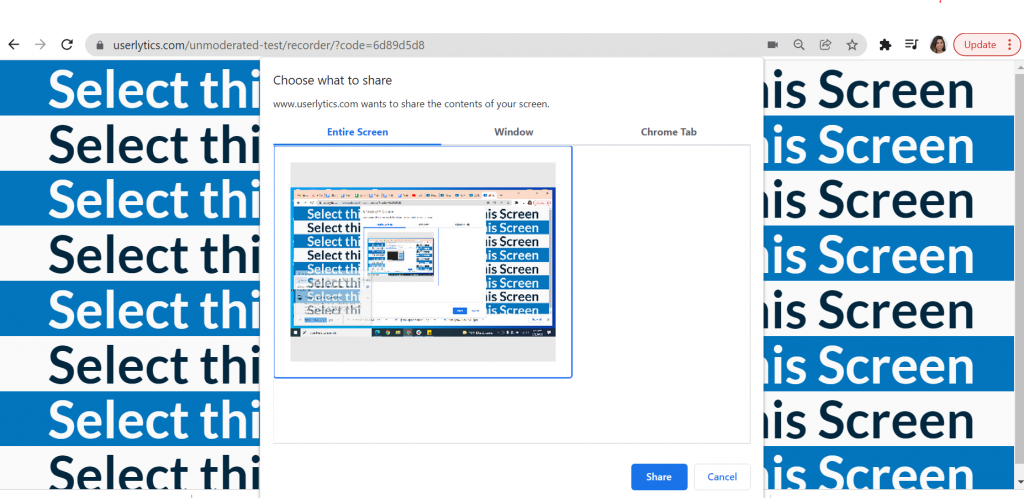
As the pre-test is running, a pop-up will appear asking you to share your screen in order for the Live Conversation to run properly.

Click on the thumbnail screen with the blue and white background text that says “Select this Screen.” Once you have selected the thumbnail, click on the illuminated blue button that says “Share.“

You are now ready to share your screen and proceed with your study session!