Userlytics’ testing platform uses various web recorders to make remote testing smoother for you and your participants. Our upgraded “Moderated Testing” web recorder provides the most advanced, native moderated user testing experience available for Chrome, Firefox, Microsoft Edge and Safari users.
Let’s dive into the details of this updated Moderated Test recorder below.
How do I start a Moderated Test?
After you’ve launched your moderated test, successfully scheduled one or more test sessions, and ensured you are using a compatible web browser, you can start your study in either of the following ways:
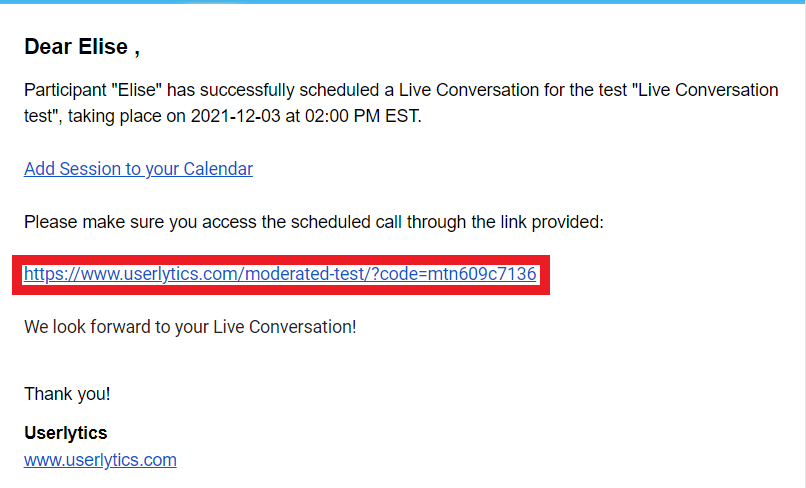
- Using the email confirmation and clicking on the link provided.
Or
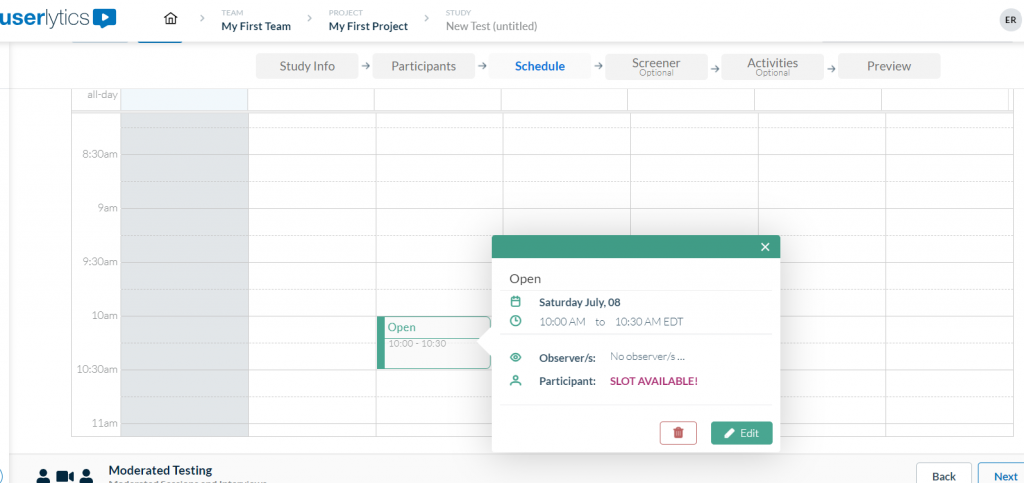
- Using the “Scheduled Sessions” page and clicking on the upcoming session
We suggest joining 5-10 minutes before the scheduled time to ensure everything is set up correctly. Additionally, it’s recommended to use headphones during the session.
What should I do once I’ve joined the session?
Once you’ve joined the Moderated Test, you will be prompted to complete a “Test Configuration” to make sure everything on your computer is working properly.
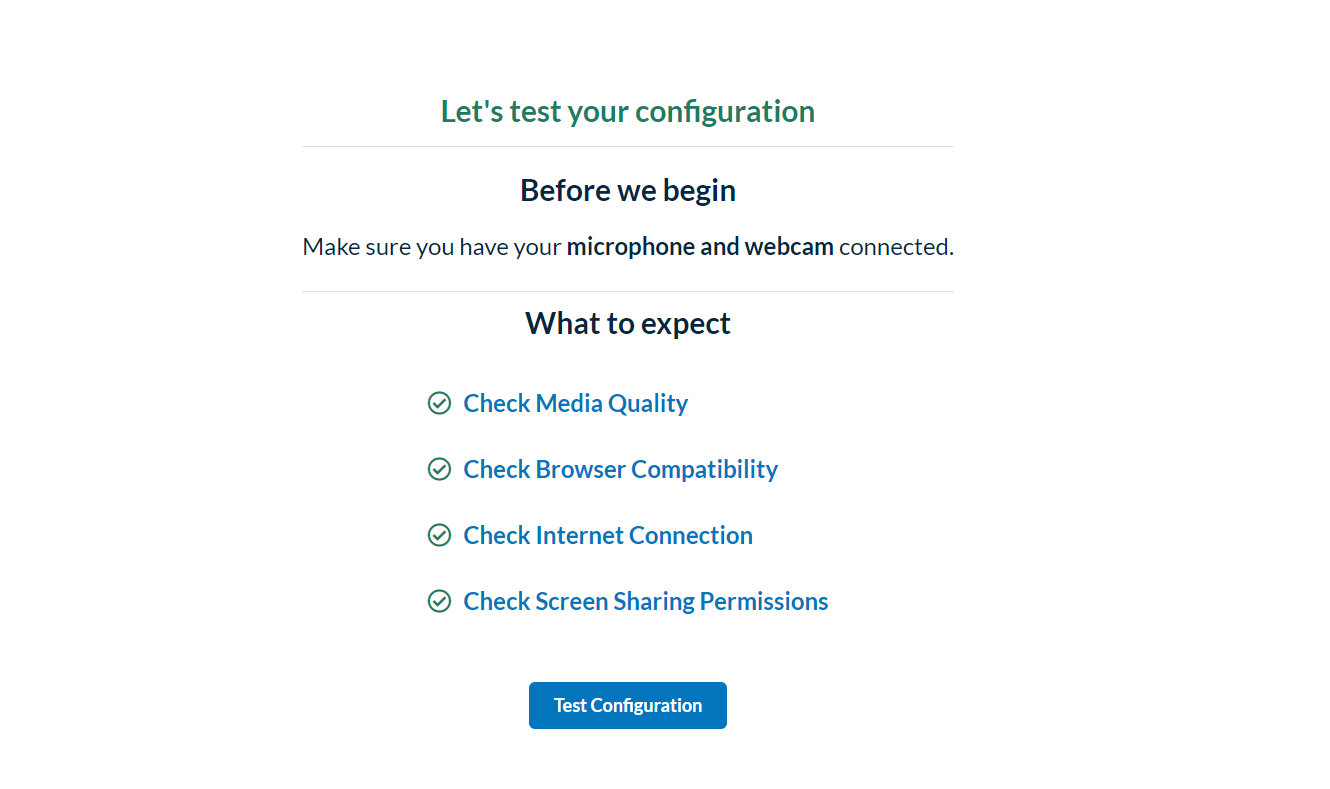
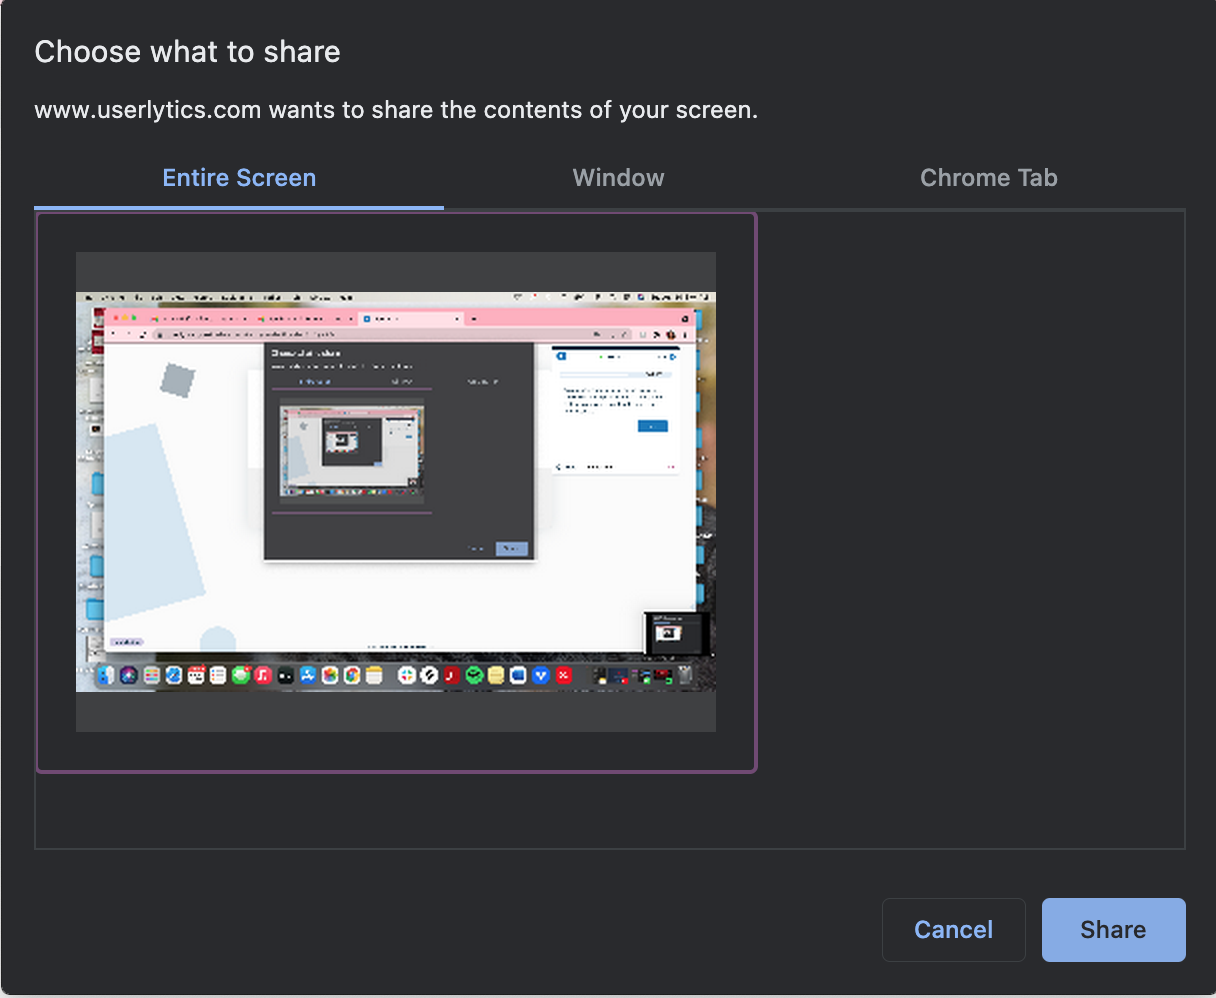
While the pre-test is in progress, a pop-up will appear, prompting you to share your screen to ensure that the moderated study runs smoothly.
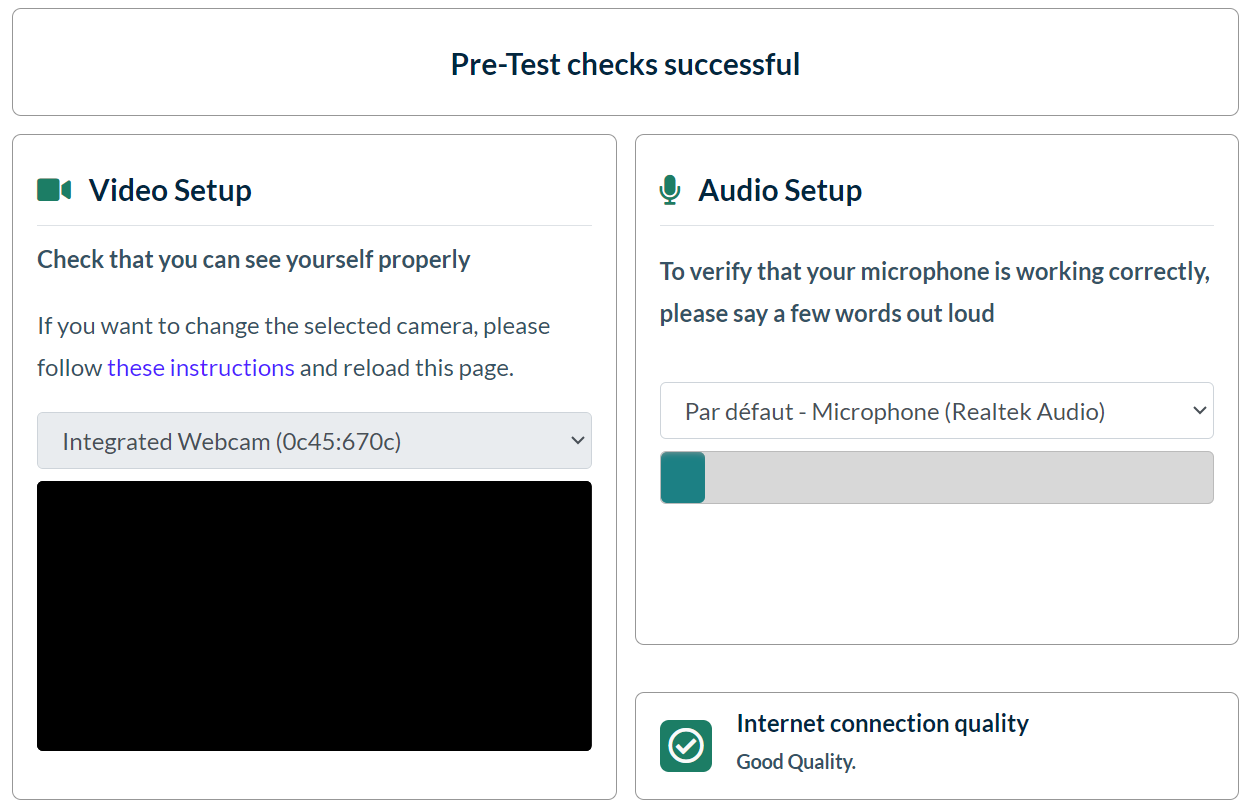
Once the pre-test is finished, a new screen will appear, summarizing the pre-test results.
If there are any system issues, the pre-test will provide instructions on how to resolve them. When everything is in order, the top of the screen will display “Pre-test checks successful.” At this point, click the “Continue” button to initiate the Moderated Test session.
How Do I Navigate the New Moderated Testing Web Recorder?
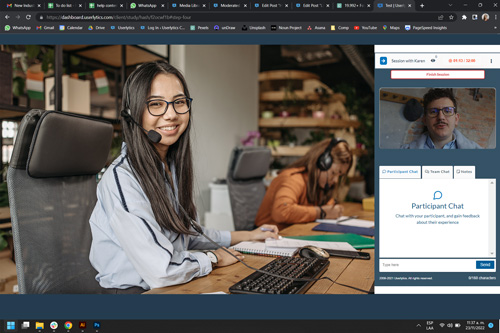
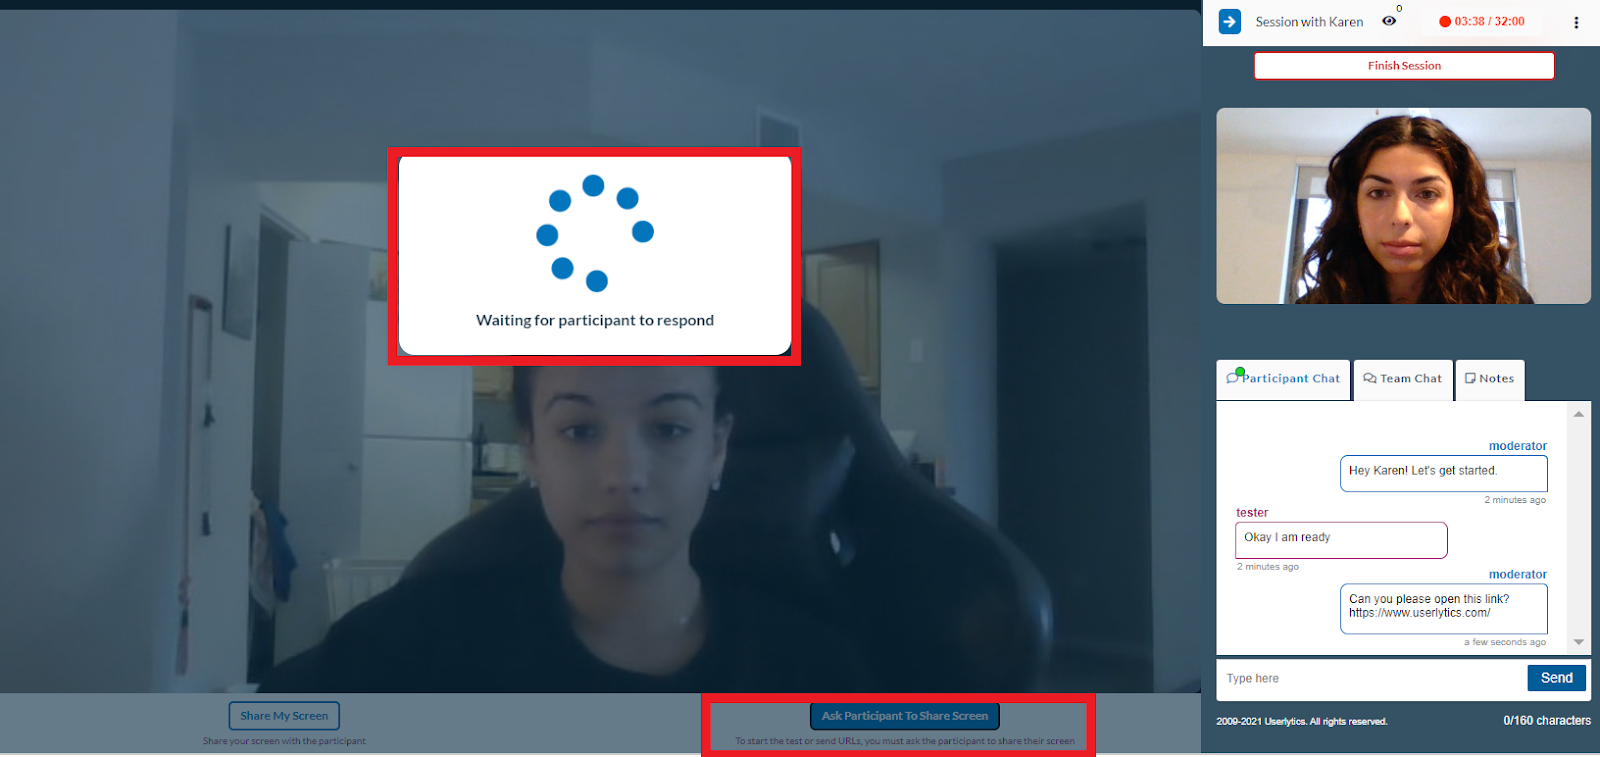
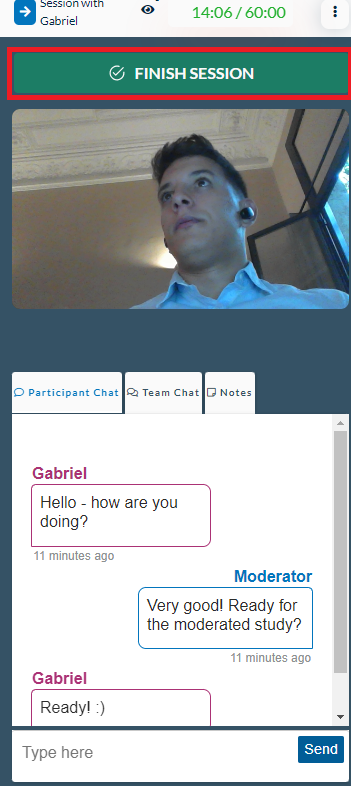
Once you’re in the session, you’ll notice your participant in the center of the screen, with your own face displayed in the top right-hand corner.
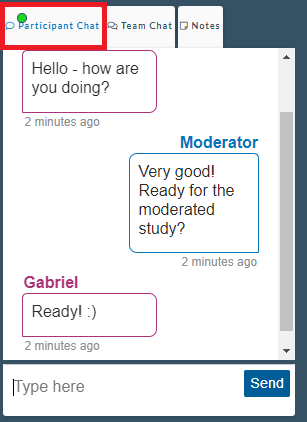
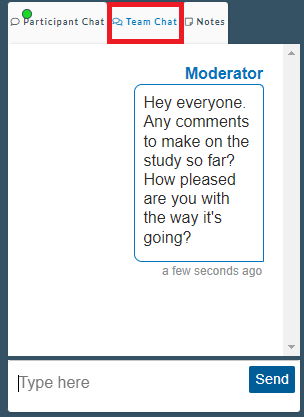
At the bottom right-hand corner, there’s a box that lets you chat with the participant, communicate with any invisible observers you’ve invited, and make time-stamped notes during the session. These notes can be later transformed into highlight reels. Importantly, your participant will only see the chat between you and them and won’t have access to your Team Chat or your Private Notes.
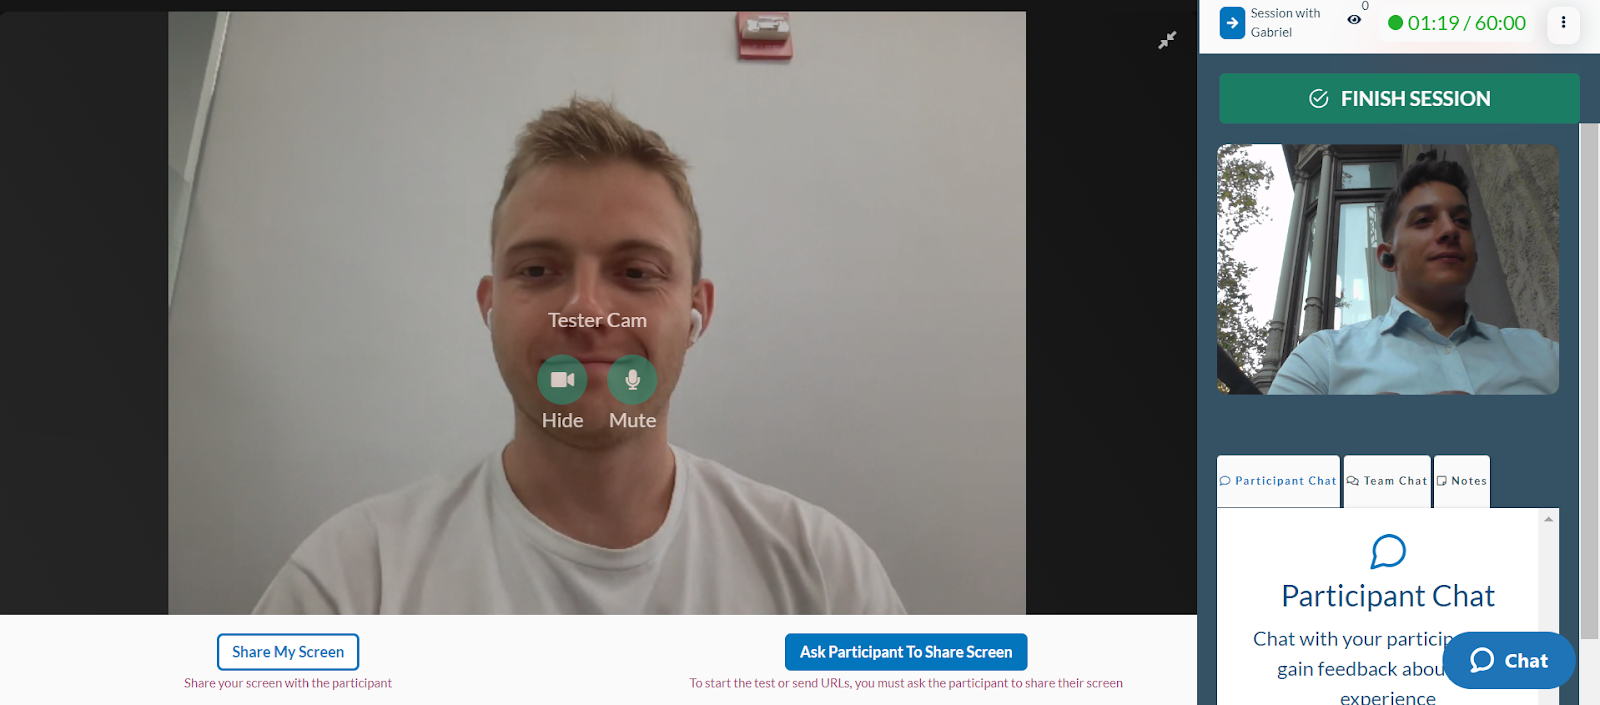
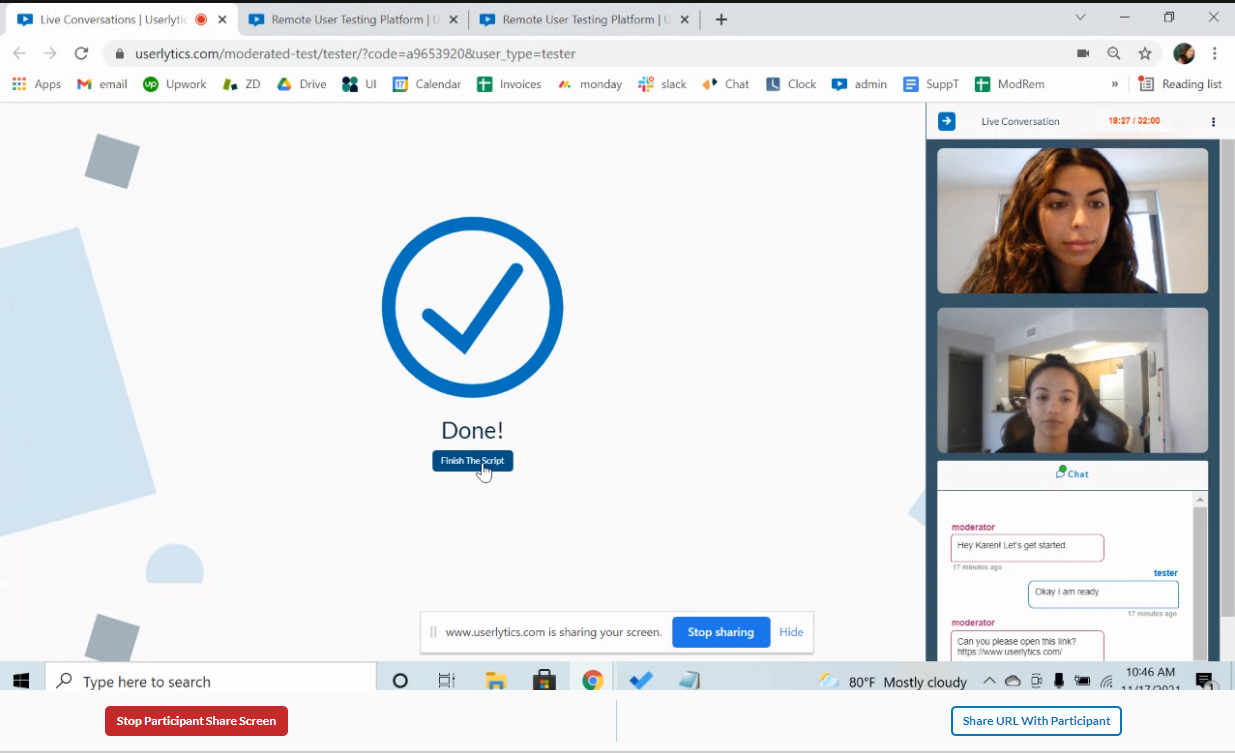
After you’ve greeted the participant and completed any introductions, click the button labeled “Ask participant to share screen.” This step is necessary to initiate the study script and provides you with a clearer understanding of how the participant is engaging with your digital asset.
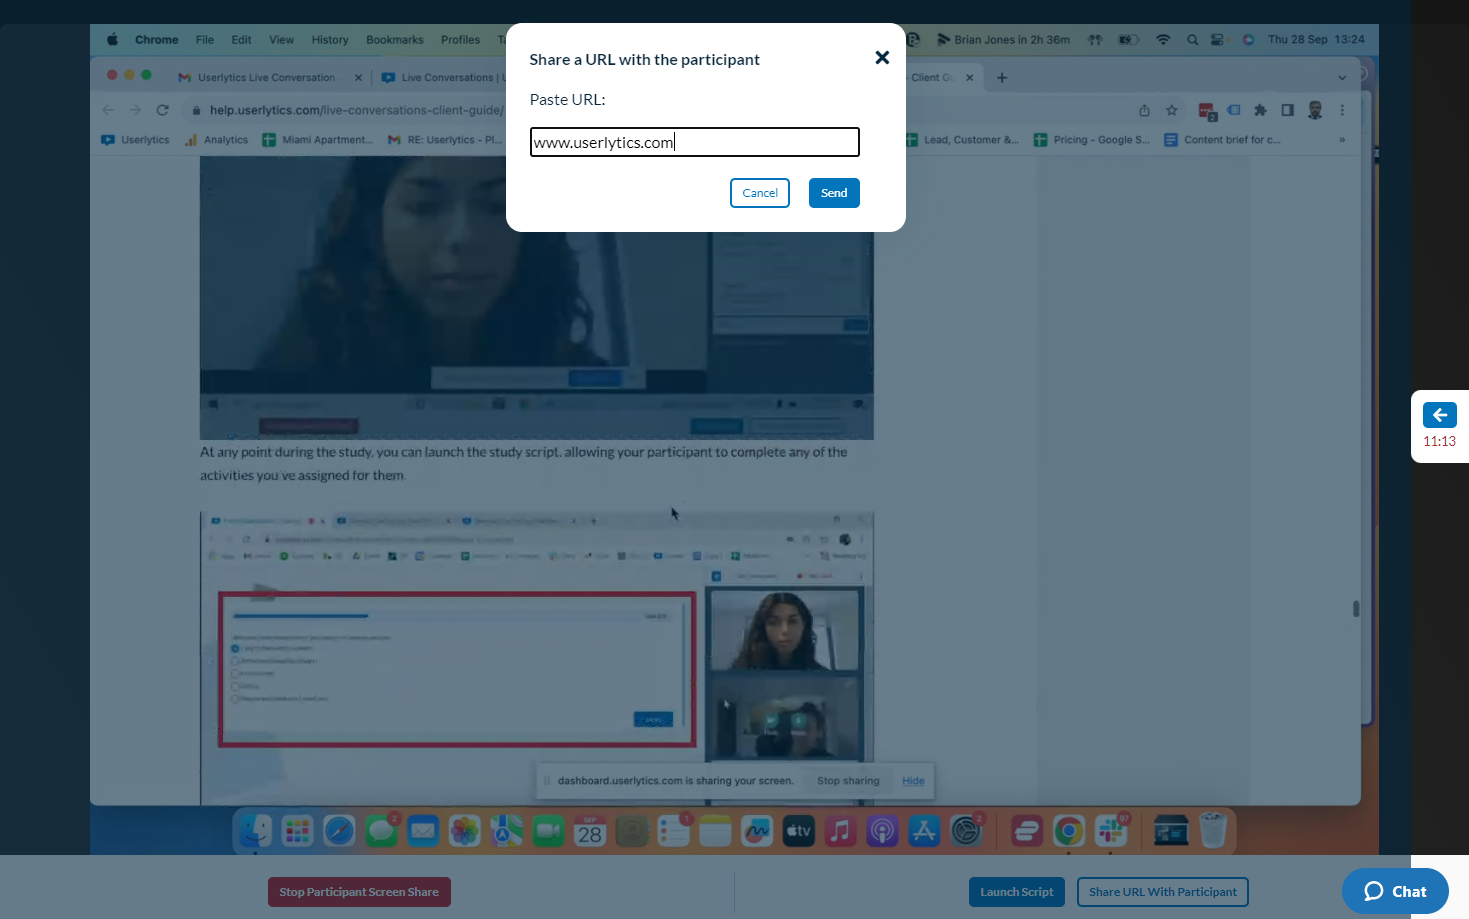
Once the participant has shared their screen with you, you can easily share the link to the digital asset you’ll be reviewing by clicking the “Share URL with Participant” button at any point during the session.
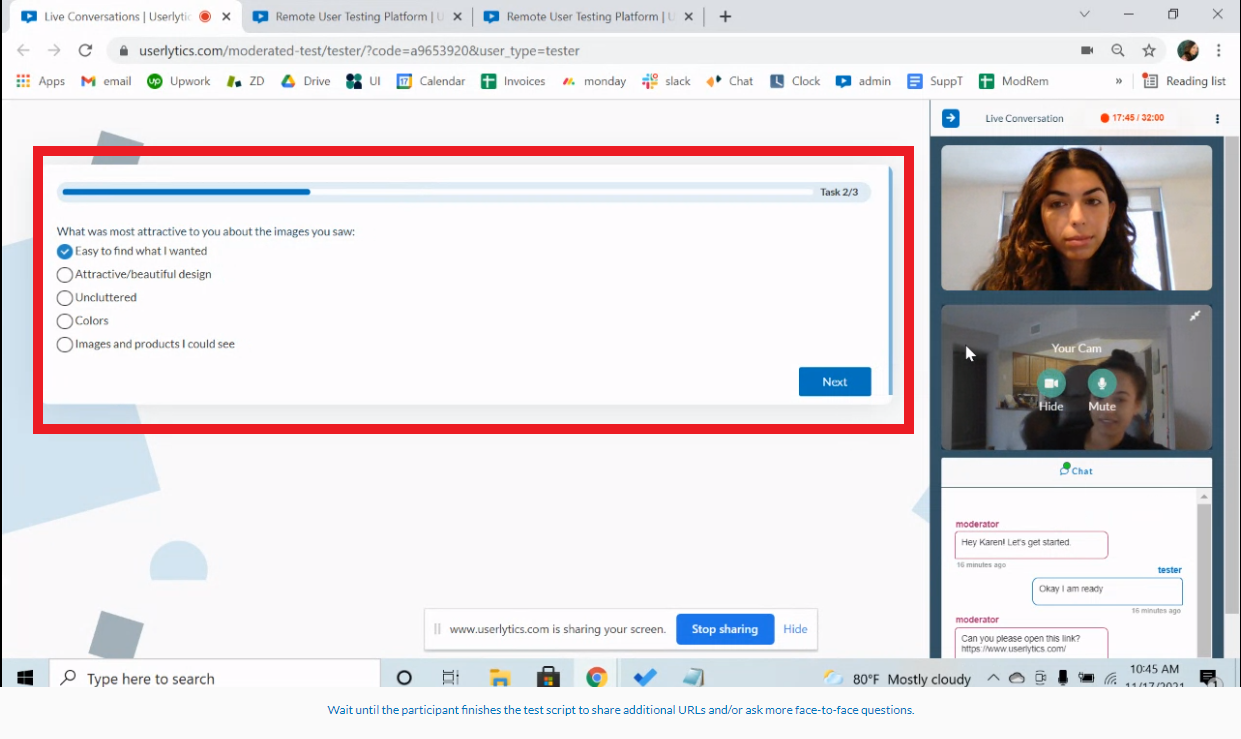
At any point during the study, you can launch the study script, allowing your participant to complete any of the activities you’ve assigned for them.
And as an added new feature, you now have the ability to share your own screen with the participant by clicking the button that says “Share my Screen.”

When the participant has completed all their activities, a new page will appear with a button that says “Finish the Script.”
When you’ve completed your session, including any final questions, you can wrap it up by clicking the “Finish Session” button located in the top right-hand corner of the screen.
Then, click “Finish Now” on the pop-up screen. The result, along with the metrics (if any), will be uploaded to your dashboard soon after.