How to Use our Overlay Web Recorder
If you are invited to test the functionality of a brand’s website or prototype, you may be taking your usability test with our new overlay web recorder. This new web recorder is very easy to use, and is designed to give you the most fun, seamless usability testing experience possible!
Below, we’ll give you a step-by-step breakdown on how to get started with our new overlay web recorder.
How do I Download the Web Recorder Extension to my Computer?
When you are invited to an online usability test, you will receive a link to begin the test. Upon opening the test link, you will be redirected to a new webpage with instructions on how to download the web recorder extension. Once you are directed to the page, click the button that says “Download” to get started.

After clicking the “Download” button, you will be directed to a new page where you can add the extension to your browser. Currently, the extension is compatible with multiple web browsers including Google Chrome, Microsoft Edge, and soon, Firefox and Safari.
If you’d like, instead of waiting until you are invited to a usability test to download the web recorder extension, you can go ahead and download it at the links below before being invited to a usability test. This way, the web recorder extension will already be installed on your computer before you begin a test, making the onboarding process even easier.
If you are using Google Chrome, click the button that says “Add to Chrome” to add the Web Recorder extension to your browser.

If you are using Microsoft Edge, click the button that says “Get” to add the web recorder extension to your browser.

After adding the extension to your browser, a pop-up window may appear asking you to confirm that you would like to add the web recorder extension to your browser. If this occurs, click the button that says “Add Extension.”

After you have finished adding the web recorder extension, you will automatically be directed back to the original test tab. You may be asked to reload the page in order to begin your test. If a pop-up appears asking you to reload the site, click the button that says “Reload.”

You have now successfully installed the web recorder, and are ready to begin the pre-test portion of your online usability test!
How do I Start a Test with the Overlay Web Recorder?
After adding the web recorder extension, you will be guided through some basic steps before you can begin taking your usability test. Click the “Next” button to read through each of the basic steps.

Next, the pre-test portion of your test will begin. Here, the system will run a series of checks on your computer to ensure that everything is working correctly for the test. Click the button that says “Test Configuration” to begin the pre-test.

After clicking the “Test Configuration” button, you will have to wait a few moments as our platform conducts the pre-test. This shouldn’t take longer than a minute.

As the pre-test is running, a pop-up window will appear asking you to share the contents of your screen. Select the option that says “Your Entire Screen,” and then click “Share.”

After the pre-test is complete, a screen will appear that shows the results of the pre-test. If anything appears in red, click on the instructions in that section to correct the discovered issue. Once all issues have been resolved, click the button that says “Continue.”

After pressing the “Continue” button, a new screen will appear giving you the option to start the usability test. Once you are ready to begin, click the button that says “Start Test.”

What Special Features Does this Web Recorder Have?
What makes our new web recorder unique is its floating task window that can be moved anywhere around the screen, whether fully visible or minimized. After clicking the “Start Test” button, the floating task window will appear. Click the button within the floating task window that says “Start Test.”

At some point throughout the test, you will be directed to a new tab with the website or prototype you are reviewing. The floating task window will show the questions or actions you need to complete throughout the test one by one. There may be answer choices you need to select within the floating window, or space for you to type out your responses – carefully read each task to ensure you know what is being asked of you. Feel free to move the task window wherever you’d like to on your screen so that you can comfortably review the website or prototype while continuing to complete your tasks.
After completing each task, click the “Next” button to move on to the following task.

How do I Submit my Completed Test for Review?
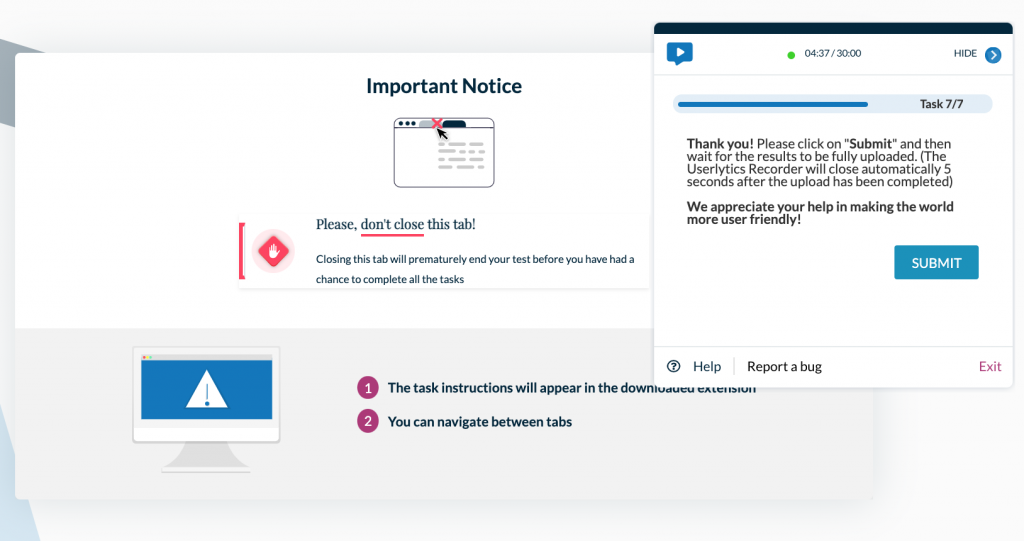
Once you have completed the last test task, the floating task window will thank you for participating in the test, and give instructions for submitting your test results. Click the button that says “Submit” to upload your completed test.

After you submit your test, you will be directed to our “Thank you” page. Your test will then be reviewed by our quality assurance team to make sure there are no issues, and you will receive your incentive soon after!