How to Access our No-Download Web Recorder on Chrome
Userlytics’ no-download web recorder makes it quick and easy for testers to join fun and interesting user experience tests with brands from all around the world. Best of all, you don’t need to download any type of software, application or extension to use the web recorder, making it incredibly easy to get started! Below we go over how you can access our web recorder on the Chrome web browser.
What Should I Expect When Opening the No-Download Web Recorder?
Pre-Test
After going through the Basic Steps of a usability test, you will be redirected to the pre-test. The purpose of the pre-test is to ensure everything on your computer is working properly so that there will be no errors during the test, such as a faulty Internet connection, problems with the webcam or microphone, or issues with your web browser. During the pre-test, you will be guided through a series of prompts and will have to wait a few moments as we assess your system configuration.


Enable Screen Recording of Entire Screen
As the pre-test is running, a series of pop-up windows will appear alerting you that Chrome would like to record your computer’s screen. It is important that you allow Chrome to record your entire screen for the test to function properly.
Enable Screen Recording on Windows
If you are using Windows, you will only have to enable screen recording within your Chrome browser. On the popup window that reads “pre.userlytics.com wants to share the contents of your screen. Choose what you’d like to share”, select the option that says “Your entire screen.” Then click “Share.”

Enable Screen Recording on a Mac
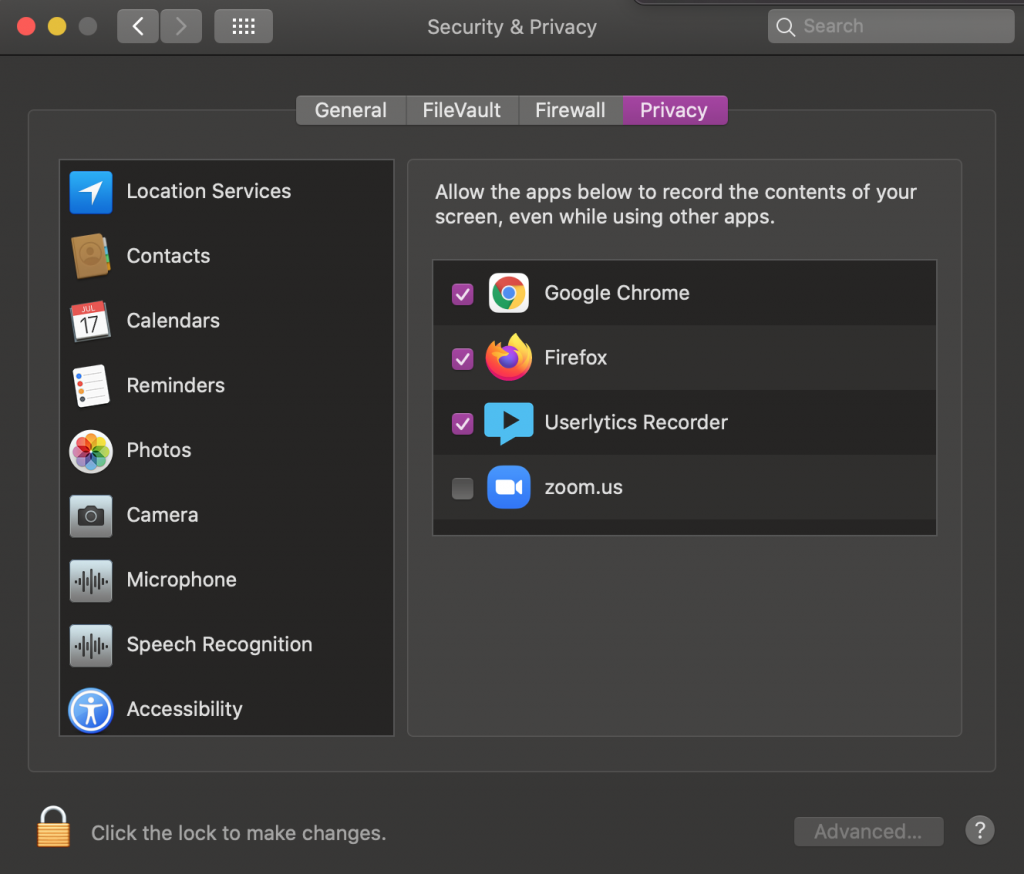
If you are using a Mac, as per Apple’s new Catalina update 10.15, you will have to adjust your security settings within your System Preferences before you are able to share your screen in a usability test. Click “Open System Preferences” on the pop-up window, or go directly to your system preferences by clicking on the Apple icon at the top left-hand corner of your screen. Then, in the “Screen Recording” section of your Privacy settings, make sure “Google Chrome” is selected.

In addition to enabling screen recording within your system preferences, you will have to enable screen recording within Chrome. On the popup window that reads “pre.userlytics.com wants to share the contents of your screen. Choose what you’d like to share”, select the option that says “Your entire screen.” Then click “Share.”
Pre-Test Results
After you have enabled screen recording of your entire screen and the pre-test is complete, a new screen will appear going over the pre-test results If there are any issues with your system, the pre-test will allow you to run the pre-test again and provide instructions on how to correct the issues. Once everything checks out, the top of the screen should read “Pre-test checks successful.” You should then click the “Continue” button to begin the testing session.